You know how getting a new gadget feels all exciting but kinda daunting too? Well, that’s the vibe when you unpack your Brother HL-1200 printer. I mean, who doesn’t love that new device smell, right?
Now, before you can start printing all those cute cat memes or important work docs, there’s a teeny hurdle: installing the printer driver on Windows. Oh boy… sounds all techy and complicated. But hey, let’s not panic.
The good news is it’s actually simpler than you’d think. Like making instant noodles kind of simple! You just gotta follow some steps and you’ll be up and printing in no time.
So grab a cup of coffee – or tea if that’s your thing – and let’s see how this unfolds together!
Connecting a Brother Printer to Windows
Trying to get that Brother HL-1200 printer hooked up to your Windows computer? No worries, I’ve got you covered. It’s not too tricky once you know what you’re doing. Kinda like putting together a puzzle when you have all the pieces in front of you.
First things first: make sure you’ve got everything ready and within reach. Yep, that includes the printer itself, a USB cable (unless you’re going wireless), and your trusty computer.
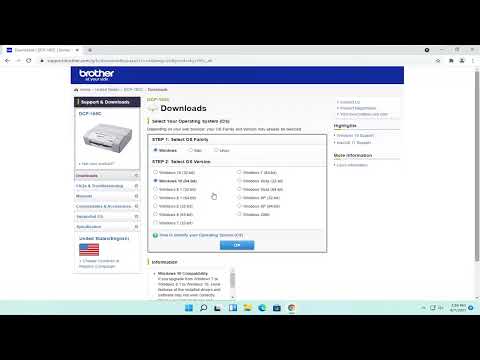
- Download the Driver: Head over to Brother’s official website to grab the right driver for your HL-1200 model. It’s super important to get this right because without it, your computer won’t know how to, let’s say, talk to the printer.
- Install the Driver: Once you’ve got it downloaded, open up that file. If you’re familiar with installing programs on your PC—you’re pretty much doing the same thing here. Follow those on-screen instructions like it’s a simple recipe; usually it’s just hitting “Next” until bam! it’s done.
- Connect Your Printer: Use that USB cable I mentioned earlier and plug one end into your printer and the other into your computer’s USB port. Now if you’re using WiFi, make sure both devices are on the same network—kinda like ensuring everyone’s in the same room before starting a conversation.
- Add Your Printer: Go over to Windows settings by clicking on Start > Settings > Devices > Printers & scanners. Easy peasy! Hit “Add a printer or scanner,” let Windows do its search magic, then select your Brother HL-1200 from any list it shows.
Troubleshooting Tips (just in case):
- If at first nothing happens—or something weird does—don’t stress out immediately!
- Check Connections:: Make sure all cables are tight and secure or check WiFi connections.
- If there are still issues after trying everything else: Uninstall/reinstall drivers completely per instructions above as sometimes playing around with installs cleans things up nicely again!
If anyone ever told me before I even touched computers that installing printers would be both simple yet frustratingly complex depending upon things outta’ one’s control…ahhh-but-here-we-are!
Brother HL-1200 Driver Installation on Windows 10
Setting up your Brother HL-1200 printer on Windows 10 can feel intimidating but, hey, it’s really straightforward. You’ll be printing away in no time! Let’s walk through the steps together and make sure everything goes smoothly.
1. Check for Compatibility
First things first, ensure your printer is compatible with Windows 10. Most recent models like the HL-1200 should work just fine. If you’re unsure, peek at the support page on Brother’s website.
2. Downloading the Driver
Finding the right driver is key! Head to Brother’s official website and search for your model: *Brother HL-1200*. You’ll see a list of available drivers.
- Select Your Operating System: Choose Windows 10 from their list.
- Click on ‘Download’: This will save the driver setup file onto your computer.
3. Installing the Driver
Once downloaded, locate that file (probably chilling in your Downloads folder) and double-click it to begin installation. Follow these simple steps:
- The installer will guide you through it—like following a recipe!
- You might be asked to accept some terms; give them a read if you’re curious.
- You can usually opt for a quick or custom install—I’d say go with quick unless you have specific preferences.
4. Connect Your Printer
Plug in your Brother HL-1200 printer using a USB cable if it’s not wireless. The thing is, once connected, Windows should recognize it automatically.
But sometimes tech likes to keep us guessing! If there’s no magic happening:
- Open ‘Settings’ : Go to ‘Devices’ then ‘Printers & scanners’.
- Add a Printer: Click ‘Add printer or scanner,’ and wait while Windows looks for available devices.
You remember those times when our gadgets surprised us with endless patience tests? Yeah… but not this time!
Troubleshooting Tips:
If after all this there’s still no joy:
- Your firewall/antivirus might block installations sometimes—have a peek here!
. Consider disabling temporarily while installing drivers (just remember turning back!).
Installing Brother HL-1200 Printer Driver on Windows 10 64-Bit
Oh, getting that Brother HL-1200 printer hooked up to your Windows 10 system, huh? Been there myself and boy, it can sometimes feel like more of a puzzle than it should be. But don’t stress—it’s pretty straightforward if you know which steps to take.
First things first. You need the right driver. This is like the translator between your computer and printer, ensuring they get along well. Here’s how you can go about installing it:
- Download the Driver: Head over to Brother’s official website. Under the support or downloads section, just pop in “HL-1200” in their search bar. Ensure you’re grabbing the download that’s specifically for “Windows 10 64-bit.” Sometimes there’s too many options and hey, the last thing you want is picking something outdated.
- Run the Installer: Once you’ve got that file downloaded—somewhere easy to find like your desktop—double-click on it. A setup wizard should pop up guiding you through everything step by step.
- Follow Prompts: The installer will have on-screen prompts. It’s usually just a lot of “Next” clicking but do pay attention when asked where you’d like to install or if any optional software is involved.
- Connect Your Printer: Plug your Brother HL-1200 into the computer using a USB cable when prompted—or if it’s wireless, make sure both devices are on the same network! If your printer doesn’t get detected automatically, try restarting while keeping them connected.
- Test It Out: It’s always wise to print a test page once everything wraps up successfully. You kind of want reassurance things are up and running right off the bat!
If during any stage you’re scratching your head at some error message popping up—or silence from what seems stuck installation processes—it might boil down to antivirus software blocking actions (you know those security giants doing their job a tad too enthusiastically).
Had my fair share dealing with network hiccups trying wireless setups but basically sticking firm does help unravel knots eventually! Keep exploring options till solving curious mysteries computers sometimes lay before us—they’ve got quite characterful personalities indeed…
Oh, printers! They can be both a lifesaver and a total headache, can’t they? I remember the first time I had to install a printer driver for my old Brother HL-1200. Wow, what an adventure that was. Imagine being up late at night, paper scattered around with printing instructions. All you want is to get that document printed, right? Been there.
Installing the driver for your Brother HL-1200 on Windows isn’t too tricky once you’ve done it before. First off, you usually need to head over to Brother’s official website. Look for their support section with downloads and drivers—kind of like hunting for treasure but online.
Make sure you download the correct version suitable for your Windows OS. This step’s crucial ’cause if you get it wrong, oh boy, you’ll have more errors popping up than you’d care to count! Once you’ve got your file downloaded, it’s as simple as running it and letting it guide you through installation.
But here’s the thing: sometimes drivers come bundled with extra software—helpful tools or diagnostic stuff—and while these might sound fancy or necessary… remember they aren’t always needed unless you’re doing some serious printing business.
If you’re more of an old-school type (like me), connecting through USB and letting Windows work its plug-and-play magic is another way to go about it; just give it some time to recognize the device initially.
One thing I learned from this? Patience is key when dealing with tech stuff like this printer fussiness also affects everyone—you’re not alone in those hair-pulling moments waiting endlessly while something installs or updates.
And hey! There’s always tech support forums when things don’t turn out quite right they’re full of folks who’ve been through similar jams eager (sometimes even excited) sharing fixes tips tricks from their own experiences—it’s like having a friendly neighborhood squad ready helping troubleshoot together!
So next time around face another electronic gadget don’t worry if things get challenging—it may take several tries nail down everything perfectly mark growing understand machines make our lives easier despite quirks glitches drive us nuts moments embracing journey nothing better triumph feeling success finally seeing pages crisp clear spilling output tray…such mighty relief joy witnessing device obey commands wished happened long ago felt good fortune bless indeed doesn’t?
Can echo thoughts sentiments honestly share joy installing devices haven’t favorite stories dealing installations mess-ups turning victories yet redeeming uplifting nonetheless heard someone facing struggle feel assured knowing end day works out after all patience perseverance many offer respite reassurance knowing aren’t alone midst chaos clarity ultimately prevails resulting gentle laughter future attempts… Who knew right?!