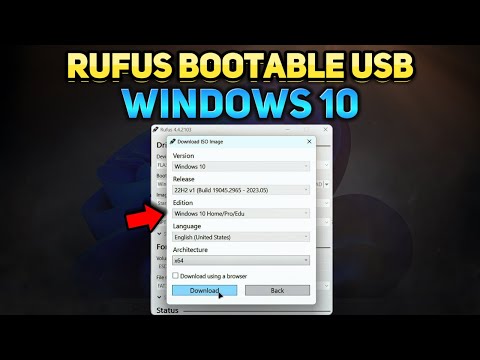
Ever tried to create a bootable USB for Windows 10 using Rufus and found it a bit tricky? You’re not alone! This little tool is a lifesaver for many, but it can feel like trying to solve a puzzle if you’re new to it. I remember the first time I had to use Rufus—I was sitting there, staring at my screen, wondering if I’d accidentally make my computer burst into flames! But don’t worry, once you get the hang of it, it’s as easy as pie. Let’s explore how this tool works and make your bootable USB journey smooth sailing.
Can Rufus create a Windows 10 bootable USB
Oh, the joys of trying to set up a new operating system! When it comes to making a Windows 10 bootable USB, Rufus is like that trusty friend who’s always got your back. Seriously, if you haven’t used it before, it’s pretty straightforward and reliable. You’ll definitely find it handy!
The first step is grabbing a copy of Rufus from their official website. It’s not a massive file, so it won’t take up much space on your drive—just download and run it directly since it’s portable software. You know what that means? No installation hassle!
Once you’ve got Rufus open, you’ll need your USB drive plugged in. Make sure there’s nothing important on there because creating the bootable USB will erase everything. It’s kind of like a clean slate situation.
Select your USB device in the ‘Device’ dropdown menu within Rufus. Then there’s the part where you choose “Disk or ISO image” and locate the Windows 10 ISO file you’ve previously downloaded from Microsoft’s site (or wherever you got it). If all this sounds like tech talk gibberish, think of ISO files as digital versions of physical discs.
And then? Simply hit ‘Start’! Rufus will handle all those complicated setups for partition schemes and file systems—it’s really designed to take the burden off our shoulders in this technical rodeo.
A little patience goes a long way here; let Rufus do its thing until it’s done. Once it’s ready, you’ll have yourself a shiny new Windows 10 bootable USB. You can use this for fresh installations or even troubleshoot existing ones if something goes awry on your current setup.
Remember when my old PC refused to wake up one morning? This very method with Rufus saved me big time! Turned out I needed an OS reinstall after all.
How long does Rufus take to create a bootable drive
Ah, the wonderful world of creating bootable drives! If you’ve ever set out on the adventure of making a bootable USB drive with Rufus, especially for Windows 10, you might be curious about how long it takes. You know the feeling when you’re really excited to try something new or fix that stubborn computer issue? Let me tell you a little story.
Once upon a time, I decided to help my friend install Windows 10 using Rufus. We were both sipping our coffee and eagerly waiting while Rufus did its magic. Now, here’s where patience comes into play. The time it takes for Rufus to create that bootable drive sort of varies. Sounds simple? Well, kind of.
A lot depends on the speed of your USB stick and your computer’s performance. If you’re working with a speedy USB 3.0 device on a good ol’ modern laptop or PC, it might just take around 10 to 20 minutes—sometimes even less! But if you’re using an older USB drive or slower machine, well, hey there can be some waiting involved—up to about an hour sometimes.
You see, what happens is Rufus has all this data from the Windows ISO file that it needs to write onto your USB stick. And it’s doing all sorts of checks and balances behind the scenes as well! It’s kind of like when you’re baking and need everything precisely measured out before mixing up that delicious cake batter.
Patience is key here but it’s usually worth it when everything goes smoothly and you’re ready to fire up your new operating system installation! So just grab another cup of coffee or your favorite snack while watching progress bars do their thing—you’ll have that bootable drive soon enough!
How to create Windows USB Rufus
Hey there! Let me share a bit with you about making a bootable Windows 10 USB using Rufus. You ever tried baking a cake without an oven? Kind of impossible, right? Well, creating a bootable USB is sort of like that magical oven for your computer—it turns a plain ol’ USB stick into something truly special.
First things first, you’ll need to get your hands on Rufus. It’s this super handy tool that’s free and lightweight. And trust me, it’s pretty much everyone’s go-to for creating bootable drives. You can download it straight from the Rufus website. Just pop over there and grab the latest version.
Once you’ve got Rufus installed on your computer, you’ll also need a Windows 10 ISO file. Basically, this file is like the blueprint for Windows 10—it’s all you need to install or reinstall the operating system. Microsoft offers these files on their site too.
So you’ve got your USB stick plugged in and both Rufus and the ISO ready? Perfect! Open up Rufus; it’s pretty straightforward from here on out. In the interface, find where it says “Device” and choose your USB drive from the dropdown list—very important step; make sure you select the right one!
Next up, check out the “Boot selection” area where you’ll click to browse for that ISO image you downloaded earlier. Sounds easy enough so far? Good!
The thing is, with file systems, they’re kind of like sorting systems for info—you’ll usually be fine leaving it as NTFS if you’re sticking with UEFI systems (which most newer computers use). Now hit start! You’ll see messages warning about data loss but if everything’s backed up you’re good to go.
Rufus will handle all those behind-the-scenes bits to transform your drive into something new—a bootable installer fit for setting up or repairing Windows 10 installations across different machines.
This whole process should take just several minutes depending upon how speedy things are running at that moment (or whether coffee breaks got involved!).
And there you have it—a fresh tool crafted by hand which can now revive or update many devices out there needing assistance with OS installation tasks ahead! Quite an adventure in modern problem solving I’d say…but isn’t it great being equipped properly whenever tech challenges arise?
Alright, so you’ve been on this little adventure of booting Windows 10 using Rufus. It’s like trying to fit a square peg into a round hole when you’re not used to it, isn’t it? But once you get the hang of it, it’s a piece of cake.
Remember, having that USB stick ready is like having your own personal emergency tech toolkit. It can save the day when things go south with your system. Oh, and don’t forget to double-check that all your important files are backed up before you dive in.
The first time I did this, I was sitting in my living room surrounded by empty coffee cups and maybe munching on one too many snacks. I had no clue what MBR or GPT even meant. It seemed like another language! But once you do it once or twice, you’ll feel like tech-savvy guru of your own world!
So just follow the steps carefully: download Rufus, select your ISO file from Windows and make sure you’ve picked the right drive for installation—because trust me, we’ve all flashed something we didn’t mean to at some point! Anyway, next time you’re in need of setting up Windows 10 again or helping out a buddy with their PC woes, you’ll know exactly where to start.
Keep those USBs handy! And hey – congratulations on successfully taking matters into your own hands!