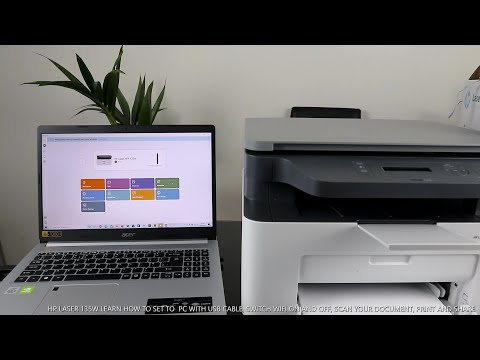
Okay, so you’re thinking about getting that HP Laser MFP 135w set up on your network, huh? Maybe you’ve just unboxed it, and it’s sitting there looking all shiny and full of potential. Oh, that fresh printer smell! I get it, the whole thing might feel like a bit of a puzzle right now. But don’t worry—it’s not as tricky as it seems.
Remember when we used to play with those building blocks as kids? Yeah, this is kind of like that but without the colorful bricks. We just need to make everything connect and work together seamlessly. Just imagine that satisfying feeling you’ll have once this baby starts printing wirelessly from anywhere in your home!
Stay with me here; we’ll figure it out step by step—like piecing together a jigsaw. Doesn’t that sound fun? Okay, let’s jump in.
Installing HP Laser MFP 135w on Windows Network
Alright, getting your HP Laser MFP 135w set up on a Windows network is something you can totally handle! Let’s get into it step by step.
First things first, make sure you have all the necessary bits:
- Printer unpacked and ready: Make sure it’s plugged in and turned on. You’ll know it’s on when those lights are shining brightly.
- Your reliable Windows computer: This is your command center for all setup activities.
- Strong Wi-Fi connection: Check that your router’s signal reaches where you’ve placed the printer. Nobody likes connection dropouts!
Now, let’s bring this printer to life through your network.
Connect to Wi-Fi using WPS (Wi-Fi Protected Setup):
1. Find the WPS button on both your router and printer.
2. Press it on the router first.
3. Within two minutes, tap the WPS button on your printer.
4. Wait for a bit; they should sync up like best friends at a party.
But hey—no WPS? No worries! We can do this manually:
Add Printer via Windows Settings:
1. On your computer, tap that Start button and dive into ‘Settings.’
2. Hit ‘Devices,’ then look for ‘Printers & Scanners.’
3. Tap ‘Add a Printer or Scanner’ and let Windows do its magic until it finds yours.
4. Once you see HP Laser MFP 135w pop up, select it to finish adding.
Now with networking, sometimes things go sideways:
Troubleshooting Tips (just in case!):
- If it’s not showing up in list, double-check that both devices are under same Wi-Fi name.
- You might wanna update drivers from HP’s official website if anything feels glitchy or slow.
Believe me – diving into settings isn’t always as easy as pie; but once everything’s connected smoothly? It’s such a relief knowing you don’t have cords running wild everywhere!
If every page prints out perfectly now – give yourself high five because ya did it!
Network Setup for HP Laser MFP 135w on Windows 10
Setting up your HP Laser MFP 135w on a Windows 10 network might feel a bit daunting at first, but really, it’s just a sequence of small steps. I remember my friend trying to do this once, and after a little guidance, it all clicked into place for her. Here’s how you can do it:
Step 1: Gather Your Essentials
First things first, make sure you’ve got everything you need: the printer itself, your computer with Windows 10, and an active Wi-Fi connection. And don’t forget the power cord—you can’t set up anything without power!
Step 2: Unbox and Connect to Power
Connect your printer to power using the supplied cable. Once it’s plugged in safely, switch it on by pressing the power button.
Step 3: Connect Printer to Network
- Wi-Fi Button: On your HP Laser MFP 135w’s control panel press and hold down the Wi-Fi button until it starts blinking. This indicates that it’s searching for available networks.
- WPS Method: Within two minutes of pressing the Wi-Fi button on your printer press the WPS (Wi-Fi Protected Setup) button on your router if supported.
- Confirmation: The blinking light should stabilize when connected successfully.
Step 4: Install Printer Software
Now head over to your computer:
- Download Drivers: Go to HP’s official website and search for “HP Laser MFP 135w drivers”. Download and run them; they’re essential for communication between devices.
- Painless Setup:: During installation select ‘Wireless’ as connection type when prompted by software wizard.
Troubleshooting Tips:: If anything doesn’t seem right check both device screens for error messages which provide clues about what might have gone wrong.
Smiling because now everything works smoothly? Great! You’re all set with printing magic from anywhere within range of home wireless signal!
HP Laser MFP 135w WiFi Setup Guide
Getting your HP Laser MFP 135w connected to WiFi can feel like setting up a new friend on your network. It’s actually pretty straightforward once you get the hang of it. Let’s walk through how you can do this step-by-step.
First things first, you gotta make sure you’ve got all the pieces of the puzzle together before you start. Check that you’ve got:
- Your HP Laser MFP 135w Printer.
- A WiFi network—make sure it’s working smoothly.
- The computer or mobile device you’ll be using to control everything.
Alright then, assuming you’re with me so far, here’s what you’ll wanna do next.
Connect Your Printer to WiFi
1. **Power Up**: Turn on your printer by pressing its power button.
2. **Control Panel Menu**: On the printer’s control panel, tap on the menu option that looks like a little gear (Settings icon).
3. **Network Setup**: Scroll through until you find something like “Network Settings” or “Wireless Settings.” Go into this menu.
4. **WiFi Wizard Setup**: Enter this option if available and follow the promptings to find your wireless network name (SSID).
Tip: If you’re not seeing any networks, move closer to your router!
5. **Enter Password**: Once you’ve found your SSID, select it and enter in the password when prompted.
6. **Confirm Connection**: You’ll see a confirmation message once connected successfully.
Download Software
Next comes the fun part—getting everything talking nice with each other.
1. Head over to HP’s official website and look for support or drivers section.
2. Search for “HP Laser MFP 135w”, download full software package which usually includes drivers too!
3. Run installer file and make sure both devices are connected under same network when prompted during installation process; this helps them recognize one another instantly without further hassle later down line
4 Finally be ready perform test print ensure functionality altogether working properly all ends secured happy days ahead!
Now go ahead pour yourself celebratory cup coffee because guess what? You did it! Your HP Laser MFP-135W should now officially part family roster thanks nifty WiFI setup skills!
Alright, let’s get into it. Setting up an HP Laser MFP 135w as a network printer can be pretty straightforward, but it’s also, you know, one of those tasks that makes you feel like you’ve conquered a mini-mountain once it’s done.
I remember helping my neighbor with this very setup not long ago. She’s fantastic with her garden but not so savvy when it comes to tech. We started by unboxing the printer and marveling at how sleek it looked—because hey, who doesn’t love a shiny new gadget?
First up was connecting the printer to her Wi-Fi network. This part can often trip folks up if they aren’t familiar with going through menus on a small screen. You want to make sure your printer is close enough to your router for the initial setup—kind of like finding the right spot for Wi-Fi-only devices during those family gatherings where everyone’s scrolling away on their phones.
We navigated through the settings on the LCD display panel of the printer itself. It involves selecting your wireless network from a list—not unlike choosing which movie to stream when you’re all settled in with some popcorn—but instead of movie titles, you’re sifting through available networks.
After typing in the Wi-Fi password (and double-checking that we didn’t mistakenly add any extra characters), things got rolling smoothly. The little screen gave us a thumbs-up message saying it connected successfully.
Then came installing software on her computer so she could actually send documents to print. Now this part is often easier than expected thanks to modern installation wizards that guide users step-by-step online—where they explain things like they’re talking to someone who’s never used technology before!
By downloading drivers from HP’s official website and running them on her PC, we were able quickly integrate everything seamlessly without too much fuss or bother—almost as if having magic words whispered into our ears during each clicky moment!
Once we completed these steps successfully? She clapped delightedly upon seeing “Test Page” appearing miraculously out from beneath glossy paper tray slots—it was such fun witnessing sheer joy manifest across loved ones’ faces unexpectedly like that!
Overall impressions aside: setting up one’s own home/office device isn’t always hard if approached patiently methodically amidst supportive environment filled ample cushions snacks sips along way…