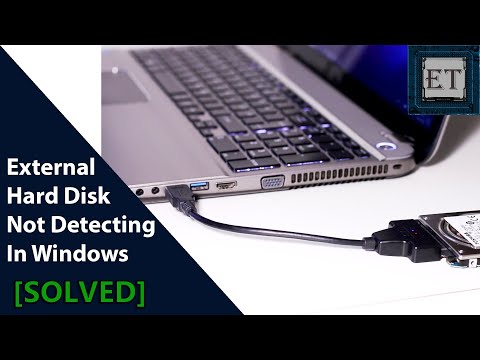
Okay, picture this: you’re all set to dive into that new game or finish up a project that’s been waiting for you. You sit at your desk, all ready and raring to go, and then—bam! Your computer just refuses to recognize your 500GB SATA hard drive. Annoying, right?
Ugh, I know! We’ve all been there at one point. It’s like the universe suddenly decides to throw a wrench in your plans just when you think everything’s lined up. But hey, you’re not alone in this.
Honestly? It might seem daunting at first sight ’cause who wants tech issues when you’re trying to get stuff done? But don’t worry; it might be simpler than you think. Sometimes these things have a way of sorting themselves out with a bit of patience and elbow grease.
So hang tight; we’ll figure out what’s going on here together—step by tiny step. The ride might be bumpy but trust me, there’s light at the end of the tunnel!
SATA Not Recognized in Windows Device Manager
Oh no, dealing with a SATA hard drive that isn’t showing up in Windows Device Manager can be super frustrating, right? It’s like the time you misplaced your keys only to find them in your pocket. Sometimes things aren’t where they’re supposed to be.
So imagine you’ve got this 500GB SATA hard drive and it’s just not being recognized by your PC. Let’s try and figure this out together. I’ll walk you through some things that might help sort this issue.
Check Physical Connections
- First thing first, make sure all cables are securely connected. A loose cable could be the culprit.
- Check both ends of the cables: one connects to the motherboard, and the other to the drive itself.
BIOS Settings
- Restart your computer and enter BIOS/UEFI settings (usually pressing keys like F2 or Del during startup).
- Once there, look for your SATA configuration. Is it set to AHCI or IDE? Make sure it’s configured as needed for your setup.
- If you can’t see the drive here, there may be a hardware issue.
Device Manager Check
- If Windows Device Manager doesn’t show it, maybe it’s under “Disk Drives” or “Unknown Devices.”
- You can right-click any section in Device Manager and select “Scan for hardware changes” just in case it missed something on boot.
Now thinking about software-related possibilities…
Disk Management Tool
- This acts as a tool to see if Windows recognizes the disk at all. You can access it by typing “diskmgmt.msc” in Run (Win + R).
- If you spot an unallocated space similar to your hard drive size here, then bingo! You might need to initialize or format it (but remember formatting erases data!).
Drivers Update
An outdated driver could also keep that hard disk hidden from view.
-
> Right-click on ‘My Computer’ > Manage > ‘Device Manager’. Expand Disk Drives
- Manually download latest essential updates straight from manufacturer websites as automatic updates aren’t always running perfectly behind us… sneaky buggers!
Windows 11 Compatibility Check for 500GB SATA Hard Drive
Imagine you’re all set to upgrade your computer’s operating system to Windows 11, but there’s one nagging concern: whether your trusty old 500GB SATA hard drive is up for the task. It’s natural to wonder—after all, a smooth transition matters big time! Let’s walk through how you can check compatibility without any hassle.
First off, Microsoft’s Windows 11 has certain requirements. Your SATA hard drive must meet these along with other system specifications.
- Storage Space: Windows 11 needs at least 64GB of storage. With a 500GB disk, you’re good there.
- Disk Type: Ensure it’s not just the space—the drive type matters too. Luckily, if it’s a standard SATA hard drive and not some exotic rare type (unlikely), it’s typically okay.
Feeling better? But, hang on! There’s something vital we must consider: what if the PC isn’t recognizing this hard drive anymore? This could throw a wrench in your plans faster than you say “upgrade.”
Let’s crack this nut:
1. **Check Physical Connections:** It sounds simple but make sure everything’s hooked up tight inside your PC case. Sometimes cables slip loose or get dusty.
2. **Device Manager Peek:** Fire up Device Manager and check under “Disk drives.” If you see it listed, awesome! Otherwise—you might need drivers or BIOS tweaks.
3. **Driver Updates:** Old drivers might be causing headaches. Update them via Device Manager by right-clicking your drive’s name and choosing “Update driver.”
4. **BIOS/UEFI Checks:** Occasionally BIOS settings might need attention if things still seem off-kilter.
5. **Disk Management Utility:** Use it to spot unallocated space that could signal issues needing salvaging or reformatting!
Remember tinkering around computers shares an affinity with detective work—detective hats on! Feeling frustrated when errors pop isn’t unusual; just approach each step calmly until that ‘aha’ moment illuminates solutions effortlessly!
If residual troubles persist even after trying diverse maneuvers don’t shy away sharing specifics online forums where tech-savvy folk love lending helping hands—they’ve been there too once upon time perhaps feeling similarly overwhelmed while wrangling stubborn hardware glitches alone late night hours…
Checking 500GB SATA Hard Drive Compatibility on Windows 10
Sure thing! Checking the compatibility of your 500GB SATA hard drive with Windows 10 can feel a bit daunting, right? But, don’t worry—let’s look into it together.
First things first, confirming physical connections is crucial. Hey, sometimes it’s just a loose cable causing all the trouble! Ensure that the SATA cable connecting your hard drive to your motherboard is securely attached. Re-seat them if need be; unplug and plug back in. It might sound simple, but it’s a game-changer more often than you’d think.
Next up is accessing BIOS/UEFI settings. When you start up your computer, keep an eye out for a prompt like “Press DEL to enter setup.” Every manufacturer has its own way about this—some use F2 or F10—so stay alert. You’ll want to check if the hard drive shows up there.
- If it’s visible here but not in Windows 10, then things are looking good hardware-wise!
- If not, it could hint at either a physical issue we missed earlier or rare compatibility oddities.
Now let’s dive into Windows 10 itself! Head over to Disk Management by typing “diskmgmt.msc” in the Search bar or Run dialog box (you know how to do that? Just hit Win + R). If you don’t see anything yet named after your hard drive; don’t panic!
If it’s listed as unallocated space, you’ll need to format it first before use:
- Right-click on this unallocated region, select New Simple Volume.
- Follow prompts till a new drive letter pops up.
In some cases though; Windows might struggle due interference from drivers lacking updates (or just plain ol’ corruption). Who would have thought right?
To tackle these pesky driver issues:
- Dive into Device Manager, accessible via Control Panel > Hardware & Sound.
- You should see Disk Drives where every connected storage device goes undercover!
- If something looks fishy under properties with yellow triangle symbols—it means there’s trouble incoming… Update Driver hangs around nearby ready-to-help too!
Finally when all else fails reaching out for extra help isn’t ever embarrassing—online forums full tech-wizards willing help solve mysteries past regular expertise levels.
Oh, we’ve all been there, haven’t we? You sit down at your PC, ready to dive into some work or maybe just relax with a favorite game, and then—bam!—your 500GB SATA hard drive decides not to show up. It’s like when you’re all ready for dinner and realize the main ingredient’s missing. Frustrating, right?
First things first: have you checked the obvious stuff? I know it’s tempting to skip this part because it seems too simple, but trust me on this one. Sometimes it’s just that the cable isn’t plugged in correctly or is a bit loose. Like when your phone doesn’t charge because that tiny cable isn’t snug in its spot? Yeah… same vibe here.
If everything’s physically connected okay and still no luck, we might want to pop into the BIOS menu. This is where things can get a little technical—think of it as peeking behind the curtains of your computer’s theater production. You want to ensure your motherboard actually sees that hard drive sitting there.
And hey! If you’re not seeing any lights flashing on that hard drive or hearing any familiar hums… well, might be worth double-checking if it needs power from an external source. Some models are sneaky like that.
Now let’s say you’ve tried all of these and nada—still no joy. It might be time to consider disk management settings through Windows itself. Maybe your disk isn’t initialized yet; it’s like having an empty notebook you haven’t written anything in yet so Windows doesn’t think to look for it.
Of course sometimes—and here’s hoping this isn’t you—the drive itself could be toast (I know… ouch!). But before jumping to conclusions about replacing it completely, try these steps first—it could save you time money headaches—all those uncomfortable things!
So yeah next time this happens take a deep breath check off each possibility one at a time remember: patience often leads us solutions we’re closer than we think!
> Right-click on each entry under Disk drives > Update driver software.
if there’s nothing listed under Disk Drivers section try re-installing drivers which sometimes helps!