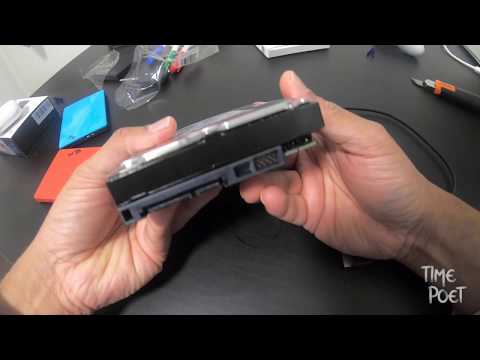
You know that feeling when you’re staring at a loose hard drive, trying to figure out how to pop it into your computer? Like, it’s right there, but where does it even go? It can be pretty annoying! But not today. We’re gonna make sure that old hard drive sees the light of day without cracking the case open.
First off, grab an adapter. Yeah, one of those USB connectors you’ve heard about. Such a lifesaver! With a few twists and clicks, you can connect your 3.5-inch SATA hard drive to your computer via USB just like magic.
Life sometimes throws unexpected tech curveballs though—like blinking lights and stubborn drives that don’t wanna play nice. Don’t sweat it if things aren’t going smoothly. We’ll untangle all those wires together and get everything back on track in no time.
Sound good? Alright, roll up those sleeves!
USB Adapter for 3.5 HDD Connection
You know, connecting a 3.5-inch SATA hard drive to your computer via USB can be pretty handy. Whether you’re trying to access files from an old computer or expand your storage, a USB adapter can make this process straightforward.
Why Use a USB Adapter?
Well, not everyone has the luxury of opening up their desktop and plugging in a hard drive directly. Some people have laptops, or simply prefer keeping things neat without fiddling with the insides of their computers. The beauty of a USB adapter is in its simplicity and convenience.
What You Need
Before jumping in, you’ll need a few things:
- A 3.5-inch SATA Hard Drive: These are the larger type; usually found in desktops.
- A SATA to USB Adapter: This tool bridges your hard drive to your computer via USB.
- A Power Supply for the Hard Drive: Since these big drives require more power than smaller ones, you’ll typically need an external power source.
Connecting Your Drive
Setting it up is not very complicated:
- Connect the Adapter: First step involves attaching your SATA hard drive to the SATA connector on the adapter.
- Power It Up: Link the power supply directly to your driveway. Make sure it’s powered properly before proceeding.
- Plug into Your Computer:: Use the provided USB cable for this final part and connect it into any available port on yur machine.
Once you’ve got everything connected though here’s where sometimes folks hit a snag: what if your computer isn’t recognizing that stubborn drive? It happens!
Troubleshooting Tips!
Oh boy – here we go! If there’s no sign of life from that hard disk:
- Sit back breathe okay now check power connections again making sure they’re snugly fit nothing loose here folks!
Another potential reason could involve incompatible software drivers missing firm updates etc.. Anyway always start simple reboot system never hurts does?
Hope now working better yay
There’s heartwarming experience happened once my Uncle Joe doing exactly same thing only realized after hours struggle forgot switch outlet ON classic mistake haha turned out fine end phew!
Hope helps good luck happy connecting!
3.5” SATA to USB Adapter Compatibility
Connecting a 3.5” SATA hard drive to your computer via USB is super handy right? You get to easily access your files without diving into the guts of your PC. But sometimes things don’t work as smoothly as we’d like. Let’s chat about getting this adapter setup going.
Compatibility Matters
So first thing’s first. Before you even buy a SATA to USB adapter you gotta make sure it’s compatible with a 3.5” drive. Many adapters seem universal but can be sneaky by not supporting the power needs of larger drives.
- Power Supply: A 3.5” drive requires more juice than a 2.5”. You need an adapter that comes with its own power supply or at least has an option for external power.
- USB Version: Look for at least USB 3.0 compatibility to ensure decent transfer speeds and backward compatibility with older ports too.
- SATA Revision: Most modern drives are compatible with SATA III but if you’ve got an older one lying around just check if it’s still good for that port.
Troubleshooting Steps
Okay now what if you plug everything in and nada happens? It can be pretty frustrating! Here’s what you can try:
- Check Connections: Double-check all cables are snugly connected both on the drive and computer ends.
- Power Up: Ensure that any necessary power adapters are securely plugged in and working fine.
- Disk Management: Hop onto your computer’s disk management tool; sometimes it just needs to assign a letter or format it before showing up correctly.
An Interesting Example
I remember once I had this old hard drive from my college days packed with music files—mixes included—that refused to connect! The trick that worked was replacing the power cable—turned out it was faulty all along!
Anyway don’t let connections scare you off.. Most times there’s just something small standing between success and frustration—it’s worth sticking with it until ya find out what’s up!
Connecting a Hard Drive to PC via USB
Connecting a hard drive to your PC via USB can be super handy, especially when you need extra storage or want to access some files quickly. Let’s dive right into making this magic happen.
First things first, you need the right tools. To connect a 3.5″ SATA hard drive, you’ll require a SATA to USB adapter or a docking station. Think of it as the bridge that lets your hard drive and computer have a little chat!
- Power Supply: Remember, those 3.5″ drives need their own power source because they’re kinda power-hungry compared to their smaller 2.5″ counterparts.
- Adapter Cables: Make sure you’ve got both the data and power cables set up. The adapter usually comes with these, so no worries there!
Okay, let’s get down to business of connecting it:
1. **Find the Ports:** On your SATA drive, you’ll see two connectors: one large for data and one smaller for power.
2. **Connect the Adapter:** Attach the SATA data cable from your adapter to the larger port on your drive.
3. **Power Up:** Plug in that separate power supply cable I mentioned earlier into its spot on the drive.
4. **USB Connection:** Now just connect the USB side of your adapter into any free USB slot in your computer.
You’re almost there! When everything’s in place, watch out for any blinks or sounds from your HDD; it should start spinning up if all’s good.
Once connected:
- Check Disk Recognition: Head over to ‘This PC’ (Windows) or ‘Finder’ (Mac) and see if it pops up like another flash drive would.
- If not showing up? Don’t freak out just yet! Open ‘Disk Management’ (on Windows: type `diskmgmt.msc` in Run) or ‘Disk Utility’ on Mac – maybe it’s shy and needs initializing or formatting.
Oh man… speaking from experience here: Always better safe than sorry–so back those precious files before messing with settings like formatting!
And hey—it might feel a tad intimidating at first glance but trust me—with this handy skill under belt?
You know when you’re digging through your old tech stuff, and you find one of those 3.5 SATA hard drives? It’s like a treasure chest from a different era. Maybe it’s packed with long-lost photos or those old music playlists you can’t find anywhere else. Anyway, hooking one up via USB can be an adventure.
When I first tried connecting mine, I thought it’d be all smooth sailing—plug and play, right? But nooo, it decided to throw a little fit at me instead. Sometimes these hard drives can be a bit stubborn about showing up on your computer screen.
First thing I did was check the cables—because let’s face it, sometimes that’s all it takes! Turns out my USB connector wasn’t seated properly in the hub. So yeah, lesson learned: always double-check the connections before diving into panic mode.
Now if you’re dealing with one that’s being extra tricky and not showing up after ensuring all connections are good, you might have to dig deeper into disk management settings on your computer or maybe even install some drivers if they’re missing.
Oh man! The moment when it finally appeared as “Drive F” felt like hitting the jackpot. All my stuff was right there waiting for me; bittersweet memories galore.
Connecting these older drives is more than just plugging them in; it’s about reconnecting with bits of our past life stored digitally. Not sure if I’m explaining this well—but hey—that’s technology for ya: both frustrating and magical at once!