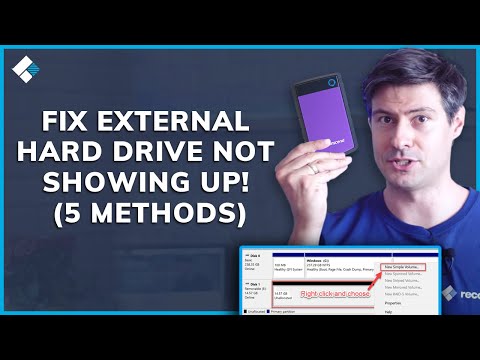
Oh man, have you ever had one of those days where your computer just decides to play hide and seek with your hard drive? Like, one minute it’s there and the next, poof! Gone. I get it—it’s super frustrating.
Picture this: You’re all set for a cozy evening of binge-watching or maybe you’ve just settled down to finish an important work project. You connect your 2.5 SATA hard drive to your computer… but wait a minute—nothing happens. Nada. Zip.
It’s like that hard drive’s decided to vanish into thin air, right? Happens more often than you’d think! And honestly? Sometimes it’s enough to make you want to give up on tech altogether—or at least chuck that hard drive out the window!
But before you reach for something heavy, let’s chat through a few things that might help bring it back from its little disappearing act. Sometimes it’s simpler than you think!
SATA SSD Connection Check
Hey, listen. So, you got a 2.5” SATA SSD that’s not being recognized by your computer, huh? That’s a bit of a hiccup! But don’t fret—there are a few things you can look into to sort it out.
1. Physical Connections
First thing to do: check if the drive is properly connected. You want to ensure that both the SATA data cable and the power cable are securely attached. Sometimes they just need an extra nudge!
It’s like when your lamp doesn’t turn on because it’s not plugged in all the way—even though it feels like it is.
2. BIOS/UEFI Recognition
Next up, let’s see if your BIOS or UEFI is recognizing it. Reboot your computer and enter the BIOS setup (usually by pressing Esc, F2, or Del immediately after powering on).
- SATA Configuration: Check if there’s an option named something like “SATA Configuration” or “Drive Settings.” Make sure all SATA ports are enabled.
- Boot Order: Confirm that your drive isn’t hidden under some boot order setting.
3. Disk Management in OS
Assuming the physical part’s fine but no luck still—you can check under Disk Management in Windows.
- Search for “Disk Management”:Select “Create and Format Hard Disk Partitions.” If you see an “Unallocated” space listed for your SSD, you’ll need to allocate it.
- Create New Simple Volume:Your computer might just need this little extra coaxing to recognize it properly.
4. Driver Issues
Drivers… they’re tricky sometimes! Outdated drivers can cause issues with recognition.
- SATA Controller Drivers:You can update these through Device Manager by searching for updates—for both generic ones from Windows Update or specific ones from your motherboard manufacturer.
- Might Need : USB-SATA Adapter:If nothing works using internally connect via USB externally could help diagnose driver related problems since different controller often utilized there!
Remember when I had my first DIY build? Missed connecting one of those sneaky cables fully—it took me two hours of scratching my head before figuring out where was happening! Point-being… It happens even seasoned folks make such mistakes!
Try these steps calmly without rushing—it’ll get resolved pretty soon yeah?
Windows 11 Not Detecting 2.5 SATA Hard Drive
Whoa, having a hard drive that’s not recognized by Windows 11 can be pretty frustrating, right? Especially when it happens to your 2.5 SATA drive. But don’t worry, you’ll get through this! Anyway let’s dive into what’s going on and what you can do about it.
First things first, make sure the connection is solid. Double-check both the power and data cables, give them a gentle push. You’d be surprised how often it’s just a loose cable!
Now if everything is plugged in right but nothing’s happening? Here are some things to look at:
- Check Disk Management: Hit the Windows key + X and choose Disk Management. Your drive might just need a letter assigned or maybe initialized.
- Look into BIOS/UEFI settings: Restart your computer and enter the BIOS or UEFI settings as it boots up (usually by pressing Delete or F2). Here, make sure your SATA port is enabled!
- Update drivers: Go to Device Manager (just type in the search bar). Look under “Disk Drives” for any exclamation marks—right-click and choose “Update driver.”
- SATA Mode change: In BIOS/UEFI settings you might want to change from IDE to AHCI mode (or vice versa). Sometimes that’s all it takes!
- Troubleshoot power issues: If it’s an external enclosure, check its own power source too. It could be something as simple as moving to another USB port or swapping out an adapter.
There’s also a chance that your hard drive needs some TLC due to damage—either physical or related partitions might’ve gotten messed up. You could run Error Checking on Windows: right-click on the drive’s icon in File Explorer then select Properties > Tools.
If all else fails, consider plugging into another computer altogether—that will nail down whether we have an issue with specific hardware/software blocking communication somehow.
So yeah fingers crossed this helps get things sorted out for good! Remember patience heads off many problems…and every little bit counts toward finding what exactly laid upon us these roadblocks.
2.5 SATA Hard Drive Detection Issue in Windows 7
Having trouble with your 2.5 SATA hard drive in Windows 7? Don’t worry, this can happen sometimes, and the solution might be simpler than you think!
First things first: let’s check the most obvious stuff. Is your hard drive properly connected? It sounds too basic, but many times it just comes loose! Ensure that both the power and SATA data cables are securely connected. A little nudge could do wonders.
Now, if everything’s plugged in correctly and you’re still facing trouble, right-click on “Computer” on your desktop and hit “Manage”. In there, take a dive into “Disk Management”.
- Initial Check: Look for any drives listed as “Unallocated” or “Not Initialized”. If you spot them, right-click to initialize or create a new volume.
- Drive Letter Assignment: Sometimes your drive might not have a letter assigned. Simply right-click the partition without a letter and select “Change Drive Letter and Paths”, then hit ‘Add’ or ‘Change’.
Occasionally things don’t show up here either. In that case head over to “Device Manager”, another useful tool under the same “Manage” window. See if there’s anything marked with an exclamation point or labeled as unknown.
If there are no errors but it still doesn’t show:
- Update Drivers: At times all you need is a driver update! Right-click on each storage device listed under “Disk Drives” and opt for “Update Driver Software”. This might solve invisible problems.
- BIOS Settings: Restart your computer to enter BIOS (usually by tapping F2, F10, Del—or whatever key works for yours). Verify under storage configuration that all ports are enabled.
Another thing worth mentioning is checking whether your drive works on another computer. This helps rule out any potential hardware malfunctioning.
The emotional part? Imagine plugging in that stubborn little device again only for nothing new to appear… Frustrating isn’t it! But understanding these steps can often save quite some hassle before jumping overboard.
Ultimately when efforts come up short—and data inside matters dearly—it may perhaps involve getting professional help; eventually some drives unfortunately meet an untimely end… So there ya go! I hope these steps help breathe life back into yours without too much stress involved!
Oh man, the frustration of dealing with a hard drive that your computer just doesn’t want to acknowledge! It’s like it’s playing hide and seek when you have important files to access. You plug it in, expecting everything to just magically appear, but nope—nothing happens. Annoying, right?
I remember this one time I was helping a friend who was dealing with exactly this issue. He’d just gotten back from vacation and was eager to download all his photos onto his computer. There he was, cable in hand, excitement on his face… And then nothing showed up on the screen. Ugh!
Here’s the deal with 2.5 SATA hard drives not being recognized: more often than not, it’s something simple under the hood that can be fixed without too much hassle.
First thing’s first: always check your connections. Sounds basic I know, but sometimes those cables aren’t seated properly or are a tad dusty—so unplugging and plugging them back in might actually do the trick.
Another thing is heading over to Disk Management on Windows or Disk Utility if you’re a Mac user—to see if your hard drive is listed there but just needs initialization or a letter assigned.
Oh! And don’t forget those drivers; they might need updating—or even re-installation for everything to start humming along nicely again.
Sometimes though it’s about power—you need enough juice flowing through that USB port especially if you’re using one of those hub things without external power supply.
Of course there could be a deeper problem lurking inside that’s causing havoc—a faulty drive perhaps? But hey let’s not think worst-case scenario until we’ve tried some simpler fixes first okay?
And believe me once you’ve tackled issues like these once or twice they become less daunting—it’s all part of getting friendly with our sometimes-finicky gadgets isn’t it?