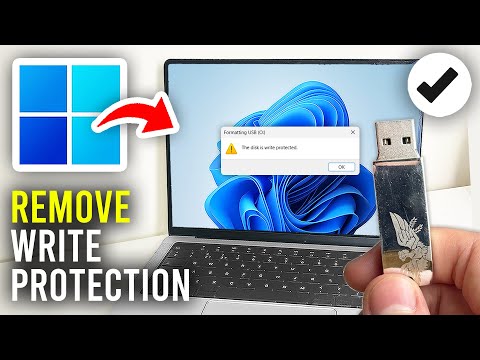
Oh man, have you ever tried to save something on your USB drive only to find out it’s refusing to cooperate? It’s like, “Nope, not today!” Super frustrating, right? You just want to get things done.
I had this happen once when I was about to transfer some important files. My heart almost skipped a beat. That little drive was being stubborn with its “Write Protection” nonsense.
But don’t sweat it. We can totally fix that! It’s actually not as scary as it sounds. All we’re gonna do is give our little USB friend a gentle nudge and tell it who’s the boss. So grab your USB stick and let’s dive in together!
Disabling Write Protection on USB Sticks
Hey there! Let’s chat about a common issue with USB sticks that many of us have run into—write protection. You know, when you try to save something on your USB drive, and all you get is a stern warning saying “Write Protected”? Annoying, right? Don’t worry, we can sort this out together.
What is Write Protection?
Kind of like a safety lock on your USB stick! It prevents data from being modified or deleted. Sometimes that’s great because it keeps important files safe. But, if you’re trying to add or change files and it’s stuck on write protection, it’s like hitting a brick wall.
Checking for Physical Locks
First things first—check if your USB stick has a physical switch. Some devices come with tiny switches that turn write protection on or off. If there’s one and it’s in the ‘lock’ position, just flip it back to ‘unlock’. Simple as that!
Using Your Computer’s Tools
If there’s no switch on your drive—or flipping it doesn’t help—you can use your computer’s built-in tools:
- On Windows: Right-click on “This PC” and select “Manage”. Go to “Disk Management.” Find your USB drive in the list. If you see any option for removing read-only attributes, give it a shot.
- On Mac: Open “Disk Utility” from Applications > Utilities. Select the USB drive and see if there’s an option under ‘File’ to modify permissions.
The Command Line Fix (Windows)
For those feeling brave enough to venture into command lines:
1. Press Win + R, type `cmd`, and hit Enter.
2. Type `diskpart` and press Enter again.
3. A new window opens; here type `list disk`.
4. Spot your USB by its size in the list then type `select disk X` (X is your disk number).
5. Now enter `attributes disk clear readonly`.
And poof! That should do the trick.
Tweaking Registry Settings
Now this one’s getting slightly techy:
1. Press Win + R, type `regedit`, then Enter.
2. Navigate through: HKEY_LOCAL_MACHINESYSTEMCurrentControlSetControlStorageDevicePolicies
3. Set value for “WriteProtect” to 0.
If “StorageDevicePolicies” isn’t there? You might need to create it manually—it happens sometimes!
Anecdote Time!
I once had a friend who was freaking out over her thesis saved only on a write-protected USB—with deadlines looming! We checked everything physically first, but eventually diving into those registry settings was what saved her day—and probably her semester!
If All Else Fails…
The thing is: some drives could be faulty or worn-out beyond repair—it’s rare but can happen! If none of these steps work after multiple tries maybe consider backing up essential data elsewhere quickly before resorting ultimately perhaps(!) replacing hardware altogether… (only last-resort advice!)
You know? These little quirks often feel daunting till we’ve tackled them head-on together like this—and you’ll wow everyone around next time someone gets stuck facing similar challenges too 😉 Good luck overcoming any usb-related hurdles ahead!
Procedure to Remove Write Protection from USB Stick
You know sometimes you try to save something on a USB stick, and it just won’t let you? Yeah, that’s write protection messing with you. It’s like a digital lock that stops any changes on your data. But there are ways to lift that invisible lock.
First things first, check for a physical switch on the USB drive. Many drives have a tiny toggle switch—almost too small to notice. If it’s switched to “lock,” well, that’s just going to stop everything in its tracks! Flip it over, if it’s set that way and see if that helps.
If there’s no switch or flipping it doesn’t fix things, let’s get into some computer magic:
1. Use Diskpart in Windows:
- Open Command Prompt: Press Windows + R, type “cmd“, and hit Enter.
- Type “diskpart”. It’s like opening up the hood of your PC!
- Once diskpart shows up, type “list disk“.
- You’ll see all connected drives listed here. Figure out which number is your USB drive from its size.
- Type “select disk X” (replace X with your drive’s number).
- Now for the magic words!: Type “attributes disk clear readonly“. Voila!
- Your USB should now be write-protection-free! To double-check: Make sure you type “exit” twice: once for diskpart and once for Command Prompt.
If you’re using Windows GUI:
Sometimes the settings can play tricks too.
- Dive into This PC or My Computer:Select Properties:Select Security Settings:
- If nothing else works reset registry keys as last-ditch attempt:
sLaunch Registry Editor by typingUSB Write Protection Causes
Ah, the dreaded “write protection” error on a USB drive. It’s like you’re trying to save that important document, and suddenly your computer says, “Uh-uh, no way!” It can be pretty frustrating when all you want is to make a simple change or add a new file. Let’s break this down.
To understand why this pesky issue happens, let’s highlight some common causes:
- Physical Lock Switch: Some USB drives have a tiny switch on the side that’s meant to protect your data by physically locking it. It’s old-school but effective. If this switch is flicked in the wrong direction, well, you won’t be adding or changing anything until you flip it back!
- Registry Settings: If you’re using Windows, there’s something called “registry settings.” Think of it like the blueprint for how programs work. Sometimes these settings might be accidentally changed, making your USB get stubborn about not wanting to write.
- Disk Errors: Our beloved USBs sometimes face technical hiccups—like corrupted files—because they’re plugged into different devices often. These glitches lead to automatic restrictions on writing data.
- Virus or Malware: Nobody likes these unwelcome guests! Viruses can sneak onto your device and mess with how files are stored or edited—making the drive keen on protecting itself.
- User Permissions: On certain computers, permissions might limit what actions users can take with external storage devices like USBs—especially in workplaces where security is priority numero uno!
Once I had borrowed my friend’s pen drive—it had some rad old-school games! And bam—write protection wouldn’t allow us any changes until we toggled that little switch back (yep, rookie mistake).
Now if you’re trying everything but still stuck? Sometimes reinstalling drivers helps—or even formatting (though that’s always last resort since it wipes clean everything). Just keep backups folks; digital chaos loves surprising us when we least expect!
Feel free though—to poke around online instructions specific for your system because tweaks differ between MacOS vs Windows vs Linux etcetera! Remember patience pays off especially dealing with technology issues filled surprises waiting around corners!
Ah, write protection on a USB drive—quite the little puzzle, isn’t it? I remember a time when my friend Sarah called me in a bit of a panic. She was working on an important project and needed to save some final touches onto her USB drive. But every time she tried, it just wouldn’t let her! Her face was a mixture of frustration and confusion.
So, what’s the deal with write protection? Imagine you’re trying to doodle in your favorite notebook only to realize someone’s put an invisible lock on it. That’s kind of how write protection works—it’s like a safety switch that prevents any changes or new files being added.
Sometimes, there is this tiny switch on the side of the USB drive. Flicking that can often solve the problem like magic! But not all drives have this feature, so then it gets tricky.
Another thing you might run into is restrictions set by software or even by Windows itself. The system could mark some drives to be read-only for security reasons—and hey, we all want our data safe and sound, right? You can dive into settings or use command prompts (like DOS stuff) to disable these restrictions if you’re feeling adventurous.
And let’s not forget about those pesky viruses! They sometimes like messing around with your USB’s settings without throwing up any red flags at first glance. Regular antivirus checks help keep this sort of mischief at bay.
In Sarah’s case, after going through all these possibilities (and let me tell you it felt like forever), she found out that her issue was just an accidental flick of that tiny switch while rummaging through her bag. We laughed about it later over coffee—never underestimating how our everyday actions can lead us into tech mysteries!
Anyway, exploring solutions doesn’t need advanced skills—just curiosity and patience often do wonders. Who knew tackling such challenges could make one feel so empowered afterward?