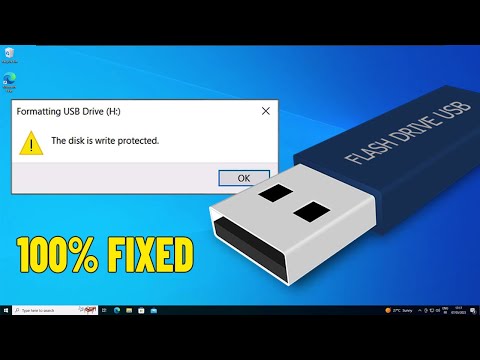
You ever tried to edit something on your USB drive, and it just won’t budge? Like, you’re ready to delete or save files, but it says “nah, can’t touch this”? Ugh, so frustrating.
Picture this: you plug in your USB at work. You’re all set for that presentation or whatever. Suddenly—bam!—write protection strikes from outta nowhere.
Why does this happen? Well, sometimes it’s a sneaky lock switch on the drive itself. Other times, it’s a software thingamajig acting up.
So now what? You might think it’s the end of your data-movin’ days. But don’t worry; we can totally fix this mess together!
Grab your USB—we’ll get you and your files back on track. Ready to tackle that pesky write protection thing once and for all?
Write-Protected USB Drive Formatting Solution
Having trouble with a pesky write-protected USB drive? You know, it can be really frustrating when you just want to format it and move on with your life. Let me share some steps that might help you deal with this issue.
First off, let’s try to understand why this happens. Sometimes USB drives have a built-in physical switch that makes them read-only. It sounds simple, right? Just look at your drive closely and see if there is a small switch or lever on the side. If there is one, just toggle it off!
But what if there’s no switch? Don’t worry; we can dive into some software solutions.
- Check for Disk Errors: Connect your USB to the computer. Open “This PC” or “My Computer,” find your USB drive, right-click it, and choose “Properties.” Under the “Tools” tab, you’ll see an option to check for errors. Give that a try.
- Use Command Prompt (CMD): This one’s like finding hidden treasure! Open Command Prompt as an administrator—it’s like using magic words here.
- Type:
diskpart - A new window opens; type:
list disk - You’ll see all attached drives. Identify which one is your USB by size.
- Type:
select disk X, replacing X with your USB’s number. - The magic phrase: Type:
alert attribute disk clear readonly. This attempts removing its write protection. - Edit Registry (Carefully!):
Hit Windows + R key together and type: regedit.Navigate through:>
>“HKEY_LOCAL_MACHINESYSTEMCurrentControlSetControlStorageDevicePolicies”.If there’s no StorageDevicePolicies key – may require creating one…
– On right pane ensure WriteProtect value says zero (‘0’) instead other numbers!
Safety tip: Playing around registry without backup? Uh-oh risky business!
Have Fun Those Drives Freeze-free Again! ul >
Procedure to Format a Write-Protected USB Drive on Windows 11
Hey there! So, you’ve got a write-protected USB drive that’s been giving you a hard time, and you’re using Windows 11 to try and fix it, huh? No worries, I’ve got your back. Let me guide you through the steps on how to format that stubborn thing. Just follow along, and soon enough you’ll be good to go.
Understanding Write Protection:
When a USB drive is write-protected, it basically means the system doesn’t allow any changes to the files inside. Like trying to write on paper wrapped in plastic! Often it’s due to a tiny switch on the side or some settings that need tweaking.Things You’ll Need:
The first step is making sure your USB drive is plugged into your computer. Let’s head over to Windows 11:- Check for Physical Switch: Some USB drives have this little slider switch somewhere along the edge. Flicking it off might just do the trick!
- Open Command Prompt: Use search (you know where!) by typing “cmd”, and remember to run it as administrator; right-click > Run as administrator.
- Use Diskpart Tool: This is like your magic wand for disk-related problems.
- Type:
"diskpart", hit Enter. - A new window opens up; type:
"list disk", see those numbers? That’s each connected drive. - You want your USB’s number; let’s pretend it’s Disk 1 for now.
- Select it by typing:
"select disk 1". - The key command here: Type:
"attributes disk clear readonly", hit Enter again.
- Type:
- Create Simple Volume if Needed: Sometimes after all this wizardry, you’ll need this extra step.
– Type:"create partition primary".
– Then format using:
(Choose quick for speed!):"format fs=ntfs quick"or
"format fs=fat32 quick";
Your choice really depends upon what fits best with devices you plan on using.
If you don’t mind losing the data already on there:
-
Once you’ve cleared the attribute:
Type:
”’
clean
create partition primary
format fs=ntfs quick
exit
”’
Now for those who are not fans of command prompts—maybe you’re thinking they sound too geeky! Try this:
Once formatted successfully – yay!
Procedure to Format a Write-Protected USB in Windows 10
Sometimes, you might find yourself unable to format a USB drive because it’s write-protected. This can be super frustrating! But don’t worry, with Windows 10, there’s a way to handle this. Let’s walk through the process together and get that drive formatted.
Check Write Protection Switch:
- First things first—make sure there isn’t a physical switch on the USB set to the ‘Lock’ position. Not all USB drives have this, though.
Using Diskpart in Command Prompt:
- Type
cmdin the search box. Right-click on Command Prompt, and choose to run it as an administrator. - Once open, type
diskpart, then hit Enter. - This opens the Diskpart tool—a powerful command-line utility in Windows for disk management.
- If you see messages like “You need administrative privileges,” it means you missed running as admin!
- Type:
list disk. This shows all connected drives. Carefully note which number represents your USB drive here; they appear as Disk 0, Disk 1… - Caution: Selecting wrong could cause data loss! Seriously—for real!
- “Selected”, not “seleccted”. Check spelling!
Then enter:
attributes disk clear readonlyAfterward you can type:
*optional if still no go
- list partition
enter
again use : same x (x=x)
Oh, formatting a write-protected USB drive, right? It's like trying to unlock a treasure chest that's really stubborn! You ever had one of those days where you just want things to go smoothly but the universe insists on tossing in some little hiccup, just for fun? That's exactly what dealing with write-protected drives can feel like. So, picture this: You're all set to transfer some files—maybe photos from your vacation or important documents—and then bam! That pesky message pops up. "This disk is write-protected." Ah, the frustration. It’s enough to make anyone want to pull their hair out! Now, let's chat about what’s going on here. This whole write protection thing is kind of like having a safety lock on your USB drive. Sometimes it's on purpose—to prevent accidental deletion—but other times it appears out of nowhere. Gremlins in the machine, maybe? To tackle this beastie, there are a couple of things you might try... First off, check if there's any physical switch on the device itself. Yep, some USB drives have tiny switches that enable or disable writing functions—kind of sneaky how they're hiding there sometimes. If there's no switch or it doesn't help flipping it? You'll be diving into some computer settings next up. You could try using that nifty Command Prompt if you're on Windows... Sounds daunting but it's really not too bad once you get comfy with it! Ah! Remembering my own episode with this issue brings back memories... I spent an entire afternoon trying every trick in the book until finally stumbling upon one small command I had missed earlier—it was the key piece for unlocking everything! Felt like winning at a board game after teetering near defeat all along. In short—and who doesn’t love shortcuts—it’s definitely feasible to format that pesky drive without pulling too many hairs out… But hey!, take each step slowly and patiently look around for those clues carefully stashed by tech wizards who came before us!
Selecting Your Drive:
The Commands to Remove Write Protection:
You know which one is your USB right? Type:
select disk X, replacing ‘X’ with your disk number.