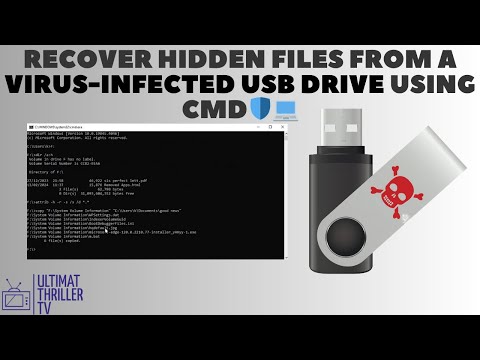
Oh wow, USB drives. They’re like these tiny lifesavers that hold everything we need—photos, documents, you name it. But, wouldn’t you know it, sometimes things just go poof! Files disappear or get hidden and it’s like they fell into some techy black hole.
I was in a pickle once: vacation pics completely vanished from my USB after plugging it into a sketchy computer. Talk about panic mode! Lucky for us there’s this little trick using the CMD Attrib Command on Windows that can help bring them back from the void.
Hang tight! It’s not rocket science or anything. Just a few simple steps and you might see those missing files again. It’s like waving a magic wand over your USB, sort of. Ain’t technology wild?
Understanding the attrib +h +s +r Command
Oh, the mysteries of computers! Ever found yourself scratching your head over hidden files on a USB? I totally get it. Sometimes, technology loves to keep secrets! But fear not, there’s this handy little trick—using the attrib command in Command Prompt (CMD) to uncover those hidden treasures. Let’s take a closer look.
So you’ve got a USB drive packed full of your important data, and you’re certain some files are missing. Maybe they’ve turned invisible due to some sneaky system changes or infection. The attrib command can come to your rescue right there.
What is the attrib command?
Think of it as a superhero tool in Windows that lets you change attributes of files and folders. Attributes like hidden (+h), system (+s), and read-only (+r) can mess with how you access these files.
Here’s how you’d use it:
- Plug in your USB drive: First things first, make sure it’s connected properly.
- Open Command Prompt: Hit Start, type “cmd”, right-click on it, and choose Run as Administrator for full permissions.
- Navigate to your USB drive: Once CMD is open, type something like “E:”, or whichever letter represents your USB drive.
- Bam!: Type
attrib -h -s -r /s /d *. This removes hidden, system and read-only attributes recursively from all files and directories within the current folder.
What’s with the symbols? Let me see if I can break them down for you:
-h: Removes the Hidden attribute so that you can actually see what’s there.-s: Drops the System attribute which makes files appear like they’re critical system components (even when they’re just pictures from last summer!).-r: Releases Read-only grip so alterations are possible again./s /d *: Applies everything down through all subfolders (* pointing at all file types).
I remember once when my own digital vault somehow locked itself up tight after I’d watched one too many episodes without backing up — absolute panic mode for a few minutes until cmd-attrib became ‘the hero’ (cue dramatic music).
But really – having such powerful tools at our fingertips keeps essential data firmly under *our* control even if technology tries hiding stuff behind invisible curtains every now again…
Diagnosing USB Corruption Causes
Hey, have you ever plugged in your USB drive and found that files are missing or corrupt? It’s almost like they’ve disappeared into thin air! It’s a bit like finding an empty cookie jar when you were sure it was full. Anyway, let’s dive into diagnosing USB corruption causes.
Understanding Corruption
Ya know, corruption in USB drives often occurs due to several factors. One common culprit might be improper ejection. Imagine yanking out the plug from your laptop without saying goodbye; it disrupts the flow of data.
Another biggie is virus infections. Viruses can sneak onto your USB just like a sneaky cat, corrupting files without you even noticing. So yeah, keeping your antivirus updated is super important!
Main Causes of USB Corruption:
- Improper Ejection: Always make sure to safely eject your drive.
- Virus Infections: Use reliable antivirus software to scan regularly.
- File System Errors: Corruption can occur if there’s an error in how the data is organized on the drive.
- Physical Damage: Dropping or bending the drive can damage it physically.
Troubleshooting with CMD Attrib Command
Now, if you’re dealing with hidden or missing files due to corruption, the CMD attrib command could be a lifesaver. It’s almost like waving a magic wand! Here’s a simple way to find those hidden treasures:
1. Open Command Prompt by typing “cmd” in the search bar.
2. Type in:
“`
attrib -h -r -s /s /d DriveLetter:*.*
“`
3. Replace “ with your actual USB letter (like E or F).
What this does is remove any attributes set on your files that might make them hidden or read-only. It’s kind of like peeling away layers to reveal what’s inside!
That’s pretty much it. Remember always backup important data… better safe than sorry!
Recover USB Files with CMD Attrib Command
Recovering files from a USB can be like finding treasure, isn’t it? Sometimes your files just seem to disappear, hidden away without any trace. You might think they’re gone forever, but hold on! They might just be playing hide and seek. There’s a nifty way to get them back using the CMD attrib command on your computer.
What is the Attrib Command?
Let’s start with the basics. The attrib command in CMD (Command Prompt) helps you manage file attributes. Imagine file attributes as little tags that tell your computer what to do with your files—keep them hidden or make them visible, read-only or open for editing.
The Process
Ready to give it a shot? Just make sure you’ve got admin privileges on the system because you’ll need them here:
- First things first, plug in your USB drive.
- Open Command Prompt. You can type “cmd” in the search bar and press Enter.
- You should see a black window pop up—looks a bit intimidating at first, but don’t worry!
- Type this in:
d: - This is where the magic happens! Type:
attrib -h -r -s /s /d *.*
Replace “d” with whatever letter represents your USB drive.
What you’re doing here is canceling out those “hide-and-seek” attributes.
A Quick Breakdown:
- -h: Removes Hidden attribute.
You know how some people love hiding their stuff under beds? It’s like saying “Hey file, come out now!”
Everything should be hunky-dory if done right! Remember though—a wise word of caution—make sure you don’t remove important system-related attributes by accident while you’re at it.
Do give it shot next time something sneaky goes invisible when least expected eh?
Oh, USB drives… those little gadgets that basically everyone relies on for transferring files, right? They’re super handy until things go a bit sideways and your files suddenly vanish into thin air. It’s like that moment when you misplace your keys, and you’re frantically searching every pocket. Panic mode, activated! But hold on a sec—your data might still be there, just hidden.
Once in a blue moon, your USB might catch a digital cold (thanks to viruses or corruption), causing files to disappear. This is where the CMD attrib command swoops in as a kind of digital superhero. I remember the first time I used it—it felt like waving a magic wand to make your lost stuff reappear!
Here’s how it works: You plug in the troubled USB drive and fire up Command Prompt on Windows. Then you type those peculiar spells—I mean commands—like you’re channeling some tech wizardry: `attrib -h -r -s /s /d E:*.*` (assuming ‘E’ is your USB’s drive letter). A bunch of symbols and letters can seem intimidating at first glance. But trust me; they simply tell your computer to unhide and recover whatever ghostly files the drive is hiding.
Imagine finding an old treasure chest buried under dust in an attic—that’s kind of what this feels like! It retrieves what was hidden without actually altering your precious data.
So yeah, next time something vanishes from your USB, don’t freak out right away. Give the CMD attrib trick a spin; it could just bring back those important documents or irreplaceable photos you thought were lost forever. And hey, if nothing else—it’s an excellent exercise in conquering tech hiccups with grace and patience!