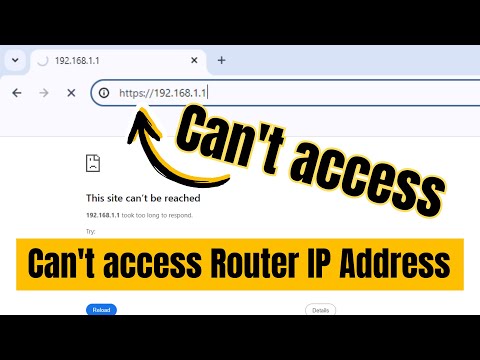
Oh, the joys of network issues, right? You’re cruising along, everything’s smooth, and then bam! Your DHCP server at 192.168.1.1 decides to throw an error. It’s like that moment when you’re watching your favorite show and your internet buffers – super annoying.
So what’s up with this pesky configuration error? Well, first things first: you’re not alone! It’s a common hiccup that happens to the best of us. Think of the DHCP server as the friendly neighbor who hands out IP addresses on your network street.
When it gets all confused—you know—it can’t do its job properly and suddenly all your devices are left hanging without proper IPs. But don’t worry, we’ll get through this together!
CenturyLink and DHCP Usage
You know, home networking can sometimes feel like a daunting maze of cables and settings. And if you’re using CenturyLink, you’ve probably run into a funny little acronym: DHCP. So let’s break it down in a way that feels as natural as chatting over coffee.
What is DHCP?
DHCP stands for Dynamic Host Configuration Protocol. Imagine it like a friendly librarian who hands out IP addresses to all the devices connecting in your network area, making sure everyone gets what they need without any fuss. It assigns unique numbers to each device so they can communicate with each other freely.
Why CenturyLink Uses DHCP
CenturyLink leverages DHCP to lend devices their own IP addresses easily and efficiently. This means less hassle for you because it pretty much automates all the behind-the-scenes work needed for your gadgets to connect online smoothly.
The 192.168.1.1 Configuration Error
Sometimes you might bump into this common hiccup when setting up or managing your home network: the “DHCP Server 192.168.1.1 Configuration Error.” Sounds fancy, right? But really, it’s just about ensuring everything’s set up correctly with your default gateway address—192.168.1.1 is often used here.
- Check Your Connections: First things first! Peek at those physical connections—wires can be sneaky.
- Access Your Router: Open up a browser window and enter “http://192.168.1.1” in the address bar.
- Login Details: Use admin credentials—these usually come on stickers attached somewhere on your router or its manual.
The next steps involve diving into some settings where changes might happen by mistake or due to technical gremlins:
- If you’re stuck with no connection:, check if there’s an active “Enable DHCP”. If not enabled—that could be why things feel off-kilter!
- A good rule? Make sure only one device functions as “the boss” (aka main DHCP server) at home amidst multiple routers/modem combos around other spots.
And don’t hesitate reaching out directly towards CenturyLink support team if something seems too overwhelming—they’ve got folks who’ve heard every quirky variation possible under tech sun!
Having gone through similar moments myself years ago—I remember late nights swapping modem channels thinking world was ending (spoiler alert: everything worked fine!) Anyway…it taught me patience plus willingness trying again until resolving whatever issue arose steps mindfulness always following simple tips above help maintaining seamless internet experience across devices today!
Why 192.168.1.1 Shows as Not Secure
Alright, let’s dig into why you might see 192.168.1.1 showing up as “Not Secure.” This can be a bit unsettling, right? You’re just trying to access your home network settings, and then bam!—warning lights everywhere.
Now, the first thing to understand is that 192.168.1.1 is a default IP address used by many routers as an entry point for managing network settings. Basically, you type it into your browser’s address bar to access your router’s admin panel.
- HTTP vs HTTPS: The alert you’re seeing usually pops up because the connection is over HTTP instead of HTTPS.
So, why does this matter? When you’re on HTTP (without the “S”), the data transfer isn’t encrypted. It’s like sending postcards—the information can be easily read along the way.
- Lack of Encryption: With HTTP, anyone with access could potentially intercept what you’re doing.
- HTTPS: On the other hand, adds that layer of security—it encrypts data so outsiders can’t snoop.
Most routers don’t bother with HTTPS for local connections because they expect you’re on a safe home network. But it’s still good practice to ensure extra security if available.
Now let’s get into that DHCP Server configuration error side of things—it’s sometimes related! DHCP stands for Dynamic Host Configuration Protocol—it’s what assigns IP addresses within your local network.
Error Diagnosis:
- If there’s a configuration error here, it may lead to connectivity issues or improper IP assignments.
- This doesn’t directly cause security warnings but can add confusion when troubleshooting your router issues!
In many cases: restarting or resetting your router back-to-factory settings can solve these hiccups in DHCP configurations.
And one more thing: while accessing routers isn’t usually encrypted (remember those post-cards), make sure to change default admin passwords immediately following setup—many folks forget this step!
A little anecdote: I remember once helping my neighbor who thought his Wi-Fi was haunted because odd devices popped up using HIS internet speed (turns out someone knew about unchanged defaults)—lesson learned!
Hope all this info helps iron-out what’s happening when “Not Secure” pops-up at ya’. Good luck with any settings tweaks ahead!
Let’s talk about that frustrating moment when you’re all set to connect your network devices, but they just won’t cooperate. You know, the blinking lights and endless loading icons hinting something’s up? Yeah, it could all trace back to a DHCP server configuration error. Picture this: you’ve just sat down with a steaming cup of coffee, ready to start your day, only to find out your internet is acting like it’s taken a vacation without telling you.
Now, this often happens when your trusty router – let’s call it 192.168.1.1 – isn’t playing nice with its friends in the DHCP department (the folks that hand out IP addresses like candy). It might be due to misconfiguration or maybe it just needs a nudge. At home, I once felt like pulling my hair out over one! My streaming was buffering at the worst times.
In simple words, the DHCP server is responsible for automatically providing each device on your network an IP address so everything can talk to each other smoothly. If there’s an error on 192.168.1.1, though? It may start assigning wrong addresses – kind of like Santa delivering presents to the wrong houses! Now imagine devices can’t figure where they’re supposed to go; that’s when things get messy.
To tackle this pesky issue, you’d want to log into your router’s admin interface (type that IP address in your browser) and have a look at those settings—just not after midnight or without googling if it’s safe first unless you really know what you’re doing…and even then maybe ask someone first!
If numbers scare you like algebra used whispering ghostly equations under their breath (yes I’ve been there too), remember there are always community forums and guides that’ll come through in those tech-heavy moments! Oh boy—after fixing mine once? I felt like celebrating with another round o’ coffee…or cake? Cheers!