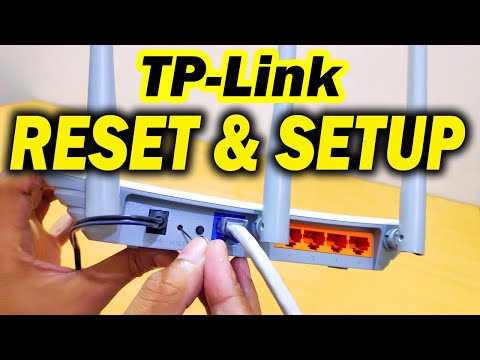
Alright, so you’re diving into the world of D-Link routers, huh? It’s not as scary as it sounds. I promise!
You know how sometimes you buy a new gadget and it’s like trying to decipher an ancient language? We’re skipping that drama today.
I mean, who needs added frustration when all you want is to binge-watch your favorite series without a glitch?
Setting up your router can actually be pretty straightforward. Like putting together a puzzle with way fewer pieces than you expect.
We’ll walk through it, step by step. Just like two pals figuring out the best way to get that Wi-Fi humming smoothly through the entire house. Ready for a little router magic?
Distinguishing D-Link Routers from Wi-Fi Devices
Setting up a D-Link router and distinguishing it from other Wi-Fi devices can sometimes feel like trying to solve a puzzle. You know that moment when you’re staring at a pile of tech gadgets, wondering which cable goes where? Yeah, we’ve all been there. Let’s see if we can clear things up.
Understanding the Difference:
- D-Link Routers: These are your main hub for connecting to the internet at home or office. Think of them as your internet gateway—they route data between your connected devices and the web.
- Wi-Fi Devices: This term is pretty broad! It covers gadgets like smartphones, laptops, smart TVs—anything that connects wirelessly to a network via Wi-Fi.
So, how do you set up this D-Link router? Picture setting it up similar to assembling furniture with an instruction manual!
The Setup Process:
1. **Plug It In**: First thing’s first—connect the router to your modem using an Ethernet cable. That’s going to be your primary connection line for internet access. Plug it into power too.
2. **Access Router Settings**: Once it’s connected, fire up your computer and open a web browser.. Enter the IP address of D-Link routers (usually something like 192.168.0.1). This leads you straight into the settings dashboard.
3. **Create User Credentials**: Inside those settings, you’ll set up user names and passwords for accessing Wi-Fi network you’d like others not guessing right!
4. **Configure Your Network:** Now comes setting specific features like guest networks or parental controls—not needed but always nice hav’ options ready!
5. **Reboot & Test:** Finally give everything run-through just make sure works smooth as butter! Restarting after changes ensures updates take effect fully.
Remember breaking these steps down becomes easier than eating pie once underway; trust me even grandma could follow along without breakin’ sweat over mysterious techy lingo involved here yet feeling accomplished end day happens often enough no worries about messin’ things especially helpful buttons anytime making mistakes wrong inputs etcetera…
Wrapping things inevitably understanding equipment involved communicating difference between various components surrounding gets clearer practice hands-on experience—frankly speaking one hand dirty ensuring stable connection while other explores wider world out there thanks dependable D-link doing own stuff silently behind scenes—you got ta love little unnoticed workhorses keep us afloat vast sea information today wowser right?!
Step-by-Step D-Link Router Configuration
Hey, setting up a D-Link router might sound a bit daunting but, you know, it’s not rocket science. I’ve seen people get all tangled up with wires and blinking lights just like my cousin last week who was wrestling with his router while Facetiming me. Anyway, here’s how you get that D-Link router up and running without turning it into a big drama.
First thing, you wanna connect your router. Grab the power cable and plug it in; easy peasy. Then take an ethernet cable, usually yellow or blue (but colors can vary), and connect your modem to the WAN/Internet port on the router. It’s usually colored differently or labeled for clarity.
You’ll now need to access the router’s settings on your computer:
- Power on your computer and open a web browser.
- In the address bar type: 192.168.0.1 or 192.168.1.1. You’ll see a login page pop up.
- The default login info is often admin/admin, but check that little sticker underneath your router if you’re not sure.
Once you’re in, you’ll be greeted by the setup wizard—everybody’s best friend during this process! It guides you through some questions to personalize settings.
Select Your Connection Type:
- If given an option like DHCP (Dynamic), PPPoE (for DSL connections), or others—choose what matches your Internet service provider’s instructions.
- Example: Suppose CenturyLink sent you some connection details—you’d pick PPPoE and fill in those provided username & password they gave you.
I remember helping Grandma with her Wi-Fi name once; she insisted we named it “CatLoverNetwork” which somehow made her even more attached to using her iPad nonstop!
Time now for wireless settings:
- Name (SSID) your network anything unique but avoid using personal details.
- Select security mode as WPA2 for that extra layer of protection—it’s like locking your front door properly!
- Create a strong passphrase; something memorable yet tricky to guess by others.
Save changes while crossing fingers ‘cause routers love dealing out drama sometimes! You might need’n reboot everything too because—like taking naps—they sometimes perform better after restarts.
And voila! Devices will now start connecting through Wi-Fi once all systems are go again post-reboots: Smartphones? Check!, Laptops? Check!
Yet if mysterious issues arise beyond initial hurdles feel free contact support who helps untangle any snags left unresolved solo-style—which isn’t odd since technology loves sneaking surprises our way at times…
Configuring D-Link Router via Mobile
Alright, getting your D-Link router up and running straight from your mobile is as easy as pie. It’s a little like setting up a new toy, just with more tech involved. Let’s walk through this process step-by-step, keeping it simple and straightforward.
1. Connect to Your Router
First things first, you need to get your mobile device connected to your router. Locate the default Wi-Fi network name (often found on a sticker on the router itself) and connect to it using the default password provided.
2. Accessing the Router’s Interface
Once you’re connected, open up a web browser on your phone—Safari, Chrome, whatever floats your boat—and type in the default IP address for D-Link routers: 192.168.0.1. Pretty much like punching in an address into Google Maps!
- Default Username: It’s usually “admin”.
- Password: This might be “admin” too or left blank if it’s just out of the box.
- If there’s been any fiddling with these already and you’ve forgotten them—yikes! You might need to reset the router.
3. Starting Basic Configuration
After logging in successfully, you’ll enter into what looks like Mission Control! Here’s where you set things up:
- Internet Connection Setup: Follow the Automatic Setup Wizard if you’re unsure about all that technical jargon.
- You can manually enter details if you’re savvy enough or have specifics from your ISP handy.
4. Customize Your Wi-Fi Settings
Now onto customizing stuff; this is where personality meets tech.
- Your SSID Name: Change that bland default network name to something cool or personal!
- E.g., “CoffeeLoversHQ” sounds way better than endless strings of numbers!
- Password Protection: Make sure it’s solid but memorable—a mix of letters numbers and symbols work best.
5. Secure Your Network Further
Security isn’t just about passwords though!
- Email Alerts: You can tweak alert settings so you’ll know if something fishy’s going down remotely!
.
There you go! Once done setting everything according,y give yourself some credit because now not only does everything technically work , but look forward feeling secure as ever hoping such info was helpful orienting gadgets initially seemed intimidating 来made fun informative more doable than expected backtrack repeat Whenev,e.r needed absolutely zero pressure involved beforehand anyway cheers handling wireless bliss sans sweat breaking top gear swearing sweet relief home admin ranking right alongside finding remote point channel whirring again feeling ✌ time&effort worthwhil,.
Ah, setting up a D-Link router can be an adventure of its own, really. You know how exciting it felt the first time you moved into a new place and had to figure out where to put everything just right? Getting your internet up and running is kind of like that. It’s all about finding just the right balance to make everything work smoothly.
First off, let’s face it: routers might look like intimidating little boxes with blinking lights and strange ports. I remember when I got my first D-Link router, sitting there flicking through the manual with a mixture of anticipation and mild panic! But once you get past those initial jitters, it’s quite satisfying.
You’ll usually start by plugging it in – power first – then connecting it to your modem via an Ethernet cable. It sounds fancy, but it’s actually quite simple once you get the hang of it. Then there’s logging into the router with its IP address. This is kind of like unlocking a special door on the internet where only you can tweak things around! Seriously!
And don’t worry about getting lost in tech jargon. D-Link usually gives fairly straightforward instructions on-screen—like they’re guiding you along step by step. One time I made a typo inputting my Wi-Fi password; took me forever to figure out why nothing was connecting… but hey, we all have those moments.
You’ll come across different settings—you know—Wi-Fi names (SSID), passwords (make this strong!), maybe even parental controls if you’re watching over little ones’ online activities!
Once you’re done tweaking and saving your settings—and yes sometimes waiting for what feels like ages—it’s pure magic seeing all your devices happily bouncing back online again.
Oh! And don’t forget testing them out room-to-room for signal strength; nothing more frustrating than finding out there’s no Wi-Fi signal in that perfect reading nook spot upstairs later on…
So yeah—hats off if you’ve managed through setting yours up already! If not yet tackled…don’t sweat; approach each part one at a time—and enjoy bringing some order into chaos till everything flows perfectly at home sweet home (internet version!). Have fun surfing!