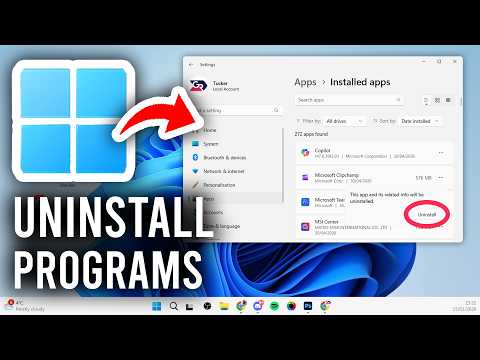
So, you’ve got that pesky Windows app cluttering up your computer, huh? I feel ya! It’s like when you’re cleaning out your closet and find clothes you haven’t worn in ages. Only here, it’s digital stuff taking up space on your screen.
Sometimes these apps just sneak in. Maybe you downloaded one by mistake or got an extra with another program. Either way, they can slow things down big time. It’s kinda like having too many tabs open on your browser—ever been there?
Now you’re thinking, how do I get rid of this thing without messing things up? Been there, too! You don’t need to be a tech whiz for this one. We’ll go through it step by step and make sure everything’s spick and span.
Ready to clear some space? Let’s dive into the world of uninstalling Windows apps together!
Deciding Between Deleting and Uninstalling Programs
Oh wow, the whole debate between deleting and uninstalling programs can get a bit tricky sometimes. You’re not alone if you’ve ever been confused about it. You know, understanding the difference is like figuring out why you need two different cleaning supplies in your house—one for mopping up spills and another for deep cleaning. Let’s dive into this with some warmth and clarity.
Deleting a Program
- What it is: Deleting a program usually means finding the program file or folder in your computer’s hard drive and hitting delete.
- When to do it: If you’re super sure that you don’t need any part of that program again, which by the way, is rare because most programs have bits stored elsewhere on your system.
- The Catch: Deleting might remove the visible parts but leaves behind hidden files or settings, kinda like sweeping under a rug rather than cleaning up properly.
I once deleted an app thinking I was being all tech-savvy—only for my trusty laptop to remind me through annoying errors that little pieces of it were left behind. Lesson learned!
Uninstalling a Program
- Definition: This process uses a specific uninstaller tool to fully remove an application from your system.
- Why it’s better: It ensures all linked files, registry entries, and related components are cleared out too—like how you’d want every cookie crumb gone after indulging!
- The Wise Choice: Use your system’s built-in uninstall feature found in Control Panel (for Windows) since it’s more thorough.
Anyway, think about those times when you’ve had stuff piling up unnecessarily because there wasn’t really a plan in place… computers are like that too! Leaving old software hanging around even when their era has passed can slow down things faster than you’d imagine.
A Practical Example: Let’s say you installed “CoolSoftware” ages ago on Windows but now want it gone:
– Go ahead to “Control Panel”
– Tap on “Programs” then “Programs and Features”
– Look for “CoolSoftware”, select it
– Click on “Uninstall” from above
It’s kinda like magic seeing unnecessary stuff poof away neatly without causing chaos!
One thing friends often miss about uninstallation processes: many leave behind temp files or folders. Yes! Single files here; orphaned data there—it accumulates over time cluttering what should be spic-and-span clean pathways inside our machines!
So keep eye out watch whether full cleanup happens also especially if frequent installs/updates involved since traces remain needing further manual intervention sometimes using dedicated cleaner tools (another discussion altogether).
Remember always be cautious whichever approach taking ensuring system restoration possible difficulties arise unexpectedly during processes mentioned earlier result disruptions daily activities affected negatively owing missteps initial attempts handling procedures correctly correctly… phew lengthy topic concise end results hope clears things clear exactly choose appropriately next encounter scenarios herein described explained thoroughly simple helpful yet engaging format agreed?
Batch Uninstalling All PC Apps
Uninstalling apps one by one can be a real chore, right? You’ve been meaning to clean up your computer, but the thought of uninstalling each program individually makes you want to procrastinate forever. But don’t worry—there’s an easier way: batch uninstalling!
First things first: Before you dive in, make sure you back up any important data. You never know what could go wrong, and we don’t want to risk losing anything valuable.
Let’s get started with the tools you’ll need. Windows doesn’t natively support batch uninstalling multiple programs at once, so you’ll need a third-party tool for this task.
- IObit Uninstaller: This one’s pretty popular for its user-friendly interface and powerful features. It lets you select multiple applications and remove them all at once.
- Revo Uninstaller: Another favorite among users. With its advanced scanning for leftover files, it ensures a thorough cleanup.
- Bulk Crap Uninstaller (BCUninstaller): Don’t be put off by the name; it’s free and open-source! Many users find it quite effective.
The Installation Process:
Once you’ve chosen your tool:
- Download: Go to the official website of the tool you selected and download it.
- Install: Follow the instructions on screen—usually just clicking ‘Next’ a bunch of times!
Selecting Programs for Batch Uninstall:
- IObit Example:You’ll see a list of all installed programs. Just check the boxes next to those you’d like to remove. Pretty straightforward!
- If using BCUninstaller:This one auto-selects ‘crapware’ if that’s your thing, or you can manually pick from your full list of installed software.
This is also where attention is key—double-check that you’re not accidentally removing something essential.
You wouldn’t want to delete that crucial photo editing software or your kid’s favorite educational game! - A prompt will usually appear asking if you’re sure about this decision—it’s not just checking on forgetfulness but also safety.
So yeah make sure again before hitting that ‘Uninstall’ button!
The Uninstallation Process: , Once confirmed most tools automatically handle everything else for ya., meaning they’ll initiate dialogues hit ‘Yes’ or ‘Next’ as needed while doing their wizardry in backgrounds .
Banning Leftovers :. Even after uninstallation some remnants might hang around in form broken registry entries folders etc,. Luckily these tools scan afterwards rooting out leftovers ensuring complete removal methodically end task
Remember!
Uninstalling Windows Apps Guide
Oh, getting rid of apps you don’t need on your Windows PC can be quite a breeze! Whether you’re looking to free up some space or just tidy things up, I’ll walk you through it in a way that’s easy as pie. Trust me, I’ve been there myself. Uninstalling all those trial versions and random stuff that I downloaded just to try out once.
Let’s get started:
- Open up Settings: First things first, you gotta go to the Start menu, which is like the main hub of your computer. Click on that little gear icon for Settings.
- Navigating to Apps: Once in Settings, look for “Apps.” It’s usually there among other options like System or Devices. Click on it!
- Select the Culprit: Now you’ll see a list of all installed applications on your machine. Scroll through and spot the one you’re itching to uninstall.
- The Uninstall Button: After selecting the app, an “Uninstall” button will appear. Give it a click! If it’s greyed out, maybe it’s one of those built-in Windows apps.
- Follow Through with Instructions: Some apps might need an extra step or two – nothing fancy – but it’ll guide you smoothly till they’re off your system.
A few tips worth mentioning:
- If an app is stubbornly sticking around and not leaving even after clicking Uninstall… well sometimes rebooting helps clear it out properly.
- If something seems off or feels kinda fishy during uninstallation—like unexpected warnings—just pause for a sec before proceeding further.
Now you’ve got yourself some more room? Isn’t life feeling lighter already? Sometimes when cleaning my own PC like this last summer.. it felt almost therapeutic in its way.
And don’t worry if any leftovers lurk around sneakily (it happens!). Regular maintenance helps keep everything running fit as fiddles again soon enough though!
Hope ya find these steps helpful enough while tackling those unwanted programs easily! Go ahead and enjoy sprucing up without breaking too much sweat today then!
Oh, uninstalling Windows apps, huh? It’s one of those things that seems easy but sometimes can turn into a whole adventure. Like, you just want to free up some space or get rid of that app you haven’t touched in forever. You know the feeling?
I’ve been there too. Once I accidentally installed this fun-looking game that turned out to be… let’s say less fun than expected. So I figured, how hard could it be to uninstall it? And if you’re like me, you might start clicking around until something happens—or doesn’t!
So first things first: you’ve got the trusty Start menu at your disposal, right? When you dive into “Settings,” you’re greeted with “Apps.” Pretty straightforward so far! Just find that pesky app on the list, click on it, and boom—you have an “Uninstall” button waiting for action.
But let me share a little cautionary tale: there was this one time when an app refused to budge. Oh boy! Apparently, some programs need a little extra convincing before they say goodbye. They might require admin rights or maybe run in the background without telling us.
Anyway, don’t panic if that’s the case! Sometimes rebooting and trying again does wonders—apps are sneaky like that.
In those tricky moments when nothing works and resistance is futile… that’s where special uninstaller software comes into play. It’s like having a superpower in your back pocket for when all else fails.
Remember though: always make sure you’re not deleting anything crucial—like drivers or important system files—you wouldn’t want any unexpected surprises after cleaning house!
And hey if all this talk about apps seems daunting just remember—it’s part of keeping your computer running smoothly and freeing up resources we often take for granted… until we really need them!