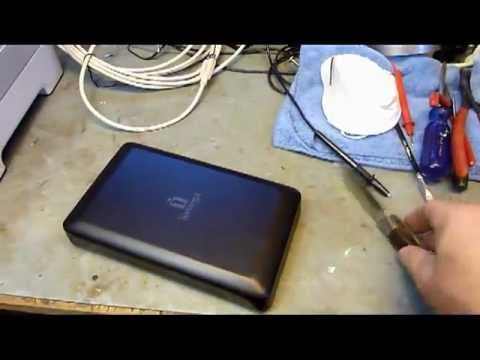
Imagine this: you’ve got your trusty iomega hard disk in hand, filled with years of precious memories, work files, and who knows what else. You plug it into your Windows 10 computer, ready to access all that good stuff… and nada! Nothing happens. It’s like your computer doesn’t even realize it exists. Frustrating, right?
You’re not alone in this tech hiccup. Many folks have faced this mysterious disappearing act. That little piece of hardware that should make life easier seems to have its own agenda sometimes.
But hold up! Before you toss the thing out the window in a fit of rage—or desperately start googling for a new one—take a deep breath. There might be some simple reasons why Windows 10 is playing hard-to-get with your iomega drive.
We’ll sort it out together, yeah? Let’s figure out what’s going on so you can get back to what matters most: those files waiting for you on that mystical hard disk!
Checking BIOS Settings for Hard Disk Detection
When your Iomega hard disk isn’t being recognized by Windows 10, it can feel like you’ve hit a digital brick wall. You know, it’s one of those times when you just want things to work, right? One place to start troubleshooting is the BIOS settings. Now don’t worry if you’re not super tech-savvy—this stuff is manageable!
What is BIOS?
BIOS (Basic Input/Output System) is what helps your computer turn on and get everything in order for your operating system to boot up. Think of it as the conductor making sure all parts are ready before the big performance.
- Accessing BIOS: Restart your computer and as it boots up, hit the specific key that gets you into BIOS. It’s often F2, Del, or something similar. A flash of text usually lets you know which one.
- Navigating in BIOS: Use your keyboard arrow keys; mouse support isn’t usually available here.
- Find Boot Menu: Look for a tab or section labeled something like “Boot” or “Boot Options.”
Troubleshooting Hard Disk Detection
In the Boot Menu area, you’re looking to see if your Iomega hard drive shows up:
- If it’s there under “Hard Disk Drives,” that’s good! But we might have a connection issue elsewhere if Windows isn’t seeing it.
- If it’s not showing up at all, ensure that all cables are securely connected between your hard drive and motherboard. Sometimes cables just wiggle loose over time—it happened to me once and oh boy, what an easy fix that was!
SATA Mode Settings Might Matter:
Another area to explore inside the BIOS is SATA Configuration:
- Your hard drive might benefit from switching between modes like AHCI or IDE. Sounds technical but try toggling these settings if nothing else works.
Make sure after any changes inside BIOS, you save them before exiting—usually done by pressing F10 followed by Enter.
You see fiddling around with these settings doesn’t require deep technical skills—just a bit of patience! And remember: always back up essential data before diving into configurations like this—you never quite know what could happen during these sessions.
If after all this detective work baffled Iomega hard disk remains stubbornly invisible on Windows, consider reaching out for some professional help—it could be an issue with drivers or even hardware quirks beyond easy fixes!
Iomega Hard Disk Not Recognized by Windows 10
Oh, no! So, your Iomega hard disk seems to be playing hide-and-seek with Windows 10. It’s annoying when something like this happens, isn’t it? Let’s go over how you can, hopefully, make it appear again.
Firstly, try connecting the hard disk to another USB port. Sometimes those little ports get fussy and stop working for a bit. Also, try using a different USB cable if you have one lying around. You’d be surprised how often these simple changes do the trick!
If that hasn’t worked, let’s check Disk Management in Windows. This is like looking behind the curtain to see if the drive’s there but just not showing properly.
1. Press Win + X and select Disk Management.
2. If your Iomega drive shows up but without a letter (like “C:” or “D:”) next to it:
– Right-click on it.
– Select Change Drive Letter and Paths.
– Click Add, choose a letter from the dropdown menu (something that’s not already taken), and hit OK.
But what if it’s still not there? Let’s dive a bit deeper into device drivers:
- Press Win + X and click on Device Manager.
- Look under “Disk Drives” or “Universal Serial Bus controllers” for any yellow triangles or warnings.
- If you spot one with an issue:
- Right-click, select “Update Driver Software…“, then let Windows search automatically.
If updating doesn’t help, uninstall it by right-clicking and selecting “Uninstall device“, then restart your computer so Windows can hopefully reinstall fresh drivers.
One thing that catches some folks by surprise; power settings! Sometimes Windows turns off USB ports to save power:
1. Open Control Panel > Hardware & Sound > Power Options.
2. Click “Change plan settings” of your current plan.
3. Hit “Change advanced power settings.”
4. Find USB Settings > USB selective suspend setting > Disable both options.
Ah! Before we wrap this up let’s think about updates—Windows Updates can cause problems sometimes too… Check if everything’s updated in Settings > Update & Security.
Sometimes our gadgets have minds of their own, don’t they? Hopefully one of these tricks will make your Iomega hard disk come out of hiding!
Iomega Hard Disk USB Recognition Issue on Windows 10
Oh, the frustration of plugging in your trusty Iomega hard disk into your Windows 10 computer and… nothing. It’s like, come on, where’s my data? Don’t worry; let’s figure this out together.
First up, let’s make sure we cover the basics. Your USB port might be acting a bit stubborn. Try connecting the hard drive to another USB port on your computer. Sometimes these ports have their own mood swings!
If that doesn’t do it, take a moment to restart your computer. I know it sounds simple, but sometimes all that tech needs is a fresh start too.
Next, let’s dig into some settings:
- Device Manager: Open it by typing “Device Manager” in the Windows search bar and pressing Enter. Find “Disk Drives,” and you might just spot an issue with your Iomega drive there!
- Right-click on any suspicious-looking drive name and hit “Update Driver.” It never hurts to check if there’s a newer set of instructions for communicating with the device.
What if Device Manager doesn’t solve it? Let’s try something else.
- Disk Management: Open this by right-clicking the Start button and selecting “Disk Management.” This is where you can see all drives connected to your system.
- If you notice your Iomega disk listed as unallocated or offline, initiate allocation by right-clicking and choosing appropriate options like “Initialize Disk” or similar actions.
Sometimes drives need a little nudge to jump start their communication with your machine!
And hey, if nothing works? Try using another cable or test the drive on another different computer just to rule out any sneaky issues with cabling or compatibility at home base.
In one personal scenario – story time! – I had my significant work project stored on an external hard disk (thankfully backed up elsewhere!), which gave me quite a scare when unrecognized randomly one day during crunch time deadline vibes until realizing mum xoxo used low-powered USB hub 😅 Simple power connectivity fix brought priceless relief!
So yeah don’t fret too much yet—it happens way more often than you’d think!
Oh, those pesky moments when technology seems to have a mind of its own! It’s quite frustrating, isn’t it? Imagine you plug in your Iomega hard disk into your Windows 10 computer, expecting all your precious files and memories to pop up, but instead—nothing. Nada. Zilch. The thing is, you’re not alone in this predicament.
I remember this one time my sister called me in a panic because her Iomega drive wasn’t being recognized. She had all her vacation photos from Europe on there and was desperate to retrieve them. After some deep breaths and a bit of amateur sleuthing, we figured things out.
First off, let’s look at the basics: sometimes it’s just that the USB port is acting up or the cable might be faulty—simple stuff like swapping ports or trying another cable can do wonders. If that doesn’t work though, it might be worth checking if the device shows up in Disk Management. Just hit that Windows key, type ‘Disk Management’ and see if it appears there even if Windows Explorer is acting like it’s on vacation itself.
On occasion, drives aren’t assigned a letter automatically—that’s kind of like getting mail with no mailbox—and that’s why they don’t show up like usual. Give it a right-click and assign a new letter if needed; sounds simple but can save you heaps of trouble.
And don’t forget about drivers! These are like translators between hardware and software—you know? Check that they’re updated because outdated drivers can cause all sorts of havoc with recognition issues too.
Honestly though? It’s just part of life’s little learning curves with tech gear – needing patience and sometimes more caffeine than planned! But feels oh-so-good when you manage to solve these puzzles yourself or find help somewhere along the way—kind of makes us feel pretty accomplished at times!