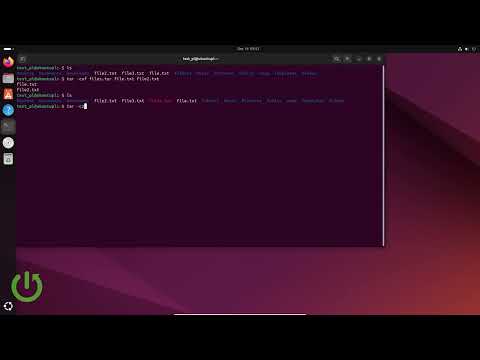
So, you’ve got this Linux thing and everyone keeps talking about the “tar command,” right? It’s like this magical tool that people say can compress your files, make backups, and do other cool stuff. But if you’re feeling a bit lost when folks start throwing around the word “tarball,” don’t stress. You’re definitely not alone.
Picture yourself just sitting there, staring at your screen. Maybe you’re thinking: “Do I need to be some kind of wizard to figure this out?” Spoiler alert: you don’t! Honestly, once you get the hang of it, it’s kinda like riding a bike—after those few wobbly starts, you’re off and rolling.
We’ll break things down nice and easy. Imagine we’re just hanging out over coffee and chatting about life…and file compression! ‘Cause really, tar’s just another tool in your belt that’ll make your Linux adventures way smoother. So grab a seat (or maybe some popcorn) ’cause here comes the journey into the land of tar!
Selecting Compression for tar Files
Ever found yourself wondering how to compress your files efficiently on Linux? You’re in the right place. We’re gonna have a friendly chat about the best ways to select compression for your tar files. It might sound tricky at first, but it’s pretty manageable once you get a hold of it.
Now, tar is like that magic bag that can bundle up all your files into one neat package. And sometimes, you want this package to be as small as possible, right? That’s where compression comes in handy.
Why Use Compression with Tar?
- Space-saving: Compressing reduces storage space.
- Faster transfers: Smaller files mean quicker uploads and downloads.
When you use tar, you’re typically dealing with two steps: packaging and then compressing. There are several types of compression tools you can use with tar. Each has its pros and cons.
Common Compression Methods:
1. **Gzip:**
– It’s great for speed; fast both in compressing and decompressing.
– Commands look something like `tar -czf archive.tar.gz /path/to/directory`.
– Perfect if time is more valuable than disk space.
2. **Bzip2:**
– This one usually gives better compression than gzip.
– But it takes more time to do its thing.
– Use `tar -cjf archive.tar.bz2 /path/to/directory` for this method.
3. **Xz:**
– If you need super compact files, xz might be your best pal.
– It compresses really well but isn’t the swiftest—takes longer to process.
– Example command: `tar -cJf archive.tar.xz /path/to/directory`.
Each method has its sweet spot depending on what matters most—time or space? It’s kinda like choosing between an express train or a scenic bus ride!
Selecting the Right Tool:
- If you’re in a hurry and want quick results, go with gzip.
- If saving space tops your priorities list and you’re okay waiting a bit longer,bzip2‘s better.
- To achieve maximum compression regardless of time constraints, choose xz.
Remember when I accidentally compressed my vacation photos before backing them up using xz? Yeah! Took ages because I wanted top-notch savings on disk space.
So there it is! A simple guide through selecting compression for tar command in Linux without getting lost among endless possibilities—all while keeping things relatable!
Evaluating Top Linux Compression Commands
Ah, Linux and its compression commands! They can seem like a puzzle sometimes, right? But really, they’re quite handy once you get the hang of ’em. Let’s dig in.
- Tar Command: First up is the Tar command. You’ve probably come across this if you’ve ever worked with Linux. It’s like that reliable old tool in your toolbox. Tar stands for “tape archive,” and you mostly use it to group a bunch of files together into one file without actually compressing them.
-
How It Works: To both archive and compress, people often pair Tar with other commands like gzip or bzip2. So, instead of having hundreds of little files scattered all over, you throw them into one neat package using Tar.
Example: If you’ve got a directory named “my_files” and want to bundle it up? You’d use something like:
$ tar -cvf my_files.tar my_files/
And voilà! All your files are bundled together under one roof.
-
gzip Command: Another tool that’s popular is gzip—it actually compresses data pretty well by reducing its size.
How long have we all been sending emails with huge attachments only to have them bounce back? Oops!
Anyway, combining it with Tar is pretty common. When you’re dealing with bigger folders or stuff you want to save space on your disk drive:
A simple command could look like this:
$ tar -czvf my_files.tar.gz my_files/
The “-z” option tells Tar to use gzip for compression.
-
bzip2 Command: Now if you’re looking for even better compression than gzip but don’t mind it taking a bit longer—there’s bzip2.
It munches on files until they’re super compact! Ideal when space management’s crucial.
The Trick Here? You just switch out that “z” from before:
$ tar -cjvf my_files.tar.bz2 my_files/
Basically swap gzipping out in favor of bzipping.
Navigating these commands might feel tricky initially because there’s so many options available—but trust me mastering them makes working on Linux much clearer (and fun).
Using the tar Command for File Compression in Ubuntu
When it comes to compressing files in Ubuntu, the tar command is your trusty sidekick. It’s been around for a while and does the job like a pro. Imagine you’ve got a bunch of files scattered all over, and you want to pack them into a neat little box—like organizing books on a shelf.
First, let’s talk about what the tar command actually does. Originally, it stood for “tape archive”. Sounds old school, right? It was used to put files together on tape drives back in the day. Still handy now for creating archives or unpacking them.
To use it, fire up your terminal. Don’t worry—it’s not as scary as it sounds! You’re basically giving instructions directly to your computer.
Create an Archive:
You might have some vacation photos or important documents you need all together in one file. You’d type:
“`bash
tar -cvf my_archive.tar /path/to/directory/
“`
Here’s what’s going on:
- -c: Create a new archive.
- -v: Verbose; will show all files being processed (it’s like getting details from your car mechanic).
- -f: Specifies the name of the archive file—in this case, “my_archive.tar”.
Compress an Archive:
Once you’ve created your archive, you might want to compress it to save space. Tar isn’t about compression itself; it just puts things together. To shrink everything down:
“`bash
gzip my_archive.tar
“`
Now it’s called my_archive.tar.gz. This makes sharing over email or cloud much easier because smaller size means quicker transfer!
Extracting Files:
Got an archive recently that someone shared with you? To bring those hidden treasures out:
“`bash
tar -xvf my_archive.tar.gz
“`
Here’s what each letter does:
- -x: Extracts the files.
- The rest (-v and -f): Same as before—verbosity and filename.
Remember—even though tar is handling these bundles nicely—it doesn’t turn them into anything readable without extracting first! It’s all behind-the-scenes magic until then.
If any hiccups occur along way… breathe deep; head back into terminal check errors message carefully sometimes small syntax mistake can throw curveball!
Tar’s simple yet powerful tool once comfortable using commands becomes second nature start feeling like computer wizard weaving spells make data dance fingertips… At least sort-speak.
Hope this helps you get started organizing data Ubuntu world using tar command smoothly feel free explore deeper options if catch fancy maybe someday delve intricacies scripting automate tasks fun journey ahead good luck!
Ah, the tar command! It’s like an old friend to anyone who’s spent a bit of time working with Linux. I remember when I first encountered it, I was on a quest to free up some space on my trusty old laptop. It taught me way more than just compressing files.
Okay, imagine you have this giant box of LEGO bricks all scattered around your room. Messy, right? That’s what your files are like spread out all over your computer. Now, the tar command is like that big storage box you stuff them into so they’re all together neatly—like a magical container.
So what does it actually do? Basically, tar stands for “tape archive.” It combines multiple files into one single file called an “archive,” and it can also compress them while it’s at it. This makes moving and storing them way easier. It’s super handy when you’re dealing with backups or transferring files between systems.
You type out these somewhat scary looking lines in your terminal— but don’t be intimidated! Something like `tar -cvzf archive.tar.gz /path/to/files` is just telling your computer: “Hey buddy, let’s stick all these files together and squish ’em down to save space.” The `c` is for create, `v` for verbose (which means show me what you’re doing), `z` to zip (compress), and `f`, well, that’s to specify the file name.
I once spent an afternoon trying to understand why my compressed file was huge compared to another method I’d read about online—turns out I’d skipped the crucial compression step by forgetting the ‘z.’ Yeah… live and learn!
The beauty of tar is in its simplicity when you get the hang of it; yet it’s powerful enough for most tasks you’d throw its way without breaking a sweat—or making you break yours!
This tool has helped me countless times on projects both personal and professional—archiving logs from servers or packing up photos before migrating systems—even if it’s not always perfect (because nothing really ever is), knowing how tar works can seriously feel liberating.
Anyway… If you’re getting started with it yourself don’t worry too much about being perfect from go—think friendly experimentation until suddenly things click into place—as if talking calmly with an old friend who held unknown secrets till now!