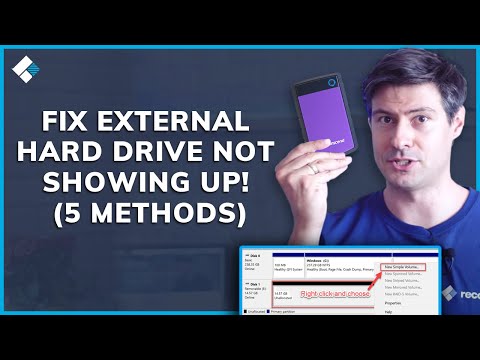
So there you are, all set and ready to transfer those precious photos or that important work stuff onto your trusty Iomega HDD. You connect it to your computer, and… nothing. Nada. Windows just looks at you like you’ve tried plugging in a toaster or something!
I mean, seriously! It’s enough to make anyone’s head spin. Remember that one time when your computer decided it just wouldn’t recognize your printer right before a big presentation? This is like that. Frustrating, right? But hey, don’t sweat it.
Let’s figure out what’s going on here and get that drive back in action. Because losing access to your data is definitely not on the agenda today, okay?
Seagate External Hard Drive Windows 10 Compatibility
Let’s chat about Seagate External Hard Drives and their compatibility with Windows 10. I feel your pain if you’re struggling with getting one of these drives to work. It can be maddening, right? But don’t worry, I’ve got some tips that might help sort things out.
- Check Your Connections: First things first, make sure everything is plugged in correctly. Sounds basic, but you’d be surprised how often cables are just a little loose.
- Drivers and Updates: Windows 10 usually plays nice with external drives, but sometimes it needs a little nudge. Check for Windows updates, because occasionally they include fixes for hardware compatibility issues. You can find updates by heading to Settings > Update & Security > Windows Update.
- Disk Management Check: Open up Disk Management by typing “disk management” into the start menu search. If your drive shows up here but not in File Explorer, it might just need a letter assigned or something simple like that.
- Power Management Settings: Sometimes your computer tries to save energy by turning off USB ports—kind of like falling asleep while driving! To stop this from happening (to the USB port, not you), head over to Device Manager > Universal Serial Bus controllers. Right-click on each USB Root Hub and select Properties > Power Management tab. Uncheck “Allow the computer to turn off this device to save power.”
- Troubleshooting Tools: Use built-in Windows troubleshooters as they are surprisingly handy at times! Go to Control Panel and search for “troubleshoot,” then select Hardware and Devices.
It’s kind of like when my friend was having trouble with her Iomega HDD—it wouldn’t show up no matter what she tried. Turns out she needed an update too! Sometimes tech just needs a reminder who’s boss.
And hey, if nothing works? You might have a faulty drive on your hands—a rare but real possibility.
Remember that electronics have their moods too—keep calm and try some different approaches until one clicks!
USB Connection Issues with Iomega HDD on Windows
Having trouble with your Iomega HDD not being recognized by Windows? That’s kinda frustrating, right? Let’s go through some things you can try to get your computer and external drive back on speaking terms!
Check Physical Connections
First thing’s first: make sure your USB connection is solid. Sometimes those cables don’t sit quite right.
- Unplug the USB cable from both the computer and the drive—then plug it back in. Listen for that satisfying click!
- If you have a spare USB cable, give it a shot. Occasionally, faulty cables cause issues.
Use Different USB Ports
Those ports can be finicky sometimes. Who knows why!
- Try plugging your Iomega HDD into a different USB port—preferably one directly on your motherboard (at the back of a desktop, for example).
- If you’re using a USB hub or dock, connect directly to the computer. Hubs complicate things sometimes.
Power Supply Check
If your Iomega has its own power supply or adapter, make sure it’s doing its job.
- Certain drives need extra juice that some computers can’t provide via USB alone.
- If an LED indicator isn’t turning on, it might be time to check connections or replace that cable too.
Update Drivers
Drivers are like translators between hardware and software—keep ’em updated! If not… communication breakdown alert!
- “Device Manager”: Search for this in Windows’ Start Menu.
- Navigate to “Disk Drives”, find your Iomega HDD if it’s listed there!
- Select “Update Driver”, choose automatic search—it should do all work for you (fingers crossed).
Troubleshoot with Disk Management
Your trusty friend when drives play hide-and-seek.
- Open Disk Management:. If scary unallocated space appears where bits ought not be missing: follow healing procedures called “Format” or “Assign Drive letters.”
Remember times when tech doesn’t behave like naughty kids hiding behind curtains during peek-a-boo games? You fix one corner hoping another won’t pop out elsewhere…
Iomega External Hard Drive Detection Issue on Windows 11
Oh, dealing with a hard drive that just won’t show up can be super frustrating, right? Especially when you’ve got important stuff stored on it. If you’re struggling with your Iomega external hard drive not being recognized by Windows 11, let’s try and work through this together.
First thing’s first: check the basics. You won’t believe how often it’s just a loose cable causing havoc.
- Connection Check: Make sure the USB cable is snugly connected to both your computer and the hard drive. Try unplugging and replugging it in.
- Port Test: Sometimes USB ports get all finicky. Try using a different port or even another device to rule out an issue with that specific port.
Still no luck? Moving on—let’s peek into Windows settings.
Dive into Disk Management. Sounds like something out of a spy movie, huh? Anyway, here’s how you do it:
- Press
Win + X, then select Disk Management. - If you spot your Iomega drive there without a letter assigned to it—I know it’s like finding treasure!—right-click on it and choose Change Drive Letter and Paths….
- Add a new letter if needed. It’s like giving your friend an address so they can visit! 😄
If it’s still playing hide-and-seek, check those drivers!
- Open Device Manager by pressing
Win + X, then picking Device Manager. - Your Iomega should hopefully appear under “Disk drives” or maybe even “Unknown devices.” Right-click on whatever seems suspicious or unfamiliar (but safe!) and select Update Driver.
Sometimes compatibility issues arise with older hardware. You could try installing any drivers provided by Iomega themselves—it might just solve the issue if Windows updates don’t do the trick.
Want one last-ditch attempt before surrendering? Borrow another computer—not forever! Just see if another system recognizes the device at all.
Those moments where things go smoothly are great—remember them? But when they don’t… well—we’ve made progress today either way!
If nothing worked yet though: maybe seek professional help (not for us; we’re fine; talking about tech support). Good luck!
Oh man, there’s nothing like that sinking feeling when you plug your Iomega HDD into your Windows computer and… crickets. Yeah, I’ve been there too. You just expect it to pop right up, but sometimes technology has a mind of its own.
First things first, take a deep breath. This issue can come with all sorts of causes and there are ways to tackle it. Sometimes it’s the simple things we miss—like checking the connections. No joke! Double-check that your cables aren’t loose or damaged. You’d be surprised how often that’s all there is to it.
If you’re still having trouble, let’s snoop around in Disk Management. Wanna know why? Because Windows might see the drive, even if it doesn’t show up where you’d expect in File Explorer. Just type “disk management” in the search bar and open it up. If you spot your drive there without a letter assigned to it, try giving it one by right-clicking on it and selecting “Change Drive Letter and Paths.”
Still nothing? Take a look at updating drivers through Device Manager—it might just do the trick! We’re always being told to update our software for everything else; this is no different.
And hey, if you’re like me and love multitasking while watching your favorite show (streaming troubles anyone?), make sure it’s not a problem with USB ports or power settings conflicting with each other—it happens more than we think!
Remember: don’t panic; most solutions are only a few steps away. Give these tips a whirl before throwing in the towel—or reaching for professional help—and save some time and headaches along the way!