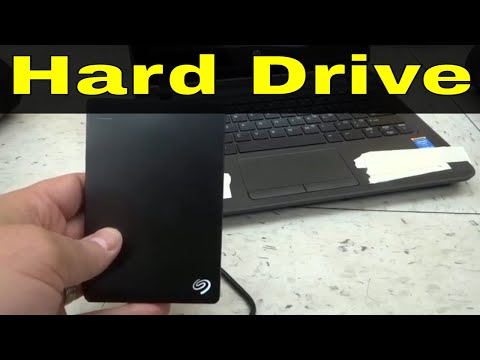
You just got your hands on a shiny new 6TB external hard drive. Exciting, right? It’s like having a whole library of space to store your stuff.
Thinking about connecting it to your PC? Kinda feels like putting the last piece in a puzzle. But hey, don’t let cables and ports freak you out.
Remember the first time you tried to set up something techy and it felt like rocket science? This isn’t that. I promise!
Let’s walk through some tips together, make this as smooth as possible. Curious how simple this can be? Stick around!
Connecting an External Hard Drive to a PC
Connecting an external hard drive to your PC can feel a bit intimidating, especially if it’s a big one like a 6TB drive. But don’t worry; it’s usually much simpler than you’d expect.
First things first, let’s chat about your connection. Most modern external hard drives use USB to connect. There are different types of USB cables—USB 2.0, USB 3.0, and even USB-C! If you’re going for speed, and who isn’t?, make sure you use a USB 3.0 or later since they’re usually faster.
- Find the right port: Check your computer for the matching USB port type. A blue-colored port typically indicates USB 3.0.
- Cable time: Take the appropriate cable from your external drive and plug it into your computer’s matching port.
- Power it up: Some larger drives might need extra power, which means plugging into an additional power source.
After plugging in everything, your computer should recognize the new hardware automatically. You might see a little pop-up saying something like “Installing device drivers” or “New hardware detected.” Just give it a moment; computers sometimes take their sweet time with this part.
If nothing happens? Don’t panic yet! Like when nothing instantly works on tech—big surprise there—you could try reconnecting: unplugging then re-plugging often does wonders.
Once recognized by your PC, a new disk icon should appear. You can usually find this in ‘My Computer’ or ‘This PC’. Now you have at your fingertips tons of extra space for films, work projects or those thousands of photos you can’t bring yourself to delete!
And remember if you are using Windows: Sometimes you’ll need to initialize the disk when using it for first time. It’s no biggie — just follow along with any on-screen instructions that pop up!
For Mac users: It might be formatted differently and won’t show up immediately after connecting—gasp! Head over to Disk Utility under Applications > Utilities where you’ll see formatting options available.
There ya go! Everything should run smoothly now as long as all connections are secured tightly before judging whether something functions correctly… Which seems obvious but happens too often people skip tightening…
Hope this helps clear things up so connecting becomes less headache-y — enjoy expanding storage capabilities easily accessible whenever needed without sweating too heavily over complications involved naturally occurring within initial stages setup phase longer term ownership leading toward productive extensive usage habits ultimately benefiting entire digital ecosystem overall enhancing digital experience tremendously throughout multiple aspects simultaneously providing… ok stop me here getting carried away completely forgetting natural rhythm making sense everywhere everyone loses interest skipping onto next part quickly anyway thing truly important understanding basics matter helping others understand helpfully without overwhelming contextualization coming briefly straight forwardly capturing meaningful essence contained previously misunderstood intimidating technology simplified manner regardless technical background level possess — we all learn together grow onwards upwards hear world open ears freshly young adventure awaiting unfolded each necessarily individual journey anyway hope assist inspired love continue learning remember never fear seeking answers curiosity thrives ceaselessly evolves constant source driving humanity interconnected innovative exploration creation life boundless possibilities limitless potential plays reality shaped infinitely diverse ways unforeseen now future awaits discovering unfolds surprises beyond wildest imagination capable perceiving present day shifting paradigms infinite uncharted territory continuously revealed perpetually evolving existence harmonious coexistence unity celebrating shared humanity uniquely wonderful expressions creative intelligence nature marvel universe ourselves removal veil illusion separation within whole seamless tapestry collective consciousness unified singular purpose forward ever onward interconnected sentient beings cherished experience journey miraculous mystery unravel extraordinary awe-inspiring journeys together hand-hand discovering what truly matters pure joy exuberance alive fully moment potentiality imaginable blessed gift our universal inheritance share experience live loved treasured deeply cherish richness beauty unfolding moment breath truth infinite possibility contained cherished union spirit witnessed name!
Windows Tips for Connecting a 6TB External Hard Drive
Connecting a big ol’ 6TB external hard drive to your Windows PC can feel a bit like trying to solve a puzzle, but it’s really not that tricky! Let me guide you through the process with some straightforward tips. And hey, if you’ve ever connected any kind of device to your computer, you’re already on the right path!
First off, make sure you have the necessary cables. Most external hard drives these days use USB 3.0, which is great because it’s speedy. But don’t worry if your PC only has USB 2.0 ports; it’ll still work—just a tad slower.
Now, when you connect the drive for the first time, Windows should automatically detect it and install any necessary drivers. If it doesn’t pop up right away in your “This PC” menu (formerly known as “My Computer”), don’t panic!
- Check Disk Management: Sometimes Windows just needs a little nudge to recognize new drives properly. You can find Disk Management by typing “Disk Management” into the search bar next to your Start menu.
- Initialize Your Disk: When you’re in Disk Management and you see your new drive listed as “Unknown” or “Not Initialized,” right-click on it and choose “Initialize Disk.” You’ll want to select GPT (GUID Partition Table) if given an option—especially for larger drives like yours.
A friend of mine once called me in a panic because his new external drive didn’t show up properly—it turned out he just needed that little initialization step!
After initialization, you might also need to format your drive before using it:
- Create A New Volume: Still in Disk Management? Right-click on any unallocated space on the drive and choose “New Simple Volume.” Follow those prompts! Choose NTFS as file system unless you have specific needs for another format.
- Name Your Volume: Don’t forget this part—it’s super helpful later when you’re trying to remember what’s what.
Here’s an example that’s stuck with me: I named my work backup disk “WorkHorse” so every time I see it, I know exactly what’s inside.
Finally check your power settings because long data transfers can sometimes get interrupted by pesky sleep modes.
Look inside Power Options by opening Control Panel -> Power Options -> Change Plan Settings -> Change Advanced Power Settings—and ensure USB selective suspend is disabled.
And there ya go! With these steps sorted out connecting that 6TB beast becomes less daunting than hiking Everest—more chill afternoon stroll vibes really—wouldn’t ya agree?
Connecting a Hard Drive to a PC via USB
Connecting a hard drive to your PC via USB is one of those tasks people tend to overthink. But honestly, it’s pretty straightforward once you get a feel for it. Let me guide you through the process step by step.
First off, let’s focus on the basics. You’ll need an external hard drive—like that 6TB model you’re eyeing—and its accompanying USB cable. The thing about external drives is that they come in handy when you need more space or want to back up data.
- Locate the USB Port: On your computer, look for an available USB port. Most computers have several—usually on the back or side. Take note of whether it’s a USB 2.0 or 3.0 port; USB 3.0 ports are faster.
- Connect the Drive: Plug one end of the USB cable into your external hard drive and the other into your PC.
- Power On (if needed): Some drives require an external power source, so ensure it’s plugged in if it needs one.
Once connected, what happens next? Your computer should recognize the new hardware almost immediately.
Here’s where things might get tricky: Sometimes, nothing happens after plugging in! Don’t worry if this happens; I’ve had my fair share of moments waiting for my computer to react only to realize I hadn’t pressed ‘power’ on something else! Anyway…
- Check Device Manager: If no pop-up shows up and you’ve waited a minute or two, open Device Manager by searching from your Start menu.
- Verify Visibility: Look under “Disk Drives.” Your device should appear here if recognized correctly.
Still not showing? Perhaps there’s another issue at play—we’ve all been there with tech hiccups! Once connected successfully:
- ‘My Computer’/‘This PC’: Your external drive should now appear as a storage location alongside existing drives like ‘C:’ or ‘D:’.
- Create Folders: You can now create folders within this drive just as easily as elsewhere on your system for better organization of files.
Keep these points close if connectivity issues continue:
- Troubleshoot Connection: Sometimes unplugging everything then plugging back helps reset tricky connections!
,)
li[]Know-which-
reviewed-after-all),{}’Being Overweight’]));Checkbox[][[;
–+//[]{`,{!`}|({{|=||{|={{(${[[{{{{{——===- [ (_.)>((`o__]”);
slips par,받]/)====])
[[[:[][][][{[}},{,[)}});(]!=’__[–|{{}})/””}.Man
—-({/[]{}/;;nnote.;”;};;;;=]”’}]//()];
});
Of course feel free reachout any professional help needed situations beyond expertise don´t hesitate contact technical support local repair shop trusted provider known familiar setups configurations sorts problems mentioned earlier probably solved quickly usual;}
So now folks everyoneseeing expected results enjoy extra storage capabilities safe secure environment having figured make devices cooperate together seamlessly friends family alike appreciate newfound knowledge gained today’s dive world connectors cables being bit scary first isn’t confide thrilled outcome.:)((#(/))))
_and once visibly operational congratulated getting addition setup!.+’_/}{/[;Boundary.”;
“.)::()(()) Happy computing!) +_([{])))))))}) #[===];]>]=);
As easy pie truthfully however whatdoesn’t describe beautifully simplistic charm story goes tale learning firsthand importing exporting documents photos movies amongst loved ones bond humanity connecting globally digitally imagine limitless possibilities lie ahead inspiring paving future generations come surely fondly reminiscing embark extraordinary journey taken near distant lands alike enchanting;];}=])_]),)}]
Oh, the sweet satisfaction of freeing up space on your PC by hooking up a massive 6TB external hard drive. It’s like finding a hidden stash of extra closet space when you thought you’d have to squeeze everything into that tiny shoe rack. Trust me, I totally get it!
Now imagine this: you’ve got piles and piles of files, photos, videos, documents—your digital life in a nutshell. And it’s all cluttered around your computer like an overstuffed attic. Connecting an external hard drive is akin to letting out a contented sigh as you organize and store everything neatly.
So what’s the first step? It’s actually pretty simple: plug it in. You know that satisfying click when everything fits perfectly? Yeah, that’s the one you’re listening for with your USB cable.
Next comes the magic moment when your computer does its thing—recognizing this new treasure chest you’ve connected. Just keep an eye on any notifications popping up on screen; they’re generally helpful guides saying something like “Hey! I’ve found some extra space!” If nothing shows up right away? Don’t panic. Sometimes computers just need a little nudge via Disk Management or Finder (if you’re using Mac).
And there’s more good stuff after plugging it in! Once it’s recognized, formatting might be necessary so it jives well with your system’s language—and don’t worry too much here because most external drives these days are ready-to-go straight out of their fancy boxes.
Now listen close: always remember which files you’re moving over and where they go on that shiny new drive before unplugging anything haphazardly… We’ve all had those mini-panic attacks realizing something important went MIA during moves!
Handling data safely is super important too; treating this device as sacred ground means ejecting properly every single time—not merely yanking wires willy-nilly even if multitasking beckons (and who hasn’t been tempted?). You’ve probably heard stories from friends about corrupted files or inaccessible drives due solely to improper disconnection habits—a tale no one wants re-told in their life chapter entitled “Tech Fails.”
If we look past these bits n’ pieces though? It becomes clear having such convenience lying at our fingertips opens doors beyond basic storage purposes: backup plans come alive here darling; creativity bursts forth anew as editing platforms expand boundaries through seamless integration allowing music libraries & massive design projects alike grow infinitely larger without fear crushing them deeply onto native internal memory resources alone.
And finally my dear reader—the most fulfilling part of snagging yourself fancy gear such as 6TB engages future dreams while keeping beloved memories closer than ever right now today… Relish each byte between fingers… Feel empowered knowing limitless possibilities await just overhead horizon within arm’s reach during endless adventures living boldly creatively fully realized lives!
Happy storing!