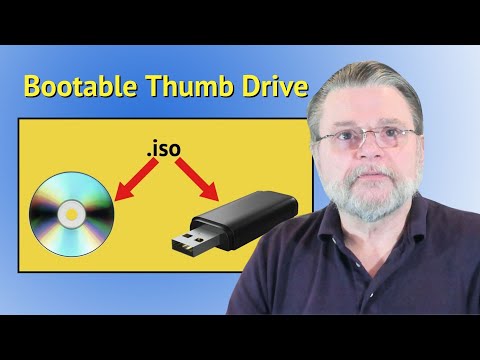
You know that feeling when you’re all set to create a bootable USB from an ISO file, and wham! Something just doesn’t click? Trust me, I’ve been there. It’s like planning a road trip and finding out you’ve lost your map. Super frustrating!
I had this one time where I’d spent hours downloading the darn ISO file. Thought I was ready to go, and poof! Some weird error cropped up. My computer seemed to have a mind of its own. Talk about a head-scratcher.
Look, many folks hit these roadblocks—so it’s not just you! Let’s dig into some common hiccups together, yeah? Who knows, we might even laugh at the end of it all.
Procedure for Creating a Bootable USB from an ISO
Creating a bootable USB from an ISO file can feel like trying to cook with a new recipe. You have all the ingredients, but it’s about getting them mixed just right. Here’s how you can do it without pulling your hair out.
First things first, you need an ISO file. It’s like a box containing the installation files of an operating system or software. When you download something like Ubuntu or Windows, it often comes in this format.
Next, grab yourself a trusty tool called Rufus. It’s freely available online. Consider this your kitchen utensil for cooking up that USB stick to be bootable. You’ll also need a USB drive that’s at least 8 GB—think of it as your platter.
Here’s what you’ll do:
- Plug in the USB Drive: Pop that USB into one of the ports on your computer.
- Open Rufus: Once it’s open, select your plugged-in USB from the device list at the top.
- Select ISO File: Click on ‘Select’ and browse to where you’ve stored the ISO file on your machine.
- Select Partition Scheme: Choose either MBR (for older BIOS systems) or GPT (for UEFI systems). If you’re unsure which one you need, check what type of firmware interface your computer uses.
- Create Bootable Disk: There’s usually an option for “Create a bootable disk using:” followed by several choices. Make sure it’s set to ISO Image.
- Start: Hit that Start button and let Rufus work its magic! It’ll clear everything on the USB before turning it into something special.
Remember: patience is key here. Sometimes processes might take longer than expected depending on how fast your setup is working.
Now onto some hiccups folks often face:
– **”Device is write-protected”:** This is like trying to open a jar that just won’t budge… Check if there’s a physical switch on the side of the drive locking it.
– **“Windows cannot create”:** Honestly? Just restart both Rufus and then try again; you’d be surprised how many problems go poof with this simple step!
So there you go – armed with these steps and solutions for common problems along way—the path toward creating bootable disk should seem less daunting now! Don’t worry if things don’t click immediately remember nobody masters new recipes overnight!
Compatibility Requirements for Bootable USB in Windows 11
Creating a bootable USB for Windows 11 is like preparing your emergency toolkit for any PC mishap, you know? But as simple as it may sound, there are certain compatibility requirements that you’ll need to get just right. Let’s go over the details together.
- USB Drive Size: The first thing is your USB drive’s capacity. A minimum of 8 GB is required for Windows 11 installation files. Bigger is better here because sometimes, mysterious little updates might sneak in while you’re creating the bootable disk.
- File System Format: You gotta pay attention to formatting your USB drive in the FAT32 file system if you’re going down the UEFI route; it’s a requirement for UEFI mode. But if you’re sticking with Legacy BIOS, then NTFS can be just fine.
- UEFI vs. Legacy BIOS: Some computers let you choose between UEFI or Legacy BIOS when they boot up. Be sure to check which one your system prefers since it directly affects how you’ll format and set up your USB stick—kind of like making sure the right key fits into the lock!
- Create ISO Image Properly: How you prepare that ISO image really matters! Tools such as Rufus or Microsoft’s Media Creation Tool really shine here because they help create a properly structured installer that works smoothly during setup.
- Check System Requirements: Before even attempting this find out if your machine meets Windows 11’s minimum system requirements: CPU, RAM, Secure Boot feature… The whole shebang. Otherwise it’ll be a bumpy ride!
Now picture this: You’ve got everything set up, and yet all of sudden nothing happens! Ooph… frustrating isn’t it? Well one hiccup can be not setting the BIOS mode correctly—it’s like trying to make two magnets repel rather than click together.
So whether you’re tackling an impromptu reinstall or helping a friend breathe new life into an older computer there are these crucial points that’ll make using Bootable USBs less daunting and more accessible!
ISO to USB Boot Problems
Dealing with ISO to USB boot issues can be quite the head-scratcher, right? It’s like you’ve done everything by the book, yet your computer just doesn’t want to cooperate. Let’s dive into what might be going on here.
First things first, ensure your USB drive is properly formatted. Often, it’s about setting it up correctly before throwing that ISO file at it. You might need to use a tool like Rufus or UNetbootin which are pretty handy for this task. The catch? Always format your USB drive with the FAT32 file system because some systems have trouble booting from NTFS.
Many times, the problem lies in the BIOS settings. Have you ever tried pressing F2 or Delete repeatedly when powering up your PC? That’s your doorway into the BIOS where you can check if ‘USB Boot’ is enabled. If not, turn it on and make sure it’s placed high in the boot priority list.
A classic mistake I’ve seen people do is use incorrect ISO files. Suppose you’re trying to install Linux but accidentally downloaded an older or corrupted version of its ISO file—oh boy! The simplest fix is re-downloading from an official source and checking its integrity using MD5 checksums if available.
Sometimes, though—and this one’s a bit tricky—it’s down to faulty hardware. Your USB port or even the drive itself could be throwing fits! Test by trying another port or using a totally different USB stick altogether. Honestly, you’d be surprised at how often hardware shenanigans are behind these nuisances!
There’s also this thing called UEFI Secure Boot, which can throw a wrench in certain installations too. It’s like a digital bouncer refusing entry due to security settings designed for newer operating systems. Venturing into BIOS again and disabling Secure Boot might just smooth things over for you.
Here’s something people miss: Selecting the wrong architecture type (32-bit vs 64-bit). Make sure it aligns with your computer’s processor; otherwise no dice!
And finally—small yet significant—you’ll want a solid connection during downloads if only because partial downloads lead nowhere fast.
So there ya have it! Patience pays off big time as long as you’re attentive during each step of making that bootable buddy out of your humble little USB device—that’s kind how we roll sometimes in tech-land!
You know, dealing with tech stuff feels a bit like being a detective sometimes. There’s this sense of satisfaction when you crack the case, right? I remember the first time I tried creating a bootable USB from an ISO file. I thought it was going to be a breeze—just copy the file over and boom, done. But oh boy, was I wrong! It’s more about technique than brute copying.
So here’s the thing: it’s supposed to be easy peasy with tools and tutorials everywhere. Yet surprisingly, there are common hiccups that seem to trip us all up. One time, I couldn’t get my computer to recognize the USB as bootable—it was maddening! Turned out it needed a little tweak in the BIOS settings. Who knew?
Then there’s choosing between MBR and GPT partition schemes. Sounds fancy but trust me; it’s simpler than it seems once you get into it. Funny enough, this can cause all sorts of issues if your machine has different preferences than you expected.
And let’s not forget about corrupted ISO files… Talk about hitting walls! Imagine downloading for ages only for it not to work because there’s something wrong with the file itself.
But you know what? Every little problem solved feels hugely rewarding—like finding pieces of a puzzle until things just click into place perfectly at last. So there we go—a handful of obstacles make success taste much sweeter in creating bootable USBs from ISOs!