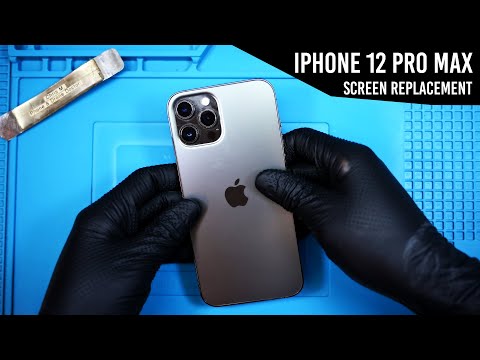
Alright, picture this: you’re holding your iPhone 12 Pro Max, and boom—it slips! Cracks spider-webbing across that beautiful screen. Oh man, isn’t that the worst feeling?
You’re not alone, really. So many of us have been there. It’s like one minute everything is fine and the next… well, you get it.
But hey! Don’t stress too much. Fixing it isn’t some insurmountable mountain to climb. It’s more like a little bump on the road.
With just a bit of guidance and patience—yes, some patience—you might just be able to tackle this screen issue yourself.
Ready to roll up those sleeves? Let’s check out what it takes to get that screen back in shape!
IPhone 12 Pro Max Screen Replacement Cost
Alright, here’s the lowdown on getting that shiny iPhone 12 Pro Max screen back to its former glory. We’ve all been there, right? You dropped your phone “just this once,” and now there’s a spiderweb of cracks. Ouch!
First things first: how much will it set you back to replace that screen? Well, it’s mostly about where you go for the fix.
Apple Store: If you head over to an official Apple Store, which some folks prefer for peace of mind, you’ll probably pay around $329. It’s not exactly cheap, but you get that snug feeling knowing it’s all official parts and skilled techs.
Authorized Service Providers: Now, these are places that Apple trusts with their products. Their prices can be quite similar to Apple’s own charges because they’re using genuine parts too.
Third-Party Repair Shops: Here’s where things can get interesting. These guys could charge less—sometimes significantly less than Apple itself—maybe somewhere in the range of $200-$300. But a word of caution: always ensure they’re reliable and experienced! Nobody wants more problems on top of a cracked screen!
- Warranty or AppleCare+: If you’ve got AppleCare+, it’ll save you big time. Replacing your screen with it might cost only about $29.
- DIY Kits: Feeling adventurous? Some brave souls choose to go down the DIY route. Kits out there can cost around $50-$100, but remember: it requires patience and steady hands.
So my friend had an unfortunate run-in at a concert when someone knocked his phone right outta his hand into some rock-hard concrete… Yeah, he was gutted! He decided on an Authorized Provider nearby—spent around $320—but walked out thinking price was worth not messing up more.
Anyway—before diving into any option, weigh what’s best for your situation. And remember safety is key when choosing third-party services or DIY methods!
iPhone 12 Pro Max Screen Replacement Procedure
Oops, replacing an iPhone screen? I remember a friend tried it. Imagine his surprise when he realized he’d forgotten where all the teeny screws went! Here’s how you can tackle it without losing your mind—or screws.
Before You Start: Gather Tools
- Precision screwdriver set
- Suction cup
- Prying tool or spudger
- Tweezers
- Replacement screen (double-check it’s compatible with your iPhone model!)
- Heat gun or hairdryer (optional but helpful)
The Procedure:
1. **Say Goodbye to Power:**
Shut down your iPhone completely. Just press and hold that power button until you see the option to power off.
2. **Remove Those Pesky Pentalobe Screws:**
Look down near the charging port—see those two small pentalobe screws? Unscrew them using the right screwdriver from your precision set.
3. **Lift and Separate:**
Use a suction cup on the screen, near the edge but not too close to freak out about missing pieces! Apply slight pressure upwards while gently using a prying tool to slide between the casing and glass.
4. **Magic Inside – Disconnecting Cables:**
Once you’re in, look for shield plates covering cables in one corner of your phone’s interior—kinda like peeking into a secret club! Use your screwdriver to remove these shields carefully.
5. **Removing The Display:**
Now’s when tweezers come handy: disconnect cables after unscrewing shields (they’re tiny but crucial). Hold firmly; don’t yank ’em out like a sticker!
6. **New Screen Time:**
Grab that shiny replacement screen you have ready, align it carefully with corresponding connectors where original cable used to be connected—think puzzle-solving here without forcing things together!
7. **Seal And Secure Everything Back In Place:**
Once attached properly, tighten all once-abandoned little screws snugly back into their homes inside so everything stays put post-operation!
8. **Final Testing Phase:**
Pop-on those initial bottom pentalobes screw back again once everything secured internally—time for moment-of-truth now checking if new display lights up fine like having successfully changed oil first time ever done yourself 😉
Tips? Be gentle at every step (especially against impatience!).
iPhone 12 Screen Replacement Cost
Oh, the bittersweet world of smartphones! One minute you’re taking a perfect sunset photo, and the next, bam! Your iPhone 12 screen takes a hit. I’ve been there, clutching my phone with dread. So let’s get into what you can do—understanding the cost sweetens the pill a tiny bit!
First thing you should know is that not all screen problems are created equal. Whether it’s just a small scratch or looks more like modern art with its spiderweb crack patterns makes quite the difference.
The cost of replacing an iPhone 12 screen can vary quite a bit. There are different options out there:
- Apple Store: If you’re going straight to Apple, and your warranty doesn’t cover it (bummer), expect to pay around $279 for an iPhone 12 screen replacement.
- Authorized service providers: These folks might offer similar services to Apple but sometimes at different prices — usually close though. It’s worth checking if their pricing fits better with your budget.
- Third-party services: Now these guys could save you some cash; prices here might range from $200 to slightly below what Apple charges depending on where you go—use trusted places!
Eager DIY enthusiasts often wonder: “Can I just fix this myself?” You certainly could give it a shot (with repair guides available online typically guiding each step carefully). But keep in mind that without experience replacing screens before: things might get tricky fast!
Here’s one thing people sometimes overlook — warranties or protection plans like AppleCare+. If by chance signed up when getting your phone initially – high five! With such coverage replacements fall drastically—in mere tens rather than hundreds dollars.
Consider these options carefully based upon situation preferences involved… Remember handling tech repairs proves daunting task unless super comfortable trying new challenges without breaking sweat literally shaking hands’ anticipation bringing triumph technology mastery within grasp… okay little dramatic!
And listen—whether diving headfirst into shopping for new one trusting professionals’ capable hands relieving electronic stress deep sigh—we’ve been where standing right now promise regained device joy waiting doorstep hidden few price tags away really worth whole lot peace mind bringing back safer.. happier pocket hug getting fixed up pronto exactly deserves owner loves cherishes dearly, rightfully counts heart sealed memories stored lifetime shared companionship glowing night song echoes warmth intersection lives echo..
Oh, the dreaded moment when your beloved iPhone 12 Pro Max takes a tumble and you hear that ominous crack. Seriously, it’s like time slows down for a second—everything freezes, and you’re just hoping against hope it’s the case that took the hit, not your screen. But hey, sometimes life got its own plans.
I remember when my friend’s phone met its unfortunate end on a concrete driveway. You know that disbelief when you pick up your phone and there’s this spiderweb stretch of cracks glaring back at you? Yeah, she was crushed! It’s not just about fixing the darn thing—it’s about all the stuff inside it. Your photos from last summer’s road trip or those chats with someone special.
The thing is, getting that screen repaired feels like walking through an emotional labyrinth. First off, there’s figuring out if you want to do it yourself or if it’s better to leave things in the hands of those genius bar folks. I mean sure, there’s tons of DIY guides out there with videos and step-by-steps. It’s tempting ’cause sometimes it saves some bucks.
But let me tell ya—it’s no small task! There are tiny screws everywhere (like seriously tiny). Unplugging all these connectors can seem daunting unless you’re pretty confident with tools in hand. Plus messing with components might void warranties which isn’t great news if something else goes awry later on.
A lot of people just prefer heading straight over to Apple or another repair shop ’cause peace of mind is worth something too right? They’ll probably replace not only glass but also ensure everything inside functions smoothly without risking permanent damage from DIY attempts gone wrong.
Anyway whatever route one chooses though – keeping backups updated matters more than anything else cause phones hold pieces memories can’t bring back once gone forever… So maybe tonight sync up all those precious pics & messages somewhere safe huh?