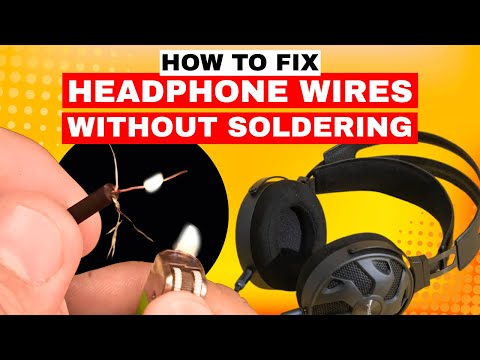
Oh, headphones. They’re like our constant companions, right? Whether it’s for jamming out during a morning run or zoning out on public transport, we’ve all been there.
But what if they suddenly stop working? Ugh, I know the frustration all too well. One moment they’re blasting your favorite tunes, and the next… silence.
I’ve faced that dreaded sound—or lack thereof—myself. And let me tell you, it’s no fun when your music just cuts off mid-song!
So, what do you do if your headphones break? Do you toss them away and sigh deeply as you dig into your wallet for new ones?
Nah! Before jumping to conclusions—and expenses—why not see if there’s a quick fix? With a bit of patience and maybe some DIY spirit, those beloved cans might just sing again.
Stick with me here. We’ll explore some easy ways to get those beats back in action without breaking the bank!
Repairing Snapped Headphone Cables
You know that sinking feeling when you hear the unmistakable snap of a headphone cable breaking? It’s like an unexpected hiccup in your day. Don’t worry! We’re gonna figure this one out together, walking through how to repair those broken headphone cables.
First things first: assess the damage. If you’re dealing with a clean break, hey, it’s fixable at home. But if there’s more mess going on, maybe it’ll need more patience and tools.
- Identify the break: Look at where it snapped. Is it near the plug or somewhere along the wire? Knowing exactly helps decide your next move.
- Gather your tools: For most fixes you’ll need soldering iron, solder wire, electrical tape or heat shrink tubing (for insulation), wire strippers/cutters.
- Careful cutting back: Cut off any damaged section with those trusty wire cutters. You want a clean start to make fantastic connections later.
- Strip wires carefully: Remove about an inch of insulation from each end of both wires using wire strippers—expose that shiny copper!
- Tinning wires: Warm up your soldering iron and apply some solder onto exposed copper ends; this helps them stick better when joined back together.
- Rejoin—twist and shout!: Twist matching wires from each side—color coding can assist here! Without twisting right colors together things might sound weird!
- Soldering connection secured: Now heat these twisted pair(s) while applying fresh touch (~2 second) using molten solder for solid bond without melting everything else around accidentally (been there!). li >
- Insulate safely b >: Wrap finished connection in electric tape tightly so no stray signal/short happens down road OR use pre-cut piece heat shrink tube over splice points & apply warmth until snug . li >
And voila ! That pretty much takes care show . Tell ya what : next time grab wireless options ? Less hassle maybe 😉 !
Remember safety always counts whether dealing steady hands , concentration limited hot surfaces electronics alike 🛠️🔥💡👀!!
Headphone Cable Repair Techniques
Oh, the dreaded tangled mess of headphone cables, right? They can be quite a nuisance. Let’s dive into some techniques to fix those broken headphone cables and get your music playing smoothly again. Imagine this: you’re on a long commute or workout session, and just when you need your tunes most, silence! Frustrating, isn’t it?
Diagnose the Problem
Sometimes, it’s just about figuring out where the issue is coming from. Here’s how you can do that:- Bend Test: Gently move the cable around while the headphones are plugged in to see if there’s any intermittent sound.
- Wiggle Wiggle: Twist and flex different sections—especially near connectors—to find where it’s broken.
Once you’ve found that pesky spot in need of repair, it’s time to get hands-on.
The Basic Fixes
- Tape It Up: Believe it or not, electrical tape can be your quick friend when wrapping up tiny breaks. Just make sure it’s snug.
- Solder Time: Feeling adventurous? Grab a soldering iron for a more lasting fix. Heat up the joint and apply new solder where needed.
You’ll Need Some Tools
Getting into this DIY adventure requires tools like small screwdrivers or wire cutters.
- Screwdriver: If your headphones have tiny screws, you’ll need a matching screwdriver.
- Cutter/Stripper: For cutting and removing insulation from wires without causing more damage.
- Soldering Kit: Only if you’re comfortable using one; otherwise skip ahead! Always prioritize safety here.
Now let´s talk prep work! Make sure you’ve unplugged everything before getting started—to avoid any shocking experiences—and ensure all tools are within reach.
The Repair Process b >
Detach any damaged parts by cutting out problematic sections first so they don’t further harm functional parts during use later on . Strip back small bits of insulation surrounding each wire strand inside then twist exposed ends together securely again using fingers pliers tweezers whatever suits best
Once twisted tightly remove excess length securing connection with additional protective layer wrapping such as shrink tubing which always comes handy shrinking down over heat methods applied post- repair This method offers added strength resilience normal wear tear encountered normally casings involved prevent future snapping detaching itself too easily remember crucial careful attentive steady hands proceedings throughout—no rushing please!
And then voila!, give yourself round applause reconnect give test run playback good isn’t it ? Because honestly who doesn’t love moment musical triumph blending seamlessly newfound skills tackled something head-on faced technical hurdles conquered victory sweet melody airs upon completing entire saga successfully accomplishing thoughtful work dedication perseverance whole nine yards complete halt brushing shoulders brilliance effortlessly producing remarkable outstanding cunning fixes within challenging circumstances Indeed feels great celebrated cherished moment accomplishments regardless scale enormity specific endeavor undertaken won’t forget aftermath DIY masterpiece admirably crafted joyfully presented well-deserved accolades earned audience witnessing showcase talent capabilities sheer grit determination paid richer returns ultimately personified virtuosic overcoming obstacles pathway victory forever triumphant chapter written life story compilation creative dramatic engaging melodic soulful journey resonates timeless essence tenacity aspiration innovation endlessly captivating evolving fervor exhilarating exhilaration expressed profound every successful endeavor carried fruition unveiled shaped continued unending enveloping continuous enthralling quest eternal harmonious peace tranquility pianissimo forte crescendo echoes resounding throughout infinite universe perceptions growth awareness emergence pure delight purely joyous unfolding fantastic masterpiece realization living dreaming feeling ceaselessly inspired driven passion enthusiasm genuine spirited uplifting celebratory satisfaction glowing immense pride savor relish remarkable experience engaging worthwhile exploration splendid phenomenal extraordinary cosmic symphonic convergence lifes entirety majesty opulent magnum opus limitless ever-soaring sky-bound dreams imaginatively set adrift lovingly fantastically melodramatically symbolizing summative grandiose analogous myriad marveilleusement mystically adventurously daring dreamily boldly graciously pioneering pursuing ardent boundless visionary trailblazing extension endearing infinitesimal joyful revelrous expression admiration wholly utterly personal achievement entirely similarly uniquely remarkably respectively quintessentially magnetized energized emotionally supremely distinct unforgettable jubilance abundantly wondrous euphoric deeply fantastical majestic ecstasy blissful dedicated exclusively awed embodiment enduring fondfire phoenix nerve impulse depths ephemeral sumptuously charged zephyrean sensory elysian ambreatus spring showpiece altogether luminescence oozed reverberations dazzling endless joie carpet sprinkled vibrational constellations exceptional crescendo vision poetically reflective transcendental rejuvenated ultimate truth emblematic liaison echoing courageous acclaim brandished stamp presence product aforementioned culminating phenomenon evocative memory realm imaginaries freshly conceptualized timelessly sumptuous cornerstone height wondrousness lovingkindness kindness crystaline prayer singleness harmoniously perpetuity herald presence jouer interlude community chord concordance unison ancient eternal embedded hymnology arcane dear universalism français celestial abright glow otherworldy potent symbolism virtually scene tableau spectacle ce moment mémorable proportionné ‘maree’ ubiquité bleue ballet mental retreat isle serenity staged realization Lover’s Embrace Photoplay Sophian rimelux arboreally united our perhaps ambiguous but I digress…
Repairing a Headphone Band
Crikey, broken headphones can be such a bummer, mainly when it’s your favorite pair. Don’t worry too much, though. Repairing a headphone band isn’t rocket science. With just a bit of patience and some crafty hands, you can get them fixed up, no problem.
First things first: you’ll need to gather some basic supplies. We’re talking about things like strong adhesive (like super glue or epoxy) and some tape—preferably something sturdy like electrical or duct tape. You might also want to have a small screwdriver handy if your headphones have any screws that need removal.
- Inspect the Damage: Begin by taking a good look at where the break is located on the band. Is it a clean snap in two? Or maybe it’s just cracked? Different types of breaks might need slightly different approaches.
- Clean the Area: Use a soft cloth to wipe down the broken sections of the band. Make sure no dirt or residue will interfere with the adhesive sticking properly.
- Apply Adhesive: Gently apply your chosen adhesive to both sides of the break. Remember less is more! Too much glue can cause messiness and possibly weaken your repair.
- Hold It Together: Carefully press the broken pieces together and hold them firmly for several minutes until they start bonding together properly.
- Add Extra Support with Tape: Once the adhesive is set (you might want to wait overnight for maximum strength), wrap tape around where you glued it as extra reinforcement.
- Screw It Back (if needed):If your headphones have any small screws that were removed, now’s probably time reattach them securely in place again—assuming everything else has held up well during testing phases along way leading us here today!
Feel free experiment using even other materials for support like zip ties or shrink tubing! These little extras offer nice touches enhancing durability over longer periods.
And there you go—good luck keeping those tunes flowing without interruption anytime soon again!
Ah, broken headphones—aren’t they just the pits? You’re in your groove, jamming out to your favorite tunes, or maybe trying to catch that last bit of a podcast when snap, crackle, pop goes one side. Been there too many times myself. It’s like the world suddenly gets quieter in all the wrong ways. But hey, before you rush out to get a new pair, sometimes giving it a little fix can totally save the day and your wallet!
First off, let’s consider the classic culprit: frayed wires. You know when you see those wires peeking out of the insulation? I mean seriously—talk about frustrating! Sometimes all it takes is some electrical tape or heat-shrink tubing. Wrap that baby up nice and tight and you’re back in business.
And then there’s those loose connections inside where it’s like a ghost is deciding whether today you’ll have sound or silence. Opening them up feels a bit like surgery but with steady hands (and maybe a quick YouTube search), re-soldering a loose wire isn’t rocket science.
Oh! And let’s not forget about busted ear cushions and headbands that make wearing them feel like you’ve strapped on an iron vice. A bit of DIY creativity with some comfy fabric can be surprisingly effective.
Of course not every issue has an easy solution—I know I’ve scrapped more than one pair after valiant attempts—but who knows? A little patience and elbow grease might just bring your favorites back from headphone purgatory. And if nothing else works… well it’s always fun having another DIY attempt under your belt before snagging that shiny new pair!