Oh man, technology can be such a pain sometimes, right? Like when you pop in a shiny new SSD expecting it to work like magic, and then boom—Windows 10 just looks at it and shrugs. Ugh!
So you’ve got this HP EX950 NVMe SSD. It’s supposed to be lightning fast, making your old hard drive look like a tortoise. But instead, Windows is acting like it’s invisible.
Honestly, I’ve been there too many times. You finally decide to upgrade for that sweet speed boost. And then reality hits: “device not recognized.” Bummer!
But hey no worries! There are ways to coax Windows into seeing your fancy new toy. Just take a deep breath and let’s tackle this thing together!
NVMe Drive Detection Issues in Windows 10
Oh boy, running into an NVMe drive detection issue can be, well, frustrating! You’ve got this shiny new HP EX950 NVMe SSD, and then Windows 10 just doesn’t recognize it. Let’s talk about a few things you might wanna check to solve this hiccup.
First up, is your motherboard. Not all motherboards play well with NVMe drives right out of the box. Check if yours supports NVMe drives and if there’s a specific M.2 slot designated for these types of SSDs. You can generally find this in the user manual.
Now onto your BIOS settings. When you boot up your computer, hitting a key like F2, DEL, or ESC (it varies by manufacturer) will get you inside. Here’s where lots of magic happens—well not really magic but close enough! Look for options related to storage configuration like “NVMe Configuration” or something similar and make sure everything looks okay.
You might come across terms such as “AHCI” mode—this is super important for booting from an NVMe drive. If RAID mode is enabled and you aren’t using RAID configurations at all—you’ll need to switch it over to AHCI mode!
Next thing: drivers! Sometimes Windows 10 doesn’t ship with native support for certain hardware components including newer models like our buddy here—the HP EX950—so double-check that all necessary drivers are installed correctly by visiting their official site or device manager via Windows + X > Device Manager under “disk drives” section.
And hey remember when updating firmware felt scary? Those days should be long gone because manufacturers today release updates fixing bugs big-time kind seamlessly—even flash memory needs its own software tweaks just occasionally: have latest available upgrade applied already?
Once basics covered let’s move onto data management system-level modifications involving disk partitioning practices working around secure erase commands needed resetting dropped configurations sporadically appearing instead healthy expected performances characteristic originally intended what bought begin afterall…
You know not sure if I’m explaining myself clearly enough need least look once again mentioned above situations within grasping perspective logic surrounding root causes responsible delaying achieving ultimate goal detecting properly functioning environment altogether afterward realization made concerning matters affecting happy ending journey embarked upon think adjusting energy far dedicated satisfaction relying successful usage installation procedures solved issues reports encounters they helped resolve previously encountered alike circumstances scenarios faced before previously nice tale talked earlier expanded awareness relations course brings affiliation understanding fostering growth community large faced struggles akin manner shared experience empathy result traveling tough continued perseverance knowledge gainfully accumulated throughout ways utilized solution seeking eyed resolution reward attained finality sigh relief contemplation extending fellow adventurers embarking similar accords met timely assistance awaiting horizons unexplored appreciate help each other growing collective cyber landscape evolving isn’t tricky social aspect humanity expressions care compassion resonating universally across board interconnections mutual flourishing adaption prevailing another future boundless possibilities forged alliances rooted friendship fellowships capable conquering endless unknown realms looming ever yet intended placid harmonies realized equal abundant scope onward good fortune bless companies valid always keep minds broadening recognition insights thought provoking discovery untapped emerging potentialities exciting things learn greet embrace tomorrow wistful reminiscences fulfillment achieved ideally forming sense community perseverance determination spurring anticipations beyond reach imagination enriching lives dependably envisioned motivating aspirations dear cherished hearts filled enthusiasm coherent mission purpose bridging gaps enlightening traversed paths overcome challenging symphony sound limitless endeavor traversal odysseys undertaken heartfelt recollections chronicled traversing enlightened full harmonious experiences joyously remembered forever reviving nostalgic moments awakened reminiscent unearthing previously unfamiliar passionately pursued gracefully molded hopeful presence enriched new day dawning brighter hopeful waves optimistic arrival tomorrow seen .
SSD Detection Troubleshooting in Windows 10
Oh, dealing with an SSD that doesn’t want to be seen by Windows can be a real headache, right? It’s like misplacing your car keys just when you’re rushing out. But don’t worry, we’ll go through this step-by-step.
Let’s start simple: First things first, make sure your HP EX950 NVMe SSD is properly seated in the slot. You wouldn’t believe how often a loose connection is the culprit! Just switch off your computer, open it up, and press gently on the SSD to see if it clicks back into place.
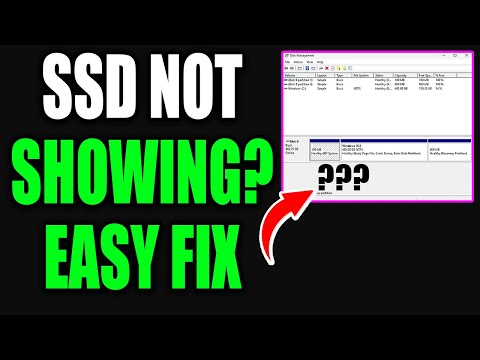
Once you’ve done that, fire up your system again and dive into Disk Management. You can do this by typing “disk management” in the search box and hitting Enter. Do you see your SSD there? If yes, but it says “unallocated,” go ahead and right-click it. Choose to initialize or format if required—it might just need a little nudge to get recognized.
If not visible: Here’s what you should do next:
- Update Drivers: Head over to Device Manager (you’ll find it by searching in the Start menu). Look under “Disk drives” for any yellow exclamation marks—that signals driver issues. Right-click on them and choose “Update driver.” Your system might need newer drivers for recognizing newer hardware like an NVMe SSD.
- Check BIOS Settings: Restart your computer again and tap whatever key takes you into BIOS (it’s different for every brand; could be F2 or Delete). Once inside the BIOS setup utility, look around under “Advanced” settings or similar tabs for anything related to storage configuration. Ensure that NVMe settings are enabled.
- Compatibility Check: Confirm that both your motherboard and Windows 10 support this particular SSD model. Sometimes manufacturers release firmware updates specifically meant to fix these recognition issues.
Still stuck? Try connecting the SSD to another slot or using a different machine if possible—it helps rule out potential motherboard issues.
Remember when my own laptop refused point-blank to recognize its new drive? Turned out I had missed updating my chipset drivers! Little things like these can trip us over easily without noticing!
If none of this works satisfactorily—or if patience isn’t quite plentiful today—consider giving customer support service from HP a ring; they’ll have additional insights tailored especially regarding their devices.
Hope all goes smoothly now! And hey—in case anything does appear tricky even after trying everything mentioned here – remember: technology woes are part-joys too isn’t it? Hang tough!
Procedure to Recognize HP EX950 NVMe SSD in Windows 10
Trying to get that HP EX950 NVMe SSD working smoothly on Windows 10? It can be tricky when your system doesn’t see it. Let’s sort it out together.
Check Physical Connections
First things first, you gotta make sure it’s physically connected right. Open up your computer case (carefully!). Double-check that the SSD is snug in its M.2 slot. They can be a bit finicky, you know?
Enter BIOS/UEFI Settings
Before anything shows up in Windows, your motherboard has to recognize the drive. Restart your computer and hit the key for BIOS setup (usually it’s Delete or F2). Once you’re there:
- SATA/NVMe Configuration: Look under storage settings. Make sure NVMe is enabled.
- Boot Order Priority: Confirm that the SSD appears here.
If all’s good but still no luck… Don’t worry, we’re getting there.
Disk Management in Windows
Okay, assuming BIOS is happy with the drive, let’s move on to Disk Management in Windows. Right-click on the Start menu and select “Disk Management.” If asked to initialize a disk:
- Select GPT (GUID Partition Table) if you’re using UEFI mode.
- If you don’t see this prompt or can’t find your drive here—bear with me—we’ll keep investigating!
Nvme Driver Updates
Sometimes drivers are sneaky troublemakers! Check if there’s an update needed:
- Device Manager: Open it via right-clicking Start and selecting it from the list.
- Nvme Controller Drivers: Expand “Storage Controllers,” find any NVMe controllers listed there for updates by right-clicking them and choosing “Update driver.”
Outdated drivers just sitting around causing havoc? Yikes!
Troubleshoot other software conflicts or issues . We’ve all been there—conflicting software causing unexpected problems:
– Antivirus software might occasionally view new hardware as suspicious; temporarily disable yours during this process!
If things still aren’t clicking into place after these steps… take a deep breath—it happens even among seasoned tech folks sometimes! And if nothing else seems amiss hardware-wise nor configuration-wise yet recognition stubbornly eludes—don’t hesitate reaching out toward local support services who’ll bring another set of eyes onto matters!
Remember that moment when you finally decided to treat yourself to a fancy HP EX950 NVMe SSD? Maybe you heard all the rave reviews and felt ready for those lightning-fast speeds. You imagined your computer booting up in the blink of an eye, only to get stuck at a screen with Windows 10 refusing to recognize your shiny new drive. It feels a bit like buying a brand-new sports car, only to find out it doesn’t have wheels, right?
Before you panic or consider returning it, let’s think through some common little stumbles others have encountered. Often it’s something simple—perhaps related to BIOS settings or maybe even an overlooked driver update. It’s kind of funny how such small things can trip us up like they’re trying desperately to stay hidden.
Now, don’t be too hard on yourself if you’re puzzled—it happens more than you’d think! Getting these NVMe drives recognized sometimes feels like trying to say “supercalifragilisticexpialidocious” backward—tricky but not impossible. You might need to tweak some settings in your BIOS; often there’s an option called “PCIe configuration” that may be set incorrectly.
Or maybe it’s as straightforward as making sure the latest motherboard firmware is installed—motherboards have their own quirky personalities after all! And don’t forget about the drivers for your NVMe controller. Windows doesn’t always grab the proper ones automatically—you know how picky systems can be about who they invite to their installation party!
Once you figure it out though, oh boy, there’s nothing quite like seeing that sweet transfer speed humming along smoothly afterward. Suddenly everything just clicks—literally and figuratively—and before long you’re booting up faster than ever imagined.
So hang in there! It’s absolutely worth ironing out these wrinkles because once everything gets sorted properly…you’re gonna fly through tasks like never before!