You know that anxious feeling when your shiny new NVMe drive just doesn’t show up? Yeah, it’s like being locked out of a party you’ve been waiting for. I’ve totally been there.
So you’re ready to experience blazing fast speeds and then… nothing. Nada, zilch. The drive is invisible! Can be super frustrating, right?
But hey, don’t fret too much. It could be something simple causing the issue. And sometimes even the tiniest oversight can make stuff go bonkers.
Let’s talk about possible culprits and finger-crossin’ solutions here—because who wants to miss out on those epic speeds, huh?
NVMe Drive Failure Causes
Hey there! Dealing with an NVMe drive failure can be quite a headache, right? Especially when it’s all connected through the ultra-fast PCIe 4.0 interface and suddenly decides to go invisible on you. Let’s dive into what might be causing these issues.
Common Causes of NVMe Drive Failure:
1. Connection Issues: It’s surprisingly easy to overlook, but sometimes the simplest things are the real culprits. A loose or improperly seated connection can lead to your drive not being detected at all.
2. Firmware Glitches: Just like software on your computer, NVMe drives have firmware – sort of like their own little operating system! If this gets buggy or outdated, it might stop your drive from working properly.
3. Driver Problems: The drivers are what help your operating system communicate with hardware. If they’re outdated or corrupted, you could run into trouble recognizing your NVMe drive.
4. Motherboard Compatibility: Although many boards support PCIe 4.0 now, older models may require BIOS updates to fully support newer drives—or may not support them at all!
5. Bios Settings Misconfigurations: Within your BIOS (the setup program for low-level system settings), incorrect settings can prevent detection and operation of the storage device.
6. Physical Damage or Wear Out: Just as humans age over time—harder usage wears out parts—NVMe drives can wear out after prolonged heavy use too!
Now some things you might want to try if facing one-of-these troubles:
- Tighten Those Connections!: Make sure everything’s snugly plugged in there.
- Bios Update Time: Check if trusty ol’ motherboard needs a bios refresh for better compatibility.
- (Re)install Latest Drivers: Keep ’em fresh so they won’t cause unnecessary problems.
Once upon a time—still vividly etched in my mind—I helped an old buddy solve his drama involving an undetected NVME due merely because dust settled around where connectors meet components inside dusty boxes left unchecked forevermore… So take care when handling delicate insides!
Checking BIOS Settings for SSD Detection
Alright, so let’s jump into the whole BIOS settings thing for your SSD detection. Sometimes these high-tech drives, like a PCIe 4.0 x4 NVMe, decide to play hide and seek. You ever had that happen? It can be a bit frustrating, right? When your system doesn’t recognize them, it’s like they’re there but they’re not there.
Okay, let’s figure this out step by step.
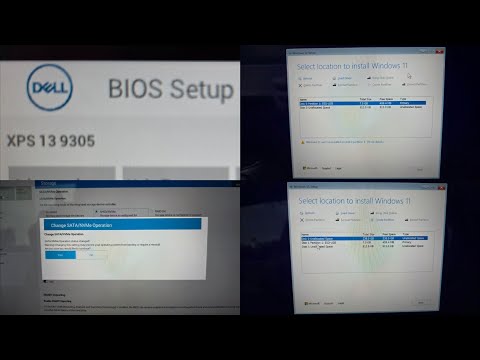
First things first, you need to access the BIOS. This might sound tricky if you haven’t done it before, but trust me, it’s not like launching a rocket or anything. As soon as you power on your computer, start tapping the Delete key or F2. Different boards might have different keys though—sometimes it’s F10 or even ESC.
Once you’re in the BIOS:
- Navigate to the Boot Menu: This is usually pretty easy to find. It’s labeled something catchy like “Boot Options” or “Advanced Settings.” Look around until you see something that mentions booting.
- Check Drive Listings: There should be a list showing all detected storage devices. Got an SSD? Yay! Not seeing yours? Bummer—but hang on!
- Dive into Advanced Settings: In some setups (especially with newer boards), you’ve got something called an M.2 slot for those speedy NVMe drives.
- A lot of times systems come with multiple slots. Check if maybe there’s a specific slot configuration needed—is it enabled?
Now if you’re still having no luck, here’s another trick: head over to what folks call the “SATA Configuration” section.
- SATA Mode Selection: This should ideally be set to either AHCI or RAID mode—depending on how many drives you’re running at once.
- If any slots aren’t detecting correctly here too then try switching modes back and forth between AHCI/RAID/UEFI) which sometimes can jog recognition awake.
Oh! Also check out any settings regarding secure boot—it has this fancy way of being too protective sometimes blocking what feels alien.
If nothing seems amiss yet no dice detecting…
– Try reseating cables & connections securely.
– Consider updating firmware directly from your motherboard manufacturer’s site!
And hey—stories from fellow techies tell me they’ve discovered sneaky culprits where outdated firmwares led their hardware astray.
Now go give it whirl—and may tech gremlins stay far away from your valuable data treasures!
M.2 SSD Detection Issue on Windows 11
M.2 SSD Detection Problem on Windows 11: What’s Going On?
Oh, the joy of setting up your shiny new PC—until your M.2 PCIe 4.0 x4 NVMe drive decides to play hide and seek! If you’ve ever found yourself in this frustrating spot, you’re definitely not alone.
Here’s the scoop:
Why Isn’t Your Drive Being Detected?
- Improper Installation: Sometimes we rush through things, right? Make sure that little beauty is snugly fitted into its slot and screwed in properly.
- BIOS Settings: Your system BIOS might not be set up to detect the new drive. You’ll wanna dive into those BIOS settings—somewhere in that magical place might be an option to enable NVMe drives.
- PCIe Lane Configuration: Motherboards have quirks. Check if the motherboard has dedicated lanes for M.2 slots and it’s using them correctly.
Anecdote Time:
I remember setting up my friend’s PC—it was like trying to fit a square peg in a round hole at first! Turns out, we just missed updating the BIOS.
What Can You Do About It?
Hey, let’s roll our sleeves:
- Check Physical Connections: Go ahead and reseat your SSD in its slot. A firm but gentle push is all it needs.
- Dive Into BIOS: Restart your computer and enter setup mode (usually by pressing Delete or F2 during boot). In there, ensure NVMe support is enabled—sometimes it’s sneaky!
- Your Drivers Need Attention Too!: Download the latest chipset drivers from your motherboard’s website; could be all it takes.
Now look, if none of these steps work (deep breath), your hardware might have an issue somewhere else. Could be worth checking connections or even testing with another SSD drive.
Think of troubleshooting as one big jigsaw puzzle where patience pays off! You’re more than ready now to tackle this head-on—or you’ll know when to call for backup.
Here’s hoping this has been helpful because let’s face it—technology can sometimes forget who’s really in charge!
You know, there’s nothing quite like the frustration of your computer deciding to play hide-and-seek with your precious NVMe drive. I mean, one moment you’re all set with your shiny PCIe 4.0 x4 NVMe drive installed, and then *poof*, it’s like it vanished into thin air. Ever been there? I bet a lot of us have.
Let’s take a quick stroll down memory lane—remember that time when you were ready to install a big game or transfer some hefty files, and boom, the drive’s nowhere to be seen. It’s enough to make you want to pull your hair out! But hey, before you start considering any drastic measures, let’s chat about what’s really going on.
First up: Have you given any thought to BIOS settings? They can be rather picky sometimes—needing an update or just a little tweak here and there so they can recognize new hardware. It’s kind of like getting them onboard with the latest trends in tech.
Then there’s that pesky physical connection issue. I’ve lost count of how many times I’ve heard people say they reinserted their drives and voilà!—everything worked perfectly again. You’d think these connections would just stay put once they’re in place but nope…sometimes they need some physical encouragement!
Another culprit might be driver problems since outdated drivers can give drives the cold shoulder treatment by not recognizing them at all. It reminds me of one of those times when my phone didn’t want anything to do with my Bluetooth earbuds until everything was updated properly.
Of course (and nobody wants this), it could also come down to damaged hardware as either faulty drives or even motherboard slots can spoil the fun by being defective right from production or getting messed up over time due maybe static electricity shockwaves etcetera etcetera blah blah boring stuff…
A debugging tale wouldn’t feel complete without touching upon power management shenanigans hiding within Windows settings either; such playful antics might result in devices snoozing way too deeply preventing detection entirely—talking correcting glitches mode here if ya’ww get muh drift?
So next time—or maybe this’ll solve things now!—when facing an elusive PCIE 4x0xNVMe ghost case try poking around among these quirks first before reaching out far-off lands assistance providers who price advice no small favor indeed!!