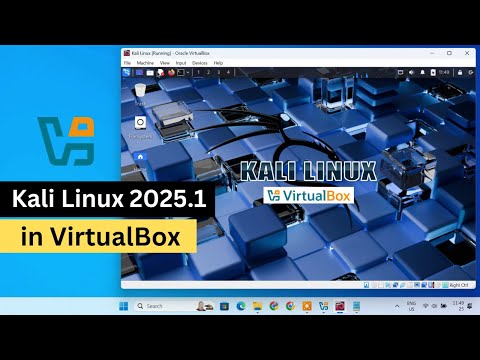
Okay, listen up. Have you ever wanted to play around with Kali Linux? It’s like the ultimate playground for tech enthusiasts. You can experiment without fear of messing things up too badly. Perfect, right?
Oh, and don’t fret about hardware changes because we’re doing this on VirtualBox. That means no risk of turning your computer into a paperweight. You know, better safe than sorry.
I remember the first time I tried it myself—I was all nervous and excited at the same time! Felt like a kid in a candy store with endless possibilities at my fingertips.
So if you’re curious about entering that world too, here’s how we get Kali Linux dancing on your VirtualBox stage without breaking a sweat. Grab your snacks; it’s gonna be fun!
Kali Linux Installation on VirtualBox for Windows 11
Getting Kali Linux running on VirtualBox within Windows 11 can feel like a pretty cool project if you’re into exploring new operating systems. It’s neat because you don’t have to mess with your current setup. Let me walk you through it in an easy-going way.
Prerequisites
Before diving in, there’s some stuff you’ll need:
- VirtualBox: Head over to the official VirtualBox website and grab the latest version. Install it like any other Windows software.
- Kali Linux ISO: You can download this from the Kali Linux website. Pick the right version for your needs; most people use the installer image.
Setting Up A New Virtual Machine
- Open VirtualBox. Click on “New” to create a new virtual machine (VM).
– Enter something memorable for name, like “Kali Linux”. Select “Linux” as your type and “Debian (64-bit)” for version.
Something funny—once, I named mine just “KL” because I’d had way too much coffee and wasn’t thinking straight!
Allocating Resources
- Memory Size: Decide how much RAM you want to give this VM. Kali recommends at least 2GB (2048MB).
- Create a virtual hard disk: Choose “Create a virtual hard disk now”, then hit “Create”…
- Select VDI format, which is almost always fine of course!
- – Dynamically allocated is a safe bet to start small and grow as needed.
– Set the initial size…something around at least, say, maybe 20GB should be good enough.
Selecting The ISO And Starting Installation
- Select Your VM:The one you named earlier—that clever name or random string? Yeah that one!Add The ISO:You’ll find an option under “Storage” settings called “Controller: IDE”. Find where it says Empty…click the disc icon next to Attributes.
VirtualBox Download Compatibility Requirements
Oh, VirtualBox! It’s like this magic portal that lets you run different operating systems on your computer without turning it into a chaotic mess. When you want to get Kali Linux going on VirtualBox, it’s key to check your download compatibility requirements first. Otherwise, it’s like trying to fit a big puzzle piece in the wrong spot—frustrating!
Here’s the lowdown:
Operating System Compatibility
- VirtualBox runs great on Windows, macOS, and Linux. You’ll want to ensure that your host OS is up-to-date for a smooth experience.
- If you’re using Windows, anything from Windows 7 SP1 and up works.
- For macOS users, you’re good if you’ve got OS X Mavericks or later.
Hardware Requirements
- Your CPU should support virtualization technology. For Intel folks, that means Intel VT-x; for AMD users, it’s AMD-V.
- You’ll need at least 4GB of RAM, though more is merrier—especially since Kali needs room too!
- A minimum of 10GB of free storage space. Kali itself isn’t enormous but needs breathing room for tools and experiments.
Kali Linux Version:
Different versions might have slightly different needs. Generally speaking:- Your VirtualBox version should be recent enough to support the latest Kali release. Staying updated helps avoid those hair-pulling bugs and glitches!
- Look out for any specific notes from Kali’s official site about VirtualBox compatibility—it’s like keeping track of a moving target sometimes.
Now imagine downloading it all excitedly then—bam! Disk space error pops up because there wasn’t enough wiggle room left on your SSD or hard drive. Once I forgot about this with an old laptop; let me tell you: no picnic digging through files hunting for stuff I could toss out.
Just remember: before diving headfirst into installing everything onto VirtualBox (like multiple VMs), keep resources available based upon how much each machine will consume when running together – nobody likes slowdowns mid-task!
Easy peasy once these checkboxes are ticked off right? What matters most is setting yourself up ready from scratch—kind saves hours adjusting things afterwards! Safe computing!
VirtualBox Compatibility Requirements for Kali Linux Installation
Alright, let’s chat a bit about VirtualBox Compatibility Requirements for installing Kali Linux. Sit tight, this can get a bit technical but I’ll break it down! I remember the first time I tried setting up Kali Linux on VirtualBox—it felt like trying to fit a square peg in a round hole. But hey, once you know the requirements, it’s smooth sailing.
Kali Linux is one of those systems that loves playing with VirtualBox, but there are some things you need to tick off your checklist first.
- Virtualization Support: Before anything else, make sure your computer supports virtualization. You know that little option in BIOS/UEFI (often labeled as Intel VT-x or AMD-V)? Turn it on. Without this magic option enabled, your virtual machine might not even start.
- Memory Allocation: Your system should have at least 4GB of RAM. But hey, more is always better! Allocating around 2GB for Kali ensures it runs smoothly without stepping on any toes during multitasking.
- Hard Drive Space: You’ll need at least 20GB of disk space for Kali itself. It sounds like a lot but trust me—once you start downloading tools and updates, you’ll be glad for the extra gigabytes.
- VirtualBox Version: Always have the latest version of VirtualBox installed. Keeping it updated means fewer headaches and compatibility issues along the way.
- Kali Linux ISO/Image File: Downloading from Kali’s official website ensures you’re getting an authentic version ready to go without any unwanted surprises inside!
You ever go overboard with something just because you wanted everything perfect? That was me when once I grabbed an SSD just to run VMs faster! Not necessary though—to each their own pace!
If you’ve got these requirements checked off then congratulations! You’re pretty much on your way into creating that virtual machine paradise running those penetration tests or whatever cool stuff you plan on doing with Kali Linux!
This basic rundown should set things up nicely when diving into further steps—remember patience (and maybe coffee!) goes hand-in-hand in tech adventures like this!
Ah, Kali Linux on VirtualBox. It’s kind of like the Swiss Army knife for cybersecurity enthusiasts, isn’t it? I remember the first time I downloaded it onto VirtualBox; it felt like opening a portal to a whole new world of possibilities. If you’ve ever gotten your hands on it, you probably know what I mean.
Now, setting up Kali Linux in VirtualBox isn’t really rocket science, but it’s got its quirks. Imagine you’re unboxing something shiny and new—there’s excitement but also that nagging worry you’ll miss an important step. To begin with, you’ve got to have VirtualBox installed on your machine (duh!). And then there’s the actual downloading of the Kali Linux image file—it feels like waiting for your favorite movie to download on a slow internet connection back in the day!
Once you have those ready to roll, there’s this excitement mixed with concentration as you open up VirtualBox and start creating a new virtual machine. Selecting “Linux” as the type and “Debian” as the version—it all seems straightforward until you hit those RAM settings! You want everything to run smoothly, right? Make sure your computer doesn’t start gasping for air because too much memory’s been allocated.
Then comes loading the ISO file (that’s geek speak for a disk image) into VirtualBox—you point it at that shiny Kali Linux ISO you downloaded earlier. It’s kind of like showing someone a map when they’re lost!
When everything’s said and done after hitting “Start” and watching Kali boot up within its little virtual bubble—the sense of accomplishment is real! It’s more than just following instructions; it’s about entering another dimension where learning and experimenting can happen without any real-world consequences.
I still get that feeling every time I set up a virtual environment—the pure potential ready at my fingertips! So if you’re thinking about diving into this process or are already knee-deep in RAM allocations… remember there’s light at end of tunnel (and possibly caffeine too!).