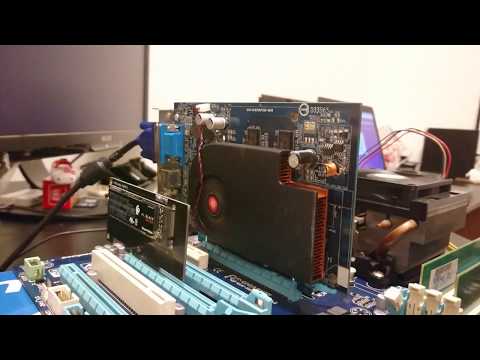
Oh man, there’s nothing more frustrating than a new gadget acting shy, right? You get all excited setting up your sleek WD Blue M.2 SSD, dreaming of lightning-fast speed, only to face…disappointment. It’s a bit like expecting fireworks but getting a dud. I’ve been there!
You boot up your system, ready to conquer the world (or at least your files), and boom—your BIOS just gives you a blank stare. It’s like your SSD decided to go into stealth mode for no reason at all.
Don’t throw in the towel just yet! You’re not alone in this little tech hiccup dance. There could be a few reasons why it’s playing hide and seek with you. Let’s dig into it and make that M.2 show itself proudly on stage!
BIOS Not Detecting NVMe Device
Oh boy, there’s a moment when you’re ready to set up your computer, everything seems perfect, but then the BIOS just won’t detect that shiny new NVMe drive! Let’s chat about potential reasons why this happens and how you might sort things out.
Understanding BIOS and NVMe
First off, what even is the BIOS? It’s like the behind-the-scenes orchestrator. It makes sure all hardware pieces say “hello” to each other during startup. The NVMe (Non-Volatile Memory Express) is a modern storage protocol for lightning-fast data transfers. Sometimes they just don’t get along at first.
Is the NVMe properly connected?
Sounds silly, right? But double-checking never hurts. Make sure your NVMe drive sits snugly in its M.2 slot on the motherboard. It should be angled slightly downward before being secured.
BIOS Update Needed
Many times, motherboards are born before NVMes! Check if you need a BIOS update from your motherboard manufacturer’s site to ensure compatibility with newer drives.
- Access Latest BIOS: Head over to your motherboard’s official website.
- Download Update: Follow their instructions carefully and download any fresh updates.
- Install Carefully: Be cautious here! A wrong step could lead to more issues.
Tweak Settings in BIOS
When booted into the BIOS setup (often by pressing F2 or Del during startup), take a peek around:
- SATA Mode Configuration: Ensure it’s set to AHCI rather than RAID unless otherwise required.
- M.2 Slot Configuration: Make sure its settings align with your drive type—PCIe for example.
An Unrelated Tale!: I once helped a friend whose issue was literally about enabling one’s slot from within the BIOS—she hadn’t even realized slots could be disabled!
Your Motherboard’s Manual as Your Best Friend!: Don’t forget it exists! Specifics about slot configurations or unique requirements are often tucked inside there.
Well, that’s quite an adventure through some common reasons behind these pesky non-detections at boot time—hoping one of the above shines light on your situation!
Enabling M.2 in BIOS Settings
Imagine you just got a shiny new WD Blue M.2 SSD, and you’re excited to get it rolling. But uh-oh, it isn’t showing up in your BIOS settings! Don’t fret—I’ve got your back on this.
First things first: it’s essential to understand why the BIOS might not recognize your M.2 drive.
- Compatibility Check: Make sure your motherboard supports the M.2 type you’re trying to install. There are different types like SATA and NVMe.
- Physical Installation: Ensure it’s correctly seated in the slot—it should fit snugly, with no wiggle room.
Now, let’s get into enabling your M.2 within the BIOS settings:
- Step into BIOS: When starting up your computer, press the designated key to enter BIOS (usually Delete or F2—it varies by manufacturer).
- NVM Express Configuration: Once inside, navigate through the BIOS menu using arrow keys. Look for an option labeled something like “NVM Express Configuration” or “Storage Configuration.”
- Select PCIe Mode: Sometimes you need to set the slot to use PCIe rather than another mode like SATA. This can often be found under “Advanced” settings.
- Avoid Conflicts: If other drives or peripherals are connected that could conflict with device resources, try disconnecting them briefly and check if this allows recognition.
Sometimes even after all this tinkering around in there, things might not go as planned:
Troubleshooting Tips:
Check if there’s a newer version of firmware for both your motherboard and SSD. Manufacturers sometimes release updates that resolve compatibility issues.
So yeah, patience and persistence go a long way in tech matters! Happy computing!
NVMe Detection Issues in BIOS
You know, dealing with NVMe detection issues can be a bit of a headache sometimes, especially when your BIOS seems to ignore your shiny new WD Blue M.2 drive. But don’t worry—you’re not alone in this. I’ve been down that road too.
Understanding BIOS and NVMe:
So, let’s start by understanding what might go wrong. The BIOS is like the brain’s operating system for your computer hardware. When it’s not recognizing an NVMe drive, it gets frustrating—believe me! This can happen due to compatibility problems or settings that aren’t quite right.
Possible Causes and Solutions:
A few things might cause detection issues, and here are some steps you can take:
- Check Connections: Ensure the M.2 SSD is properly plugged into the slot on your motherboard. Sometimes, a simple disconnect and reconnect solves everything.
- BIOS Settings: Dive into your BIOS settings—you know how mysterious they can look—and make sure they’re set to recognize NVMe drives. Look for options related to storage configuration; AHCI mode is often necessary for some drives.
- Mismatched Technology: If you’re using an older motherboard, it might not support newer NVMe standards or sizes. In such cases, updating the BIOS could add the necessary support.
Updating Your BIOS:
Now here’s another thing: updating the BIOS can sound scary but it’s often crucial for compatibility fixes! Just head over to your motherboard manufacturer’s website and grab the latest version designed specifically for your model.
Anecdote Time!
I remember once upgrading my own setup—popped an NVMe in there only to get panic-mode when it didn’t show up at first boot-up! It turns out my board needed that firmware update I had ignored earlier (oops). Once updated though? Smooth as butter!
As we wrap this up together just keep tinkering patiently with those configurations & updates till success shows its face again – sometimes trial-and-error lands us right where we need.
Oh, the frustration when your computer decides it wants to play hide and seek with your WD Blue M.2 SSD! It’s like you’re all set up for a cozy movie night, popcorn ready, but then you can’t find the remote. Been there? I have!
So you’ve got a shiny new SSD, but it’s not showing up in BIOS. First things first, let’s take a deep breath.
Many times, it’s something simple—like seating issues or BIOS settings—but it feels as if technology has its own secret language sometimes. You get me? I remember trying to set up my friend’s system once – everything seemed perfect until… nothing showed up where it was supposed to. Classic move by the universe!
Let’s start with some basics: make sure that SSD is properly seated in the M.2 slot on your motherboard—sometimes those little guys can be finicky. It needs that sweet spot connection to be detected.
If it’s snug as a bug in its slot but still AWOL from the BIOS list, it might be time for some detective work in the BIOS settings themselves. Check out the storage configuration menu and confirm that any settings related to M.2 or NVMe drives are enabled.
Another curious thing could be an outdated motherboard BIOS version that doesn’t support newer tech yet—it happens more often than you’d think! Updating your bios might seem petrifying at first glance (kinda like contemplating cutting your own hair), but sometimes it’s necessary to stay on top of tech changes.
In some rare cases—and fingers crossed this isn’t yours—the drive could have issues itself. But before assuming the worst scenario, try testing with another system if that’s an option or swapping slots if there’s more than one available.
It’s all about patience and steady troubleshooting—a little bit of trial and error never hurt anyone along this path… Even when every step seems drawn-out and challenging remember: those simple victories feel oh-so-sweet once conquered!