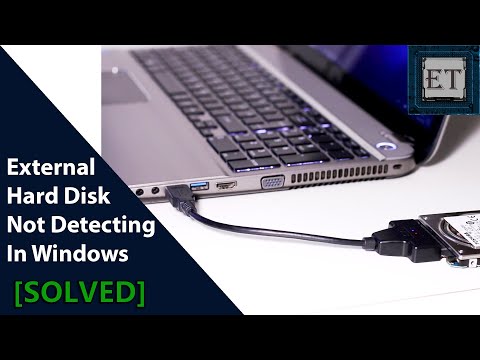
Oh no! Your computer just gave you the dreaded “hard drive not detected” message, huh? It’s like your morning coffee spilled all over your desk. Total frustration. But hey, don’t panic just yet.
Here’s a little secret: sometimes it’s not as bad as it seems. You see, many times that pesky error message pops up because of a loose SATA cable connection.
I had this happen once when I was in the middle of something really important—like my online game leaderboard was on the line! Turns out, a quick check and wiggle of the cables saved my day.
Now you’re probably wondering what a SATA cable is. Imagine it’s like the electronic lifeline between your hard drive and motherboard. Without it snugly connected, nothing talks to each other properly.
So let’s roll up those sleeves (metaphorically) and take a peek inside that computer case of yours… ya ready?
Check SATA Cable Connection on Windows 10
Oh, let’s dig into this. You know how sometimes your computer just doesn’t seem to recognize the hard drive? It’s like you know it’s there, but Windows 10 is acting all clueless. One of the common culprits could be a loose or faulty SATA cable connection to your hard drive. It happens more than you’d think!
So let me walk you through checking that little pesky cable. It’s a bit like playing detective but with wires!
Step 1: Shut Down Your Computer
Before anything else, power off your computer and unplug it from the outlet. Safety first, right? We don’t want any surprises with electricity.
Step 2: Open Your Computer Case
Now, this might sound intimidating at first if you’re not used to it. Look for screws at the back of your case—usually only a couple—and remove them carefully. Slide or pop off the side panel to access the internals.
Step 3: Locate the SATA Cables
Inside there, you’ll see a bunch of wires and stuff—don’t worry! The SATA cables are usually pretty distinct: flat and often red or blue.
- The Connection on the Motherboard: Find where one end of the cable is plugged into the motherboard. Give it a gentle push to make sure it’s secure.
- The Connection on the Hard Drive: Trace that same cable to where it connects to your hard drive and perform another gentle press.
Step 4: Inspect for Damage
Check both ends for any visible signs of wear or damage—like frayed edges or cracks in connectors—for instance, if it looks dodgy, replacing might be smart.
Step 5: Reassemble and Test
Once everything’s checked out nicely put panels back together securely and power up again crossing those fingers!
If after all these checks nothing changes maybe try using another SATA port on your motherboard just switching things around sometimes works wonders too!
Anyway don’t get discouraged by these tech hiccups—they’re part-and-parcel dealing with computers really! If issues persist even after swapping cables could mean hardware problem requiring professional help—but hey one step at time right?
Hope this helped shed some light!
Checking SATA Cable Connection for Hard Drive Detection
You know that panic when your computer just won’t recognize the hard drive? It’s like, hello, where did all my data go? But before you start imagining the worst-case scenarios, let’s dig a little into one of the usual suspects—SATA cables.
What’s a SATA cable?
Well, simply put, these are the skinny wires connecting your motherboard to your hard drive. They’re crucial for transferring data back and forth. If they’re not working right, neither is your access to those important files.
Now picture this: you’re trying to boot up your PC and boom! It says it can’t find the hard drive. Frustrating right? Good news is, checking those SATA cable connections can often fix things up. Here’s how you can peek into it:
- Turn Off Everything: Before anything else—power down your computer and unplug it from any outlets! Safety first.
- Open Up Your Computer Case: Grab a screwdriver to remove screws if needed. Just be gentle as you do so.
- Find The Cables: Once inside look for those flat red or black cables running between your motherboard (that big circuit board) and hard drive.
- Tighten Them Up: Give each connector an ever-so-slight jiggle at both ends—on both hard drive & motherboard side—and make sure they’re snugly fit in there.
- Look For Damage Or Wear And Tear:Add some light inspection time here too; see if there’re kinks or physical marks on any cables which might need replacing capiche?
Getting everything secured usually slaps sense back into missing drives… Who knew something seemingly simple could save hours of hair-pulling frustration?! By tending well-needed attention towards these connectors promptly —you’ll find yourself giggling again over successfully battling technical mysteries instead of drowning under them… phew!
BIOS Not Recognizing SATA Hard Drive
Oh no, I’ve been there! The frustration when your computer’s BIOS just decides to ignore your shiny new SATA hard drive can be a real headache. But fear not, sometimes it’s something quite basic like the connection. So, let’s make sure you’ve got everything covered.
Start with the Basics
Sometimes, it’s really as simple as a loose cable or maybe even a little bit of dust causing all the fuss. What you can do is pop open your computer case—carefully!—and check out those SATA connections.
- Check that Connection: You want to make sure the SATA cable is plugged in securely at both ends: one on your hard drive and the other on your motherboard.
- Swap Cables: If you’ve got an extra SATA cable lying around (maybe from an old setup?), try switching them. Sometimes cables go bad without any visible sign!
- Ports Matter: Plugging into a different SATA port on your motherboard could also solve this puzzle. Maybe there’s something funky going on with that original port?
The BIOS Settings Adventure
Now if things are looking good connection-wise but you’re still hitting walls, it’s time for some detective work in the BIOS.
- SATA Mode: Dive into those settings (usually by pressing keys like F2, Delete right after starting up). Under ‘SATA Configuration’ section look if it’s set to something odd like RAID instead of AHCI or IDE.
- Enable Sata Port: On some motherboards, individual ports might be disabled in BIOS for reasons unknown—make sure they’re enabled.
Anecdotal Wisdom
I once had my friend who was all convinced his hard drive was toast because nothing worked until he realized his cat had decided that behind his PC case made an excellent hideout… knocking cables just slightly loose repeatedly!
Finally remember making backups regularly saves hassles long-term through unexpected surprises – connected cables or otherwise! Got any spare anecdotes yourself? Those tales often come handy when troubleshooting pains strike again someday soon perhaps…
You know, there’s nothing quite as heart-stopping as seeing your computer refuse to acknowledge your hard drive. I mean, everything’s stored there, right? The first time it happened to me, I almost panicked. My first thought was that I’d lost all my family photos and important documents forever.
But then, a friend of mine—who’s a wizard with computers—calmed me down. He asked if I’d checked the SATA cable connection. At the time, I had no idea what he meant by that. What’s a SATA cable anyway? Turns out it’s this little connector piece that links your hard drive to the motherboard inside your computer.
It’s weird to think that something so small could cause such a big problem! Over time or after moving your computer around a bit, these cables can get loose. Just like how when you plug in your phone charger and it’s not snug enough, and it doesn’t charge properly.
I opened up my desktop (first time I’d done that too!) and looked at all those tangled cables inside like I was solving some mystery puzzle. And there it was—the SATA cable half-heartedly hanging on for dear life.
All it took was unplugging and plugging it back in securely to get everything working smoothly again. That moment of relief when my screen lit up with all my files safely tucked away… unforgettable!
So yeah, if you ever find yourself in this boat where the hard drive isn’t showing up or being recognized—maybe give that SATA cable connection a check before jumping into panic mode like I did back then! You never know; sometimes it’s just loose connections causing all this fuss!