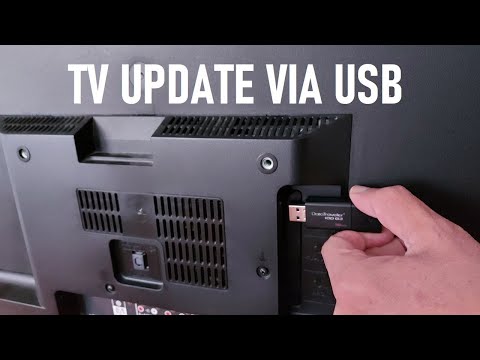
Oh man, ever had one of those moments where your TV decides to act up right when you’re about to watch the big game or binge your favorite series? Ugh, it’s frustrating! But hey, lucky for us, there’s a fix that might just do the trick.
Sometimes our trusty Samsung TVs need a little update to keep things running smoothly. And guess what? You don’t always need the internet for this—just a USB stick and a dash of patience. No rocket science here.
You know, it’s kinda like giving your TV a quick tune-up. Got an old USB lying around? Perfect! This is gonna be super handy and not as techy as it sounds—promise!
Updating Samsung TV Firmware via USB
Updating your Samsung TV firmware via USB can seem a bit tricky at first, but once you get the hang of it, it’s pretty straightforward. Trust me, with a little patience and the right steps, you’ll have your TV running smoothly in no time.
First off, why should you update your TV firmware? Firmware updates are super important because they often fix bugs or improve features. Think of them as little health checkups for your TV. Keeping your firmware up to date ensures that everything runs smoothly and some features may even perform better.
Here’s how you can do it using a USB stick:
- Find the right firmware version – Head over to Samsung’s official support website and search for your specific TV model. You’ll find this in the manual or on a label at the back of the TV.
- Download onto USB – Once you’ve found the correct file, download it to your computer. After downloading, unzip (or extract) it straight onto a USB stick. Make sure there’s nothing else on that USB drive—just makes things less confusing.
- Prepare for updating – Plug that prepared USB into one of your TV’s ports. Turn on the TV using remote control; these days they’re more like magic wands than remotes! Go to ‘Settings’ through menu option.
- Select Software Update – Navigate within settings until you hit either ‘Support’ or ‘Software Update’. There should be an option labeled something like “Update Now.” This is different between models but generally similar enough!
- Select ‘By USB’– Confirm your choice when prompted whether updating by internet or connected device (USB). The update process may take several minutes during which both patience coffee breaks might come handy!
Now remember: don’t turn off power midway through an update unless absolutely necessary since interruptions could cause issues needing tech support intervention later!!!
In any case where things don’t go exactly how planned—double-check model version compatibility with downloaded files online again before repeating any steps…I mean who hasn’t felt frustration from tech hiccups now then??
And voila! With these instructions guiding every step conveniently alone path towards successful installation future viewing experiences guaranteed improve alongside updated systems working optimally… fingers crossed!!
Manually Updating Samsung TV Software
Updating your Samsung TV software manually can seem a bit tricky, but it’s totally doable with some guidance. It’s kind of like giving your TV a little tune-up to keep everything running smoothly.
First off, you want to check what software version your TV is currently on. To do this, grab the remote and press the Home button. Then go to Settings, select Support, and finally click on Software Update. You’ll see which version you’re using right there.
Next up, you’ll need a USB drive for this whole process. Just make sure it’s formatted to either FAT16 or FAT32; these are types of file systems that your TV will happily talk to.
Now, head on over to the Samsung Support website on your computer. Search for your TV model—it’s usually tucked away in tiny letters somewhere on the back of the screen if you’re unsure! Once you’ve found it, look for a section called Downloads. There should be an option available labeled as something like “Firmware” or “Software Update.”
Here’s where things get important! Download that update and unzip the file if it’s compressed. This extracted folder needs to be copied directly onto your USB drive. Kind of like when you’re saving photos from an old laptop!
Time for action with all that prep work done: plug that USB stick into one of those ports on your Samsung TV—it doesn’t matter which one usually as long as there’s space!
After plugging in the USB drive, press the Menu button on your remote control. Navigate through till you find
- Support
- Software Update
- Select “Update Now”
Your TV should detect any compatible update files hanging out there in no time at all—just click ok if asked whether it should proceed updating what’s necessary—you certainly don’t want outdated apps slowing down Netflix nights!
Keep calm while it updates because turning off during installation might cause issues requiring more tech-savvy problem solving; we wouldn’t want anyone stuck scratching their heads over why things stopped working properly afterwards now would we?
Updating TV Firmware via USB
Updating your TV’s firmware via USB might sound a bit technical, but it’s actually a pretty straightforward process. It’s kind of like updating software on your computer—it’s all about keeping things running smoothly and adding new features. Let’s get right to it.
Why Update Your Firmware? Firmware updates can fix bugs, boost performance, or even add new functions to your TV. Sometimes, they’re necessary to keep apps and features working correctly. I’ve had moments when my own gadgets started acting up because I forgot those much-needed updates.
Here’s What You’ll Need:
- A USB flash drive
- An internet-connected computer
- Your Samsung TV model number (you’ll find this in the settings or on the back of the TV)
Steps to Update Your Samsung TV Firmware via USB:
1. **Download the firmware update**: Head over to Samsung’s official support site. There, you’ll search for your specific TV model and download the latest firmware update available.
2. **Prepare the USB drive**: Once you have downloaded the firmware file, extract it if it’s zipped. Then copy it to an empty USB flash drive formatted as FAT32 or NTFS.
3. **Insert the USB into your TV**: After safely ejecting from your computer, plug that little gadget into one of your TV’s USB ports.
4. **Start the update process**:
– Turn on your Samsung TV.
– Navigate through “Settings,” go down to “Support” (it might also be called something slightly different depending on your model).
– Choose “Software Update,” then select “Update Now.”
– The system should recognize the file on the stick automatically and prompt you with instructions—follow these patiently!
A Few Tips from Experience:
- Patience is golden! Updates can take several minutes; don’t unplug during this time.
- If nothing seems to happen after plugging in that drive double-check both compatibility & proper extraction.
I remember once being baffled when my older cousin’s smart television didn’t show Netflix icons anymore until they updated its software! That taught me how vital staying up-to-date truly is—even TVs get left behind technology-wise if we’re not attentive enough at times.
Keeping everything current avoids those annoying wrinkles of tech-life while ensuring everything works slick as intended… Happy watching!
Alright, let’s get comfortable and chat about updating your Samsung TV software using a USB. You know how sometimes you just wanna watch that new show everyone’s buzzing about, but your TV starts acting like it’s from another century? Well, the magic of updates can really save the day.
I remember this one time, a few years back, I was all set for a movie night with my family. We had popcorn ready and everything. But just as we sat down, I noticed our Samsung TV had some glitchy hiccups — not cool at all! After some frantic button pressing and a bit of grumbling (mostly from me), I realized it probably needed an update.
Getting that update in there might sound like some tech wizardry, but it’s actually pretty simple once you know where to start. Here’s the gist: you download the latest software onto a USB stick from your computer or laptop. Think of it like packing updates into a little suitcase for your TV to unpack later.
Then comes the fun part… well not fun exactly but necessary! You insert that USB into one of those slots at the back or side of your TV — it’s like giving your old pal (the TV) an envelope full of good news. The TV should do its thing automatically: detect the update and install it.
The whole process is fairly smooth; might take some time if you’re doing it for the first time because finding those settings could feel like searching for treasure at times! Just follow through what appears on screen after plugging in—it’ll guide you along nice n easy.
Afterwards, everything tends to run so much better—you sign up for fewer glitches during those exciting final episodes or big game moments!
I mean nothing’s ever completely foolproof right? But once you’ve done this manual update routine successfully even once… man does future maintenance become less intimidating!