Alright, picture this: you’ve just set up your shiny new Ubuntu server, and now you’re ready to dive into the world of DNS servers. Exciting, right? I get it. Setting up a DNS server might sound like a daunting task. But hey, it’s not rocket science.
Why even bother with DNS? Well, think of DNS as the internet’s phonebook. It translates those human-friendly website names into IP addresses that computers can actually understand. Handy, huh?
So if you’re itching to set up your own on Ubuntu, you’re in the right place. We’re going to break it down step by step in a friendly way—trust me, it’s not as tricky as you’d think! Ready? Let’s roll up our sleeves and jump right in!
Configuring DNS Server on Ubuntu
Hey there! Configuring a DNS server on Ubuntu is not as intimidating as it might sound. It’s kind of like setting up a big address book for your computer to look up where everything is on the internet. The neat thing about using DNS is that it’s the backbone of how we find websites by their names instead of numbers, you know?
So, let’s dig in and chat about configuring this on Ubuntu.
1. Install Bind9:
First things first, you’ll need to get a piece of software called Bind9. It’s really popular for DNS because it does a great job and people trust it.
“`bash
sudo apt-get update
sudo apt-get install bind9 bind9utils bind9-doc
“`
Once you’ve got those jam-packed packages installed, you’re ready for the next step!
2. Configure the DNS Files:
This part involves tweaking some configuration files to get your DNS working just right.
- /etc/bind/named.conf.options: This file handles global server options.
- You want to set forwarders; think of them like helpers that fetch information from other servers.
Edit this file with your favorite text editor, maybe `nano` or `vi`.
“`bash
sudo nano /etc/bind/named.conf.options
“`
Inside, look for:
“`plaintext
forwarders {
8.8.8.8; // Google’s public DNS for instance.
};
“`
Save and exit once you’ve filled in everything nicely.
3. Setting Up Zone Files:
Zone files are kind of like sections in that address book I mentioned before—each one manages records for certain spaces (domains).
Create a zone file under `/etc/bind/`.
Here’s an example:
“`plaintext
zone “example.com” {
type master;
file “/etc/bind/db.example.com”;
};
“`
You’re linking “example.com” with its corresponding database file there!
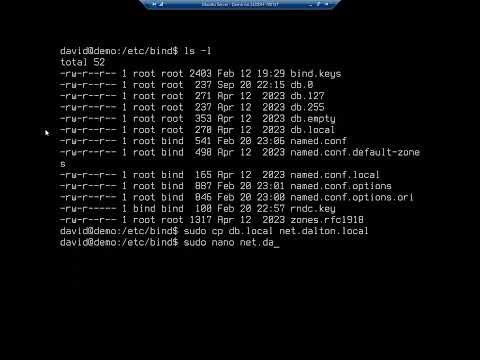
Now let’s make the database file by copying an existing one as a template:
“`bash
sudo cp /etc/bind/db.local /etc/bind/db.example.com
“`
Then edit this new file:
“`bash
sudo nano /etc/bind/db.example.com
“`
Modify the contents so they match your domain info precisely.
For instance:
- @ IN SOA: Stands for Start Of Authority—this line identifies the start point and authoritative nameserver.
- @ IN NS ns1.example.com.
Add A records if needed; these map domain names to IP addresses:
“`plaintext
ns1 IN A 192.xxx.x.x
“`
Remember to replace example entries with real details!
4. Restart Bind Service:
You’ve done all this hard work configuring stuff! Make sure everything clicks correctly by restarting Bind:
“`bash
sudo systemctl restart bind9
“`
Afterward test it all out using tools like `dig` or `nslookup`. Run something like:
“` bash
dig example.com @127 .0 .0 .1
“`
And watch those results pour back showing off those resolved IPs!
There you have it—a shiny new Ubuntu-based DNS perfectly configured at home ready to route requests capably across cyberspace!
Command Line Steps to Set DNS Server in Ubuntu
Alright, setting up a DNS server on Ubuntu using the command line can sound a bit technical, but trust me, it’s totally doable. I remember when I first tried it—I was pretty nervous, scared I’d mess something up. But with a bit of patience and clear instructions, it turned out to be a breeze!
First things first: fire up your terminal. This is where all the magic happens in Ubuntu. If you don’t know where to find it, just look for an icon that looks like a black screen or use the search function.
Once you’ve got your terminal open, you’ll need to edit the file that holds all your network settings. Here’s how you can do it:
Edit the Netplan Configuration File:
- Navigate to the directory where it lives:
cd /etc/netplan/ - Now list files in this directory:
ls - You might see something like 01-netcfg.yaml, or another file ending with .yaml.
- Edit this file using a text editor like Nano:
sudo nano [your-file-name].yaml
Add DNS Servers:
- In this file, you will add some lines under your network settings. Things can vary slightly based on config but here’s an example of what you might add:
network: version: 2 ethernets: enp0s3: dhcp4: no addresses: [192.168.1.100/24] gateway4: 192.168.1.1 nameservers: addresses: [8.8.8.8, 8.8.4.4] - The key part here is adding under ‘nameservers’—those numbers are Google’s public DNS servers.
- If you’re unsure about some details like addresses or gateway info—you might want to check with your router settings.
Apply Changes:
- Save and exit Nano by pressing `CTRL + X`, then `Y`, then `Enter`.
This will save changes and close. - You apply changes using netplan apply command:
sudo netplan applyIf there are no errors—it worked!A little test couldn’t hurt either…If things don’t connect properly double-check those edits before tearing your hair out (trust me).And voilà—you’ve set DNS servers through command line! Remember though each system setup differs slightly—a little detective work ahead saves time later debugging! Now wasn’t really hard right?
Configuring DNS Server in Ubuntu 20.04
Configuring a DNS server on Ubuntu 20.04 might seem intimidating at first, but with a little guidance and patience, you’ll be up and running in no time. Here’s a friendly walkthrough to get you through it.
First things first, what is DNS anyway? DNS stands for Domain Name System. It’s like the phonebook of the internet that translates domain names (like www.example.com) into IP addresses so your browser can load internet resources. Simple, right?
Installing Bind9:
To set up a DNS server on Ubuntu, you’ll use a package called Bind9. Don’t worry—it’s not as technical as it sounds!1. Fire up your terminal.
2. Update your package list:
“`bash
sudo apt update
“`
3. Install Bind9:
“`bash
sudo apt install bind9
“`Configuring Bind9:
You’ve got Bind9 installed! Now it’s time to configure it.- Edit the main configuration file located at
/etc/bind/named.conf.options. - Add or modify lines like these between the curly braces
{}:options { directory "/var/cache/bind"; recursion yes; // Enable/disable recursion in queries allow-query { any; }; // Allow queries from any client };This tells your DNS server where to store its cache and whom to allow requests from.
Setting Up Zone Files:
You want to manage specific domains? Make ‘zone files’!
- Edit named.conf.local:
“`bash
sudo nano /etc/bind/named.conf.local
“`
Add something like:zone "example.com" { type master; file "/etc/bind/db.example.com"; }; - Create the actual zone file for example.com based on a template:
“`bash
sudo cp /etc/bind/db.local /etc/bind/db.example.com
“`And edit it accordingly:
“`nano /etc/bind/db.example.com“`Within this file, set correct domain information:
$TTL 604800         ; default time to live
@ IN SOA ns1.example.com. admin.example.com. (
                        2     ; Serial number
                       604800 ; Refresh interval
                           ...additional fields...
)
@ IN NS ns1.example.com.
ns1 IN A YOUR.IP.ADDRESS.HERE
www IN CNAME ns1     ; Example CNAME record
Restarting Services:
Once configured properly you’ll restart services:
“`bash
sudo systemctl restart bind9
“`Wanna check everything works ok? You could use dig:
“`bash dig @localhost example.co“`
That’ll show if queries are answered correctly by yr new server!
Remember – every mistake is just another opportunity learn something knew!
Alright, let’s chat about setting up a DNS server on Ubuntu. So, you’ve decided to go on this journey—great choice! You know, there’s something empowering about managing your own DNS server. It feels like having control over a tiny piece of the vast internet puzzle.
I remember this one time I set out to configure my very first DNS server on Ubuntu. Honestly, I felt like an explorer charting new territories. I mean, initially, the thought of working with configurations was intimidating. But then again, the thrill of getting it all sorted out was pretty rewarding.
First things first: make sure your Ubuntu system is all updated and ready to roll. It’s like giving your car a tune-up before a big road trip—you don’t want surprises halfway through! Then you’ll get into installing Bind9—that’s the software most folks use for DNS stuff on Ubuntu.
There’s a bit of fiddling with configurations in “/etc/bind/named.conf.options” where you define forwarders or even secure zones if you’re feeling fancy. And don’t forget that moment when you edit “/etc/bind/named.conf.local.” You’ll declare zones here; it’s essentially telling your server which domains it should handle.
The confusing part for many is making sure everything points correctly and resolves without hiccups. Testing is key here—use commands like “nslookup” or “dig” to ensure things are peachy keen.
And hey, who says tech can’t surprise you? There was this time when a misplaced semicolon had me scratching my head for hours. It was like trying to find that one missing puzzle piece under the couch!
Wrapping it up with regular checks and testing ensures stability. Because peace of mind comes from knowing everything runs smoothly even when you’re not looking.
Diving deeply into DNS might seem daunting at first glance but stick with it, and soon enough it’ll feel as natural as riding a bike! And just think: every little tweak brings you closer to mastering the art of networking in your own unique way.
- Edit the main configuration file located at