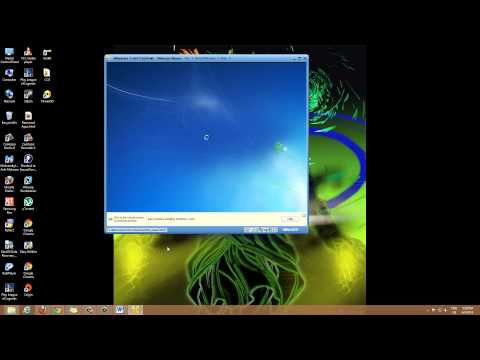
Oh boy, remember Windows 7? Those were some good times, right? It had that familiar feel you just can’t find in newer versions. Kind of like an old pair of comfy jeans.
Now, imagine having Windows 7 on your modern machine without messing up all those nifty new features. Sounds dreamy, doesn’t it? Enter VMware! It’s a bit like magic – letting your computer pretend to be another one.
But why? You might have some old games or programs that only run on Windows 7. Happens to the best of us! Or maybe you’re just feeling nostalgic and want a trip down memory lane.
Setting up a virtual machine might sound fancy and complicated at first. But hey, fear not! I’ll walk you through it step by step, like we’re having coffee together. Let’s dive into this journey and figure out how to get things rolling!
Installing Windows 7 on VMware Virtual Machine
Imagine you’re setting up an old computer in your garage, just for that nostalgic feeling. Installing Windows 7 on a VMware virtual machine kinda gives you the same vibe without having to dust off ancient hardware. Before diving in, let’s make sure we’re on the same page.
What you’ll need:
- A copy of VMware Workstation or Player installed on your computer.
- The Windows 7 ISO file. You can find this if you have an existing license or through legitimate sources.
Getting started:
First up, open VMware and choose to create a new virtual machine. There should be an option labeled something like “New Virtual Machine.” It’s sort of like building a house—laying down the foundation first.
Selecting the installation method:
You’ll see two main choices: use your downloaded installer disc image file (like that ISO we talked about) or use a physical disk if you’ve got one handy. Since most of us live in digital land these days, pick “Installer disc image file (ISO).”
Now, find where you saved your Windows 7 ISO and select it. If everything’s lined up correctly, VMware will detect it automatically.
Setting up the VM:
Give this virtual creation a name; let’s go with something fun like “Old School Windows.” Choose where to save it on your system; maybe somewhere you won’t forget!
Next is deciding how many resources to throw at it—kind of like deciding whether you’re feeding a hamster or a horse. Generally speaking:
- Memory (RAM): At least 2GB for smooth sailing; more if you’re feeling generous.
- Hard Disk Space: Make sure there’s enough room for not just Windows but any programs you’d wanna run later—around 40GB is usually good.
Final steps before launch:
Click through until you’re greeted by something like “Finish.” It doesn’t launch automatically cause sometimes life needs that extra push. So hit “Start,” and watch as your baby booted from scratch!
As installation begins, you’ll follow those familiar setup prompts from back when we all had mullets…or maybe not mullets but definitely less grey hair.
And there ya go! Once installed, don’t forget those initial updates and drivers—it’ll feel more at home with them patched in 🙂
So that’s basically how our little digital time capsule gets set up!
VMware Compatibility with Windows 7
Setting up a Windows 7 virtual machine in VMware can be really handy. Sometimes you just want to run an older OS without dual-booting, right? Maybe you have some nostalgic software or need to test something. Here’s how you can get started with that using VMware.
### Getting Started
You’ll need a few things before diving in:
- VMware Workstation or Player: These are the software options for creating and running virtual machines.
- Windows 7 Installation Media: A CD/DVD or an ISO file.
### Installation Steps
First off, make sure your system meets the requirements for VMware. You’ll need enough RAM and storage space to handle both your main OS and the virtual machine comfortably.
1. **Launch VMware:** Open it like any other program on your computer.
2. **Create a New Virtual Machine:** Look for a button or menu item saying “New” or “Create.” It’s usually quite visible.
3. **Select Installer Disk Image:** If you’re using an ISO file, point VMware to it. If not, insert your Windows 7 CD/DVD.
4. **Choose Version:** Pick “Microsoft Windows” as the guest operating system and select “Windows 7.”
5. **Set Up Your VM Settings:**
- Memory (RAM): Allocate enough memory for the VM without starving your host OS.
- Disk Space: Give it ample space; let’s say at least 40GB to start with.
Now, let me share something interesting: My first virtual machine was a bit of a mess because I forgot this step—**allocate sufficient resources**! It’s easy to underestimate what you need.
### Running Windows 7
Once it’s set up, you’ll go through the familiar Windows installation process within VMware:
- Installation Process: Follow the prompts—enter your product key if required, select preferences etc.
- Add Drivers via VMware Tools: After installation, it’s smart to install VMware Tools for better integration between guest and host systems.
And hey! Seeing that iconic Windows logo boot up in a little window is kind of nostalgic!
### Important Tips
– You know what? Always keep snapshots of your VMs when making changes—saves headaches if something goes pear-shaped!
– Check licensing agreements regarding using older versions like Windows 7 in commercial settings as these might vary.
So there you have it—a cozy setup guide for running Windows 7 on VMware! It might take some getting used to if this is all new territory but remember… experimentation helps learn what works best for you!
Windows 7 Compatibility in 2026
Setting up a Windows 7 Virtual Machine in VMware can be quite the adventure, especially if you’re thinking about doing this in 2026. It’s like wandering down memory lane with an old friend, you know? But there are some things to keep in mind. Let me walk you through it.
Is Windows 7 Still Compatible?
Well, that’s a good question! By 2026, Windows 7 is pretty much vintage. Official support from Microsoft ended back in January 2020. However, this doesn’t mean it’s impossible to run it; it just means you’ll need to be extra cautious due to the lack of updates and security patches.
Why Use a Virtual Machine?
A virtual machine (VM) lets you run one operating system inside another without needing new hardware. It’s like playing dress-up for your computer! VMware is one popular software for creating VMs that can simulate your old Windows environment.
- Create Your Virtual Environment: Install VMware Workstation or Player on your current operating system.
- Get an ISO Image: You’ll need a copy of the Windows 7 installation files, usually as an ISO image. Make sure it’s from a legitimate source.
- Configure Your VM Settings:
- Name: Something meaningful, like “My Vintage Windows.”
- Memory Allocation: Allocate at least 2GB of RAM; more if possible.
- Disk Space: Give it around 25GB or more of storage space.
Installing Windows 7:
The installation process should be familiar if you’ve done it before. Mount the ISO in VMware and follow the wizard’s steps: language settings, partitioning disks—just don’t forget those infamous reboots!
Mind Those Drivers!:
Without official support, finding drivers for modern hardware might be tricky like searching for socks after laundry day! You might encounter some hiccups when installing peripherals or getting network connections working smoothly.
Caution: Security Risks!:
Running any outdated OS poses significant security risks. Think of online interactions as walking through thorny bushes—you have to watch out! Avoid browsing risky sites or sharing sensitive data using this setup.
By doing all these steps correctly setting up will allow experimenting here while not affecting daily activities on newer systems that you probably use most times anyway right?
Oh, setting up a Windows 7 virtual machine in VMware—do you remember those days? It’s a bit like stepping back in time, right? There was something nostalgic about working with Windows 7. You know, it was an era when things seemed simpler!
So, let’s say you’re feeling a bit nostalgic or perhaps have some old software that only runs on Windows 7. Setting up a virtual machine can be your ticket back to those times without having to actually mess with your current system. VMware is this nifty tool that lets you create virtual PC environments inside your existing computer. Imagine it like a house with many rooms; each room is independent of the others.
First things first, you’ll need VMware Workstation Player or something similar to get started. Maybe you’re someone who loved playing around with different operating systems as a kid? The excitement of booting into an OS and seeing everything work smoothly could bring back fun memories! Once you have VMware ready to go, you’ll need an ISO file for Windows 7. Think of ISO files like digital copies of physical DVDs—pretty cool right?
I remember the first time I set up a virtual machine; there was this mix of excitement and nervousness—you don’t want anything to go wrong! You’ll just click through some menus choosing how much RAM and hard drive space to allocate (don’t worry, it’s not as complicated as it sounds). The thing is it’s all about balancing: too much for the VM can slow down your main system, while too little makes the VM sluggish.
Now comes the magic moment: starting the VM and watching it boot into familiar territory—those spinning dots turning into the Windows logo. Ahh! Watching everything come together can be quite satisfying.
During setup maybe you’ll recall that one game or application which only worked on Windows 7—oh boy! After installation remember installing guest additions for smoother integration between host and guest systems—it lets them play nicely together sharing clipboard content among other perks.
You might hit some snags along way—as technology always throws curveballs—but solving these hiccups adds another layer accomplishment!
So whether you’re doing this because some old software needs revival or simply basking nostalgia’s glow—the journey sets interesting tales along its path using past technology from present machines isn’t just practical—it’s also personal bringing memories embedded deeply within those years gone by alive once more across virtual screens today—isn’t tech awesome sometimes?