Hey, ever been in that moment when you really need to save something from your screen? Like, you spot a hilarious meme or an important piece of info? We’ve all been there. You know what’s super handy for that? Yep, screenshots!
So here’s the thing: Windows 10 makes it surprisingly easy to save those neat screen captures as images. No rocket science needed! Just a few clicks and boom—image saved. It’s kinda like snapping a picture with your phone, but on your computer.
And trust me, once you get the hang of it, you’ll wonder how you ever lived without this little trick. Ready to dive in? Let’s unravel this together.
Saving Snippets as Images Procedure
Alright! So, you’ve got something on your screen that you just *need* to save as an image, right? Maybe it’s an amusing meme or an essential piece of info. Whatever the reason, let’s get that snippet saved.
Step 1: Capturing the Screenshot
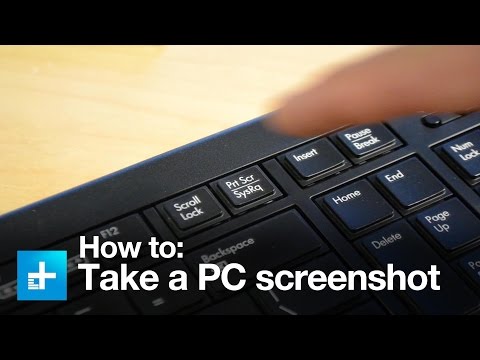
First things first, press the PrtScn (Print Screen) key on your keyboard. This key is usually located at the top right corner. Doing this captures the entire screen and copies it to your clipboard. But what if you only want a specific part of your screen?
Step 2: Using Snipping Tool
Hit the Start menu and type “Snipping Tool.” Click open this handy tool. Select “New”, then drag to capture just what you want from your screen. It’s like digital scissors!
Step 3: Saving Your Snippet
After capturing with either PrtScn or Snipping Tool, open up a simple image editor like Paint. Paste using Ctrl + V if using PrtScn or directly edit in Snipping Tool for finer touch-ups.
- Name It: Click on “File” then “Save As”. Choose a location you’ll remember.
- Select Format: You’ll see options like .JPG or .PNG. Pick one! JPGs are smaller; PNGs keep more detail.
- Avoid Confusion:If naming files feels tricky some days, name them something memorable!
Once you’ve saved it securely in place—voila! You’re all set!
It was quite a giggle when I first tried screenshots; instead of capturing my work presentation slides, I accidentally sent my boss a picture of my favorite cat meme… Ah well!
Doesn’t sound too hard now does it? And there goes another tech mystery solved in simple steps without breaking sweat!
How to Save a Screenshot as an Image on Windows 10
Oh sure, capturing and saving a screenshot on Windows 10 is like catching lightning in a bottle—but much easier, don’t worry! Let’s walk through it together. Sometimes you need to save what’s on your computer screen as an image, whether it’s for sharing with friends or keeping for personal reference.
So, when you want to grab a screenshot there are several ways you can go about it. They’re all simple once you get the hang of them!
First off, let me guide you through one of the most basic methods:
- Press the PrtScn (Print Screen) Key: Tap this key located at the top right of your keyboard. It captures everything on your screen. But hey!, this just copies it onto your clipboard—it doesn’t save it yet.
- Use Snipping Tool or Snip & Sketch: These built-in tools let you select only part of your screen if that’s what you’d prefer. Open either tool from the Start menu by searching their names.
Alright, once you’ve captured your desired screenshot using any method mentioned above, here’s how to save it as an image file:
- Pasting into Paint: Open Paint by typing “Paint” in the search area beside Start button. Once it’s open simply press Ctrl + V. Your captured image will appear in Paint.
- Savimg from Paint: Click on ‘File’, then select ‘Save As’. You’ll have multiple format options like .PNG or .JPEG—pick whichever suits ya best!
Now if keyboard shortcuts are more up yer alley—there’s another quick combo:
- Windows + Print Screen Keys: Hit both keys simultaneously and BAM! Your screen gets captured and auto-saved directly into Pictures > Screenshots folder without needing any paste action first!
Isn’t that neat? Just remember those folders so they don’t pull invisible Houdinis later down line—you won’t lose anything valuable again after mastering this nifty trick!
You see? Handy stuff indeed; now no precious pixels escape immortalization forevermore during great adventures online!
Saving Screenshots as JPG on Windows 10
Taking screenshots is super handy, isn’t it? Whether you want to save a memorable moment or an important piece of info from your screen, knowing how to save screenshots as JPG on Windows 10 can be really useful. So, here’s the scoop.
First off, there’s a straightforward way to grab a screenshot using the Print Screen button on your keyboard. Press that button by itself if you want to copy everything on your screen. This copies the image to your clipboard.
Now, here’s where we do a little magic: Open Paint. Yes, good old Paint—it’s still around and really simple. Paste your screenshot there by either hitting CTRL + V or right-clicking inside Paint and choosing paste. Voilà! Your screen should appear in Paint.
To save it as a JPG:
- Go to “File” in the top-left corner.
- Select “Save As“.
- A menu with file types will pop up; choose “JPEG Picture“. This stands for Joint Photographic Experts Group if you’re curious!
- Name your file something you’ll remember. You don’t want 101 files called “screenshot”, do you?
- Select where you’d like to save it—desktop is always easy—and click “Save“. And there you have it!
Oh, there’s another cheeky tool called Snipping Tool (or its newer buddy, Snip & Sketch). You’d find these by typing their names into the search bar at the bottom left of the screen. These let you select exactly what part of your screen you’d like saved. Once you’ve got that highlighted:
- Select “File” and then “Save As”.
- Name and choose JPEG format as mentioned earlier.
You might wonder why JPG over other formats? Well! It gives you pretty good quality without those massive file sizes—perfect for sharing or just storing lots of images without eating up all your disk space.
There was this one time I had to capture slides from an online course… long story short—I am so glad I used JPG instead of PNG and managed my storage like a pro!
And there ya go! You’ve now got those slick looking screenshots all neatly packed in their JPEG glory!
You know those moments when you’re really proud of something on your computer screen? Maybe you’ve just completed a big project, or there’s an error message that’s driving you nuts and you need to show it to someone. Whatever it is, taking a screenshot can be super helpful.
Now, if you’re using Windows 10 and wanna save that screenshot as an image, it ain’t too tricky. I remember the first time I had to do this—I kind of felt like a tech wizard afterward! Just hitting the “PrtScn” (Print Screen) button already feels like magic because it quickly captures everything on your screen.
Then there’s the Snipping Tool, which is like having a pair of digital scissors letting you choose exactly what part of the screen you wanna capture. It kinda gives off DIY vibes—like crafting but for computer stuff. Once you’ve got what you’re looking for, saving it is as simple as opening Paint or another image editor and pasting in your screenshot with “Ctrl+V.” From there, just save the file in whatever format suits ya—JPEG or PNG are pretty common.
Sometimes I think back on how daunting these things seemed at first. But with each little digital hurdle I jumped over, my confidence grew. Just remember: every tech challenge makes you better at navigating this digital world we live in! If you haven’t tried saving screenshots yet give it shot; who knows? It might just come in handy one day!