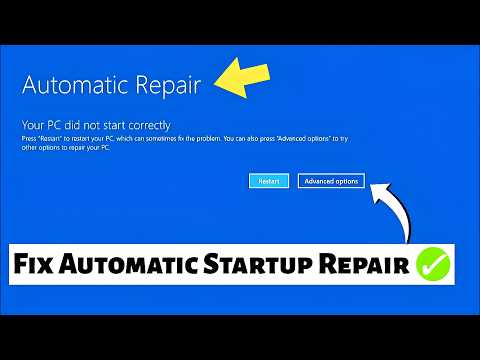
You know that feeling when your computer just won’t start up? Like, it’s totally stubborn and you have no clue what’s going on? Yeah, been there, my friend! It’s like having a car that just refuses to move.
But hey, don’t stress. Sometimes those pesky startup issues on Windows 10 need a little nudge with a “Reset This PC” move. Imagine giving it a fresh start—kind of what you wish you could do after eating too much pizza.
It’s not rocket science. More like turning the power off and on again but with extra steps! 😄 So let’s dig into fixing this together—you’ve got this!
Repairing Corrupted Startup Files
Oh, startup issues on Windows 10! They can really throw a wrench in your day, can’t they? Imagine booting up your computer one morning and suddenly being faced with nothing but a blank screen or an error message. Yikes! But hey, don’t worry too much—because we’re gonna chat about how you can fix those pesky corrupted startup files. Just follow along as we walk through the process to get things humming again.
Understanding Corrupted Startup Files
You know that moment when you switch on your PC and something seems off? Maybe it’s acting glitchy or simply refusing to start properly. Well, those symptoms could point toward corrupted startup files. These files are like the engine of your car; if they’re damaged, you’re not going anywhere fast.
Using “Reset This PC”
There’s this handy-dandy feature in Windows 10 called “Reset This PC.” It’s sort of like hitting refresh on your computer without losing personal data—if you choose the right option!
- Access Recovery Mode: First step? Restart your system and press Shift + Restart. Your machine should boot into recovery mode.
- Navigate to Reset: Choose Troubleshoot, then pick Reset this PC.
- Choose Your Option: You’ll see two choices: “Keep my files”, which keeps personal data but removes apps and settings; or “Remove everything”, which wipes all clean for a fresh start.
- Follow the Prompts: The system guides you step by step. Just read carefully and choose according to what you need.
A Little Anecdote for You!
There was this one time my friend Sarah was totally flustered because her laptop wouldn’t boot up at all after an unexpected update. She thought she lost two years’ worth of photos! (Talk about hitting panic mode.) But once she learned how to access recovery mode using “Reset This PC” while keeping her files, both she—and her memories—were saved.
The Importance of Backups!
I can’t stress enough how having regular backups is like having an ace up your sleeve. Seriously, just do it—it’ll save you so much headache down the line if things go awry during repairs.
Anyway folks , I hope these pointers help make repairing corrupted startup files less daunting for you than deciphering ancient runes.. Remember: we’ve got tools at our disposal—you just have to know where they are and use them wisely! Keep calm , reset when needed !
Windows Tool for Automatic Boot Repair
Windows can be a bit of a drama queen, right? The tiniest hiccup in the boot process and all of a sudden you’re staring at an error screen. It’s like your computer has decided it’s not getting out of bed today. Let’s see how you can use Windows tools to wake it up when it hits that “I won’t start” mood.
Reset This PC: A Lifesaver
There’s this neat feature called Reset This PC. It’s like giving your computer a fresh start without losing all your favorite files. Imagine cleaning out only what’s broken or unused and keeping everything else lovely and intact. You see, this tool is handy when dealing with startup issues that require more than just a restart.
- Accessing Reset This PC: First, go to the Settings. Hit Update & Security, then find Recovery. Look under there for Reset this PC.
- Your Choices: You can either keep your personal files or remove everything if you want to start completely clean.
- The Magic Happens: The system will reinstall Windows while addressing any troublesome settings or missing drivers.
Imagine one day I had this laptop that suddenly wouldn’t boot after an update. A total diva moment! Using the reset tool was like sending it on a spa weekend—it came back refreshed and working beautifully.
The Automatic Repair Tool: Your New Best Friend
Another cool utility is the automatic repair tool. It’s like calling in the repair guys automatically when things seem off during booting—convenient right?
- Kicking It Off: When your system fails (think: multiple unsuccessful boots), Windows should prompt you to enter recovery mode automatically.
- Select Troubleshoot: First thing you do when recovery mode shows up is select Troubleshoot.
- Diving into Advanced Options:: Click on those advanced options because somewhere inside there hides Automatic Repair.
Once there, sit back while computer elves hurriedly assess errors stopping startup from happening smoothly; they’ll then adjust whatever needs tweaking behind-the-scenes fending off major issues before rebooting typically successfully!
Seeing software step up for self-repair really reinforces faith that tech wants teamwork—not tedious tasks bogging down users—so every once awhile ylong typically successful!
Resetting Windows 10 via USB for Startup Issues
Oh, startup issues—those can be a headache, right? Imagine you’re all set to dive into your work or enjoy some gaming time on your Windows 10 PC, and bam! It just won’t start properly. Fortunately, there is a way out of this jam by resetting your Windows 10 using a USB, kind of like hitting the refresh button for your computer. Let’s walk through this together.
Why Reset via USB?
Sometimes when you can’t even get into Windows to access any recovery options, using a bootable USB drive becomes a lifesaver. It’s like having an external lifeline when nothing else works.
Creating the Bootable USB
You need another working computer for this step. You’ll use it to create what’s called a “bootable” USB drive.
- Gather Your Tools: Grab an empty USB drive—at least 8GB should do the trick.
- Download the Media Creation Tool: You can find this on Microsoft’s official site. Run it and select “Create installation media for another PC.”
- Select Your Options: Choose your language and version of Windows 10 that matches the one you’re trying to fix.
Booting from the USB
Once you’ve got that bootable USB ready, you’ll need to use it on your broken PC:
- Insert The Drive:, Stick it right into one of those USB ports.
- Acess The Boot Menu:, You’ll usually have to hit something like F12 or Escape as soon as your computer starts up—try not blinking if it’s being tricky!
Select Your Boot Device: From the menu, choose usb. Now’s not the time for shyness; make sure you pick that option before anything else!
The Reset Process:
When everything goes smoothly (fingers crossed!):
- An Installation Window Appears:, Select “Repair Your Computer”. It’s there in small print downío at the bottom corner..sneaky little thing.
Reset This Pc -> Keep my files (if desired) .One step short of magic…it begins resetting while saving documents though installed apps may vanish forever../Li>
You know, when it comes to trying to get Windows 10 back on its feet after it’s been acting up during startup, it can be a bit of an adventure. It’s like that time I thought my trusty old car would start on a snowy morning without a hitch—only to find myself stuck in the driveway. Resetting your PC can feel similar but with fewer frozen fingers and more finger-crossing.
So, when your computer’s failing to boot properly, that’s where “Reset This PC” comes into play. It’s sort of like giving your system a good shake and saying, “Hey, snap out of it!” Basically—what you’re doing is reinstalling Windows without losing all those cherished photos or documents. It’s a magician pulling rabbits from hats—only this time the hat’s your hard drive.
Getting started is usually just about pressing F8 or another function key while starting up (depends on your computer model), which takes you into the recovery environment. From there, you’ll find options like “Keep my files” or “Remove everything.” Now that choice can feel like picking between cake and ice cream at times! Keeping files means you hold onto personal stuff but freshen up Windows itself—while removing everything gives your computer a real clean slate.
It’s funny how computers remind us of ourselves sometimes; they need resets too! And let’s face it: they’re occasionally stubborn as an old mule until we’ve done so much song-and-dance trying other fixes first. But remember—the real secret sauce here? A little reset might just do wonders for the system—and save you one heck of a technical headache!