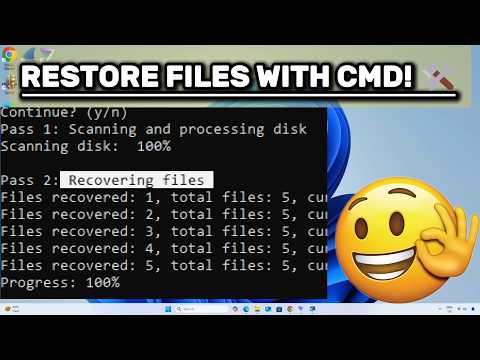
Oh man, losing data can feel like your heart’s dropped straight into your stomach, right? We’ve all been there—you accidentally delete an important file or a system glitch just wipes stuff out. Totally frustrating! But fear not, my friend. Windows has this built-in superhero called the CMD command, ready to swoop in and save the day.
Now, I know what you’re thinking: “Command prompt? Isn’t that like techy magic?” Honestly, it does sound a bit intimidating with its black screen and blinking cursor. But trust me, it’s like having a secret weapon in your back pocket. Once you get the hang of it, you’ll wonder how you ever lived without it!
Picture this: You type in a few commands (like secret codes), and poof! There’s your lost data back safe and sound. It’s not a fancy app with bells and whistles—more of an old-school detective doing its thing quietly behind the scenes.
Anyway, if you’re curious about how it works or just want to feel like a pro hacker for a day—you’re in for an adventure. Let’s see how we can turn that CMD command into your new best buddy for recovering data!
Using CMD for Data Recovery on Windows 10
Sure thing! Let’s get into using CMD for data recovery on Windows 10. I know, it might sound a bit techy, but hey, CMD stands for Command Prompt, that little black box where you type in commands and it does stuff for you. Think of it as having a friendly conversation with your computer.
Why Use CMD?
You might wonder why the heck someone would use CMD when there are so many apps and software. Well, it’s often quicker and doesn’t require downloading extra tools. Plus, if your computer is acting up and won’t boot properly, CMD can be a real lifesaver.
The Basic Steps
- Accessing CMD:
To start off, press Win + R, typecmd, and hit enter. If you’re recovering from a serious issue like startup failure, boot into Advanced Startup Options by restarting your PC and repeatedly pressing F8. - Navigating to the Right Drive:
Once you have the command prompt open, first make sure you’re in the right drive where files were lost. You can switch drives by typing something likeD: - Checking for Errors:
Type inchkdsk x: /f. Here ‘x’ is the drive letter where you’re looking to recover data from. - The Recovery Command:
Use this gem: type inattrib -h -r -s /s /d x:*.*. Again replace ‘x’ with your particular drive letter.
This command looks for hidden files which could be causing issues. - SFC Scan (System File Checker):
This tool helps when system files are misbehaving. Just type insfc /scannow. Simple as that!
An Example of Using Attrib :
Recovering Data Using CMD on Windows Systems
Hey there! You know, losing data can be super stressful, right? But relax, ’cause I’m gonna help you try recovering data using the Command Prompt (CMD) on Windows. Let’s walk through it together in a way that’s easy to digest.
Why Use CMD for Data Recovery?
CMD can be like your secret ally when things go awry with data. It’s that trusty old tool, sitting quietly in your PC, ready to help out. While it might feel a bit too geeky at first, it’s reliable and doesn’t need any special software. I mean who wouldn’t want a backup plan like that?
Steps to Recover Deleted Files
Here’s how you can use CMD to save the day:
- Open Command Prompt: Hit the Start button and type “cmd” in the search bar. Right-click and choose “Run as administrator” so you have full access.
- Navigate to the Drive: If your lost files were on drive D, type
D:and hit Enter. - Use ATTRIB Command: This command helps unveil hidden or system files which could be your missing ones! Type:
attrib -h -r -s /s /d *.*
What this does is remove any hidden attributes from your files and directories (fancy words for saying “make ’em visible again”).
When You Should Try This Method
This is handy if you’re dealing with issues where files got mysteriously missing due to being hidden or accidentally turned into system files. Like that time I misclicked something weird (…oops).
Now, just keep in mind this works mostly when dealing with logical errors in file systems rather than physical damage or severe corruption.
A Small Reminder
Always back up important stuff whenever possible! We’ve all been there—accidentally deleting something we swore we’d never lose again… Eh? 😊
Hope this gives you some comfort next time things get accidentally deleted or seem invisible. Computers like keeping secrets sometimes!
Recovering Data Using CMD in Windows 7
Oops, sorry, but recovering data using the Command Prompt on Windows 7 can be tricky and isn’t always guaranteed to work. However, it’s awesome that you’re eager to learn about it! Let’s explore this neat little trick of using the CMD tool.
First things first: open the Command Prompt with administrative rights. To do that, hit the “Start” button and type “cmd” in the search bar. Right-click on “cmd.exe” and pick “Run as administrator.” This grants you full access so any command executed has maximum permissions.
Now, let’s dive into some commands:
- CHKDSK: This is short for Check Disk. It’s like having a friend check for errors on your disk drive that might cause data loss. Type
chkdsk E: /freplacing E with your drive letter where you think that something fishy is happening. - SFC: System File Checker is handy for fixing corrupt files which could be affecting data recovery. Just enter
sfc /scannow. Sit back and let it work its magic! - ATTRIB: If you’ve got files suddenly gone missing or hidden, ATTRIB can unhide them like a magic trick! Use:
attrib -h -r -s /s /d E:*.*. Remember to swap E with your actual drive letter. - XCOPY: Copying files from one place to another can save them from oblivion. A nifty command:
xcopy E:*.* D:backup /e /i, assuming D is your backup location. - DISKPART: When partitions act up, Diskpart comes in handy—it’s like a partition therapist! Enter DISKPART then play around by listing disks with LIST DISK and selecting wisely before proceeding!
You know what? I once freaked out when my vacation photos mysteriously disappeared after a power outage; attributing those hidden treasures saved me from despair!
A gentle reminder: Errors happen even to seasoned professionals–have patience while exploring these commands.
Keep backups regularly though—better safe than scrambling around when important data goes MIA unexpectedly—you never know right?
And remember—don’t tamper without full understanding since misuse might lead down alleys hard navigating back from (trust me). Enjoy recovering safely!
Do ya need anything else cleared up?
Oh boy, the feeling of accidentally deleting that important file, right? I’ve been there. It’s like one minute you’re staring in disbelief at your screen, and the next, you’re frantically trying to figure out if there’s any way to bring it back. Quite a ride!
Fortunately, Windows is a bit like having a toolbox with quite a few hidden features tucked away. One of those nifty tools is the Command Prompt (CMD), which can magically help you recover lost data. I mean, who would’ve thought it could be that helpful?
Imagine the CMD as this black box where you type those mysterious incantations—I mean commands—and poof! It does something amazing for you. The trick lies in knowing what to type and when. Okay, it’s not magic; it’s more like command-line sorcery for your files.
Even though tech folks might talk about using programs like CHKDSK or ATTRIB through CMD, don’t let these names scare you off! They’re just fancy ways of telling your computer what to do with your storage and files.
For instance, CHKDSK scans disks for errors and fixes them while ATTRIB helps manage those sneaky hidden attributes on your files. This stuff can help make sure everything’s as it should be on your drive.
The goal isn’t just getting back lost files but understanding how powerful this tool really is. Back when I first tried using CMD for recovery—admittedly with a bit of Googling by my side—I found myself genuinely impressed with what could be achieved by typing some simple words on that seemingly intimidating black screen.
So next time you’re up against data loss, remember that even though there are specialized recovery tools out there (which are pretty great too), sometimes going old-school with CMD might just save the day!
That being said do keep in mind: Always have backups ready—you never know when you’ll need them again…