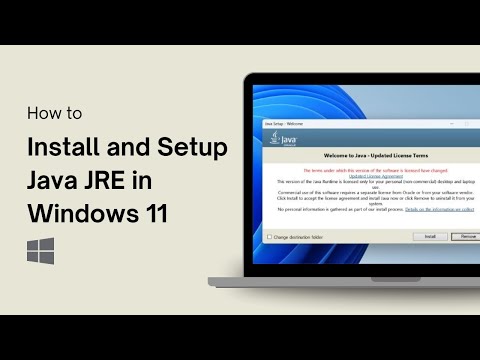
Oh man, nothing’s as frustrating as wanting to dive into a project, only to be held up by pesky installation errors. You know that moment when you’re all set to work, coffee in hand, and then bam! Java JRE 11 just refuses to cooperate on your Windows 10? Total mood killer.
I was right there with you not too long ago. I remember my excitement turning into a quick puzzlement. Honestly, it felt like the computer was laughing at me. But don’t worry—we’ll figure this out together.
Messing around with installations is never as straightforward as you’d hope, especially when random errors keep popping up like unwanted guests at a party. But hey, it’s all part of the tech adventure we’re on. Let’s roll up our sleeves and sort this out!
Java Installation Compatibility on Windows 10
Alright, installing Java JRE 11 on your Windows 10 machine can sometimes feel like navigating a maze. You might encounter compatibility issues or error messages, but no worries, we can straighten things out.
First off, you need to make sure your system meets the requirements for JRE 11. This is where folks often trip up a bit. Your Windows 10 should ideally be updated to the latest version because sometimes older versions can cause conflicts with newer software like Java.
To get started with the installation:
- Download the correct installer from Oracle’s official website. Make sure it’s the Windows x64 version if you’re running a 64-bit system.
- Open the downloaded .exe file to begin installation.
- You might run into problems if there are existing older versions of Java installed. It’s usually best to remove previous versions first through the Control Panel under ‘Programs and Features’. This can prevent those nasty little hiccups during setup.
- If an error pops up during installation saying something like “unable to install”, right-click on the installer and choose “Run as Administrator”. This often resolves permission-related errors.
Another common issue is environment variables not being set properly. You might have heard this term tossed around – it’s just about telling your computer how and where to find Java when it needs it.
Here’s how you do it:
- Right-click on ‘This PC’, select ‘Properties’, then go to ‘Advanced system settings’.
- Select ‘Environment Variables’ at bottom of window.
- You’ll see two sections: user variables and system variables. Look for one called “Path” in both sections.
- Add new by clicking ‘New’ or editing an existing entry so that paths match where JRE was installed (usually something like C:Program FilesJavajre1.11.xbin).
That feeling when everything finally works? Priceless! Just remember these steps next time around or bookmark this page if ever you face similar hurdles again… Happy coding! Or whatever you’re planning with Java!
JRE 11 Installation Errors on Windows 10
Oh boy, installing JRE 11 on Windows 10 can sometimes feel like trying to fit a square peg into a round hole, you know? I’ve been there, and it’s not fun. Let’s go over some common hiccups and how you might smooth them out.
Checking System Requirements
First off, before you even start the installation process, double-check that your system meets the requirements. Ensure your Windows 10 version is up-to-date. It’s like setting up for a party—you want everything ready before guests arrive!
Downloaded File Integrity
Another snag that pops up quite often has to do with the downloaded file itself. Make sure you’ve downloaded the correct installer from Oracle’s official site and it’s not corrupted in any way. If there’s an error message about file integrity during installation, re-download the installer.
Administrator Privileges
Here’s one of those things that can trip folks up: administrator privileges. Without them, installing JRE might be like trying to drive a car without keys—you’re going nowhere fast! Right-click on the installer and select “Run as Administrator” to give it a whirl with all needed permissions.
Path Environment Variable
Post-installation woes often stem from an incorrect PATH environment variable configuration. Sounds techy? Think of it as setting directions for Windows so it knows where to find Java when needed:
- Go to Control Panel -> System -> Advanced system settings.
- Select “Environment Variables”.
- Under System Variables, look for “Path” and click edit.
- Add something like:
C:Program FilesJavajre-11bin.
Error Messages During Installations
If you’re seeing specific error messages during installations such as “Java is already installed”, maybe there’s an old version lurking around like that mystery dish in your fridge.
- Visit Control Panel.
- Select Programs & Features.
- If older Java versions are listed there—give them their eviction notice!
Troubleshooting Installation Logs
Sometimes peeking inside installation logs offers clues when problems persist longer than expected (kinda feels like detective work!). You can find logs generated by most installers within temporary directories or specified log paths provided by installers themselves.
Remember—to keep things running smoothly long-term consider updates regularly once installed because security vulnerabilities aren’t great surprises anyone loves getting stuck dealing with!
Hope these pointers help tackle some common headaches folks run into!
Fixing Java JRE 11 Installation Errors on Windows 10
Okay, let’s roll up our sleeves and dive into fixing those pesky Java JRE 11 installation errors on Windows 10. Sometimes tech just wants to be a bit tricky, you know?
1. Check Your System Requirements
Before getting started, make sure your computer meets the system requirements for Java JRE 11. A mismatch here could be causing the hiccup you’re facing. Windows 10 should be updated, and you need at least a certain amount of RAM and storage space.
2. Download from Official Website
Ensure you’re downloading Java from the official Oracle website. Sometimes third-party sites can provide outdated or corrupted files, leading to installation errors.
3. Admin Privileges Needed
Are you running the installer as an administrator? Right-click on the installer file and select “Run as Administrator.” This step is crucial because without admin privileges, some parts of Java may not install correctly.
4. Clear Old Versions
Previous versions can sometimes interfere with new installations:
- Uninstall older versions: Go to Control Panel > Programs > Uninstall a program.
- Select older Java versions: Remove them before attempting a new installation.
- Restart your PC:, This clears any remnants hanging around.
5. Set Environment Variables Correctly
Java needs its path set correctly in your environment variables:
- Right-click My Computer > Properties > Advanced System Settings.
- Select “Environment Variables” at the bottom right corner.
- Add JAVA_HOME under system variables with the path to your JRE folder like C:Program FilesJavajre1.8.xx (replace xx with version number).
- Edit PATH variable by adding %JAVA_HOME%bin at the end.
Trust me, this little check-up often sorts lots of issues!
6. Use Offline Installer if Needed
If online installations are failing due to network blips or restrictions (oh boy, I’ve been there), try downloading an offline installer! You just double-click it — no network needed during setup.
If all else fails: reinstall everything once more — maybe even Windows itself if you’re desperate enough! You’d be amazed how many problems vanish after clean starts…
So give these steps ago — keep calm… have patience…
Installing Java JRE 11 on Windows 10 can sometimes be a bit like trying to solve a puzzle where one piece just doesn’t fit. You think it’s all going to work smoothly, and then bam—error messages pop up like uninvited guests at a party.
I remember this one time I was helping my friend Mike set up his computer for a programming course. We were all excited, you know, ready to dive into coding. Everything seemed fine and dandy until it came time to install the Java Runtime Environment (JRE) version 11. Suddenly, up popped an error message! We scratched our heads for what felt like hours.
You might run into errors like “Java not recognized” or “installation failed.” Often, it’s linked to compatibility issues or conflicting environments. Let me tell you: that experience taught us patience in spades!
First off, make sure you’ve got administrative rights on your system because without them, installing anything is like trying to drive without keys—it’s not going anywhere. And always double-check if another version of Java is lingering around; they can clash like two cats in the night.
Also, path variables can be tricky little devils! Sometimes they need adjusting so your system knows exactly where everything is supposed to go—like directing traffic after road construction.
In Mike’s case, we finally realized it was due to remnants of an older installation messing things up. A quick uninstall of the previous version using Control Panel and tidying up leftover files did wonders.
So if you’re hitting these kinds of bumps in the road with Java JRE 11 installs on Windows 10, don’t sweat it too much; everyone runs into little hiccups now and then… With determination (and maybe some online digging), you’ll get through it just fine!