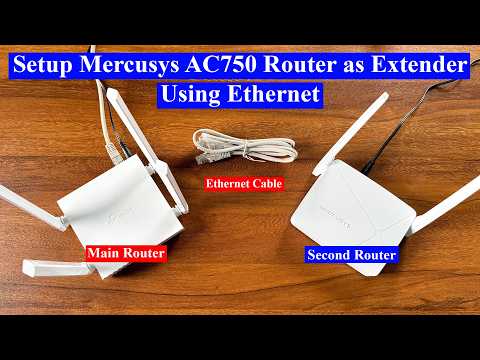
Okay, picture this. You’ve got a house that’s like an Internet black hole in one corner. Frustrating, right? You just want that sweet internet goodness flowing everywhere.
Well, if you’ve got a Mercusys router laying around, you’re in luck! It can totally act as a wired repeater and zap that signal where it’s needed most. Sounds like magic? Nah, just some smart tech wizardry.
And don’t worry—it’s not as hard as it sounds. It’s like playing with Legos once you get the hang of it! I mean really, who doesn’t love extending their WiFi without all the drama?
So buckle up; let’s see how to give your internet some serious reach.
Router Setup for Wired Extension
Sure thing! Let’s unravel the process of setting up your Mercusys router as a wired extension. Think of it like this: you’re transforming your existing network into something even more robust without going wireless. Alright, let’s break it down step by step.
First up, you should have a few things ready:
- Two routers (your main and the Mercusys one).
- An Ethernet cable, which is basically like a long physical handshake between devices.
- A computer or device for configuring settings.
Step 1: Connect Everything Up
Take that Ethernet cable and connect one end to a LAN port on your main router. The other goes into the WAN or LAN port on the Mercusys router. Yep, that’s all about making sure they can chat with each other.
Step 2: Access Router Settings
Get comfy with your preferred web browser and type in the Mercusys default IP address in the address bar—“192.168.x.x”. If you’re scratching your head about what comes after “192,” just check the user guide or peek at the label under the device.
Step 3: Dive Into Network Settings
Once you’ve accessed those settings, look around for something called “Network” or “LAN.” It’s where you adjust how your devices talk locally. Here’s a little trick: set Static IP Addresses. For example, if your main router’s IP ends in .1, try assigning .2 to .50 for other devices like our Mercusys friend here. It avoids dueling addresses!
Step 4: Disable DHCP
DHCP is like this automatic stay-in-your-lane guide for devices connecting to a network. But now we’re going manual! So switch off DHCP on the Mercusys router because we want only one device (the main router) dolling out addresses.
Step 5: Reboot and Test Connections
Give everything—routers and connections—a merry reboot so changes stick close to heart. Once back up, test by connecting another device using yet another handy Ethernet cable into an available LAN port on that configured Mercusys magic box.
And there you go! With this setup done right you’ll have extended coverage throughout more spaces without clawing through more cables—or messing with Wi-Fi signals everywhere else at home!
Hardwiring a WiFi Repeater: Compatibility Limitations
Oh, you’re thinking about hardwiring a WiFi repeater, particularly if you’ve got a Mercusys router lying around? Cool! Let’s have a chat about that.
When it comes to compatibility limitations, there are some bits and pieces you’ll wanna keep in mind. Imagine trying to fit a square peg in a round hole. Doesn’t quite work, right? Let’s try to make this all clear and easy.
Getting Started:
You need to confirm first if your Mercusys router can actually be used as a wired repeater. Not all routers can do this fancy trick. Check the router’s manual or the manufacturer’s site—it’s like reading the map before heading on an adventure.
Here’s how you could approach this:
- Ethernet Ports: Does the Mercusys have enough Ethernet ports available? You usually need at least one LAN port for hardwiring.
- Settings and Firmware: Dive into the router settings through its admin panel—often accessed via an IP address in your browser—and look for features like ‘Access Point’ or ‘Client Mode.’ These modes often let you hardwire it as a repeater.
- Cables: Make sure you’ve got adequate Ethernet cables. They’re like lifelines connecting different devices.
Configuration Steps:
Now, configuring it requires tweaking some settings. Like adjusting bicycle gears before biking up a hill—it just makes everything run smoother.
- Network Settings: Ensure your main router and your Mercusys device are on complementary IP ranges—not overlapping but within reach of each other.
- Disable DHCP Server: On your Mercusys, disable its DHCP server feature so all devices connected get their network info from your main hub.
- Cable Connection: Once configured with necessary tweakies—plug one end of an Ethernet cable into any LAN port on your primary router—the other plug goes into any available port on that trusty old Mercusys fellow of yours!
- If you’ve done everything right—the WiFi network should be extended further without those annoying drops!
Example: If your primary network uses IPs from `192.168.1.x`, set your repeater’s static IP (say `192.168.1.y`) out of the main range assigned by DHCP.
Remember though: every adventure might bring some hiccups along; they come hand-in-hand!
Testing & Performance:
Finally—you’ll want to test everything out! It’s so much fun when things work after you’ve tinkered with them…
Gotten yourself tangled along? Oh dear no worries—we’ve been there too sometimes!
Router Configuration for Repeater Mode
Configuring a router in repeater mode can sound a bit intimidating, right? But really, it’s not rocket science. You’ll find it’s kind of like setting up another room in your house to get better Wi-Fi coverage. Let’s focus on how to turn your Mercusys router into a wired repeater.
Understanding Repeater Mode: First off, when we talk about a router in repeater mode, we’re essentially turning it into an extender. The aim is to extend the range of our existing network so that it covers those annoying dead zones where Wi-Fi just doesn’t quite reach.
Your Setup Needs: So, you’ll want your Mercusys router and an Ethernet cable handy. The cool part? It’s gonna act as an extra helping hand for your main network by boosting the signal further.
Here’s the fun part!
- Connect Your Hardware: Take that Ethernet cable and plug one end into any LAN port of your main router and the other into the WAN or Internet port on your Mercusys.
-
Access the Router Interface: Get yourself onto a computer connected to either of these routers. Open up an internet browser like Chrome or Firefox. Type in something like
192.168.0.1or check under your router for its default access IP. - Log In: You’ll probably need some credentials here—usually “admin” for both username and password, unless you’ve changed them beforehand.
-
Navigating Settings: Find something along lines of “Operation Mode” or “Working Mode”. Here you might see options like ‘Router’, ‘AP’, ‘Repeater’, etc.
For this task, pick “wired repeater“. - Synchronize with Main Network: Set up this new fellow (the Mercusys) using the same SSID (that’s just a fancy term for network name) as our primary network and with identical security settings—you know passwords’n’all that jazz!
Just imagine how great it will feel seeing those extra bars on devices!
A little anecdote: I has had family dinners ruined simply because we couldn’t stream funny videos from grandparents’ backyard.
Now wrap things up: give everything time reboot properly; page should refresh; verify connection looks good across gadgets around home; test consistency speeds near this secondary unit itself yet again et voila! A more robust wireless environment happy surfing awaits everyone involved here…
Oh, I remember the time when I was trying to extend the Wi-Fi coverage in my old house. You know how those dead zones can be so annoying, right? It felt like I’d entered a mysterious Bermuda triangle of no internet connection every time I went to certain rooms. Anyway, that’s when someone suggested configuring a wired repeater.
Now, if you’re using a Mercusys router, setting it up as a wired repeater can be quite helpful. The process might sound technical at first — you’re essentially turning your extra Mercusys router into an extension of your current network by connecting it directly via Ethernet cable to your primary router.
Here’s what happens: you plug one end of that cable into the LAN port of your main router and the other end into one of the LAN ports on your Mercusys router. This essentially feeds internet directly through this cable and out again, boosting signal strength without needing additional wireless connections which can sometimes get iffy.
On that note, there’s this simple joy in walking through every corner of your home with all bars full on your Wi-Fi signal! Of course, you’ll need access to the router’s management page: typically found at an address like 192.168.1.1 or some variation depending on model specifics. Once you’re inside — pretty exciting stuff for techy folks — you go through options like DHCP settings and ensure it doesn’t conflict with existing ones from primary networks.
I got caught once forgetting those little details; took me ages wondering why nothing seemed different! So yeah double-checking these is always smart!