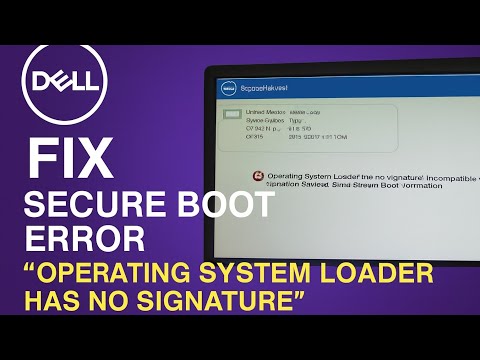
You know that feeling when you’re all set to start your day, coffee in hand, and your computer decides it’s not gonna play nice? Yeah, it’s like the universe just hit you with a plot twist. Picture this: you power up your Dell laptop, expecting everything to go smoothly… and bam! “Secure Boot Error” pops up on the screen. Talk about a buzzkill.
You might be staring at that error message like it’s some cryptic puzzle from an escape room. But fear not, my friend—it’s more common than you’d think. It’s kinda like forgetting where you parked at the mall; annoying but fixable.
Anyway, let’s get into what might be going on here and how you can gently nudge your laptop back into action. We’ll get through this together!
Dell Secure Boot Error Causes
When you wake up, ready to start your day, the last thing you want is for your computer to greet you with a “Secure Boot Error” on startup. It’s like the digital version of a flat tire right before a big road trip. But don’t panic; let’s explore what’s going on and what might be causing this error.
Understanding Secure Boot
Secure Boot is a security feature designed to protect your system from malware attacks during the boot process. Basically, it ensures that only trusted software can load when you turn on your computer. It’s a bit like having a bouncer at the club entrance checking IDs: if something’s not legit, it’s not getting in.
Common Causes of Dell Secure Boot Errors
- Firmware Updates: Sometimes, after updating firmware or BIOS, settings can get changed unintentionally. This can lead to discrepancies between your current setup and what Secure Boot expects.
- Operating System Changes: Installing or upgrading an operating system that’s not recognized by Secure Boot can cause issues. Maybe you’ve recently switched from one OS to another? That could be it.
- Corrupted Boot Files: If some vital boot files are missing or damaged—say due to a power failure or an interrupted update—that can trigger an error.
- User Configuration Changes: Occasionally tinkering with BIOS/UEFI settings without fully understanding their impact may turn off necessary features inadvertently.
- Hardware Additions: Adding new hardware components which aren’t compatible with Secure Boot settings could also spark errors.
Troubleshooting Steps
Getting past this hurdle doesn’t have to be daunting!
- If you’ve just updated something (like BIOS), try reverting back if possible and see if things settle down again.
- You might consider resetting BIOS/UEFI settings back to default values as sometimes configurations just need centering again.
- If changes were made recently regarding operating systems (especially non-trusted ones), double-check they align properly with Secure Boot policies.
Imagine once I got stuck in such situations over Christmas—right when everyone wanted holiday photos printed! Took some patience but remembering that most glitches are temporary helped keep calm till solutions arrived.
These potential fixes should ease concerns significantly regarding any Dell startup woes tied specifically towards secure boot errors encountered alongside its usage wherever found troublingly existent!
Dell Secure Boot Startup Error
Oh, the dreaded “”—it can be quite a puzzle, right? Let’s open this box and see what’s inside. This error pops up when your computer’s Secure Boot feature isn’t doing its thing the right way. Now, what exactly is Secure Boot? Imagine it like a security guard at the entrance of your computer’s operating system. It’s there to stop any unauthorized or harmful software from sneaking in during startup.
Why does this happen? Well, one of the most common reasons is a configuration hiccup in your BIOS settings. Think of it as if you’d accidentally rearranged some wires under the hood without realizing it.
To get things back on track, you might need to tweak these settings:
- Access the BIOS Settings: Start by turning off your Dell computer. When you hit the power button to turn it back on, quickly press F2. This key usually gets you into BIOS mode on Dell machines.
- Navigating Through BIOS: Inside BIOS, use arrow keys like you’re playing an old-school video game and go to “Boot” or “Security.” It might look different depending on your model.
- Secure Boot Option: Look for “Secure Boot.” If it’s enabled and giving trouble, try disabling it for now. You can enable it again once things are sorted out.
- Save Changes & Exit: Press F10, which should save all changes and exit BIOS mode—a way like saying “Seal those changes and close this door!”
Now what if that doesn’t fix things? Sometimes updating—like a wardrobe refresh—is necessary! Check if there’s a newer version of firmware available for download from Dell’s support site.
If even after this cleanup act nothing improves (booo!), maybe there’s something bigger at play here involving hardware faults or needing professional intervention…but let’s not jump there yet!
Just remember: Keep calm ☺️—and follow each step slowly but surely until success greets you again upon rebooting!
Secure Boot Error Causes on Dell Windows 10
Alright, let’s dig into this. Imagine you’re starting up your Dell computer, and instead of a smooth boot-up, you land on an unexpected error screen. Frustrating, right? One of these little hiccups could be a Secure Boot error on your Windows 10 machine. But don’t worry—I’ve got some insights to share with you.
What is Secure Boot?
Secure Boot is like a gatekeeper for your PC’s startup process. It’s designed to protect your system from malicious software by ensuring only trusted applications can start during the boot-up phase. Sounds super useful, doesn’t it? But sometimes this very feature can cause issues if things get tangled up.
Why Does This Error Happen?
There are several reasons why you might encounter a Secure Boot error with your Dell Windows 10 computer:
- Firmware Updates: If there’s been a recent BIOS or UEFI update and something goes awry during installation—well, that might throw off the balance.
- Hardware Changes: Installing new hardware like graphics cards or RAM can sometimes confuse Secure Boot since it likes everything to match its records.
- Software Interruptions: Wow, software updates—particularly those involving drivers or critical system processes—can upset the Secure Boot process.
Troubleshooting Tips
Here’s what you can do right at home:
- Check BIOS/UEFI Settings: Restart your computer and press F2 (or another designated key) to enter BIOS settings. Verify that Secure Boot is enabled and look for any suspicious configurations.
- Reset BIOS Defaults: Sometimes restoring default settings in the BIOS can clear out discrepancies causing issues.
- Update Your System: Make sure both Windows and all drivers are fully updated—the little things matter!
- Cautiously Disable Secure Boot:: If nothing works—even reluctantly—you could temporarily disable Secure Boot to gain access. Just be cautious since it more vulnerable without it.
Remember that once upon a time I fiddled around changing my laptop’s motherboard upgrade—not realizing mixing parts messes up existing security settings—and ended up stuck before I knew what hit me!
I hope these points make navigating that pesky error feel less daunting—and help bring back normalcy faster than expected!
Oh, I’ve got a story for you! You know that little moment of terror when you press the power button on your computer, expecting it to whirr into life, and… nothing. Well, not exactly nothing. Instead, you are greeted by an ominous error message: “Secure Boot Error.” It’s like a digital slap in the face first thing in the morning. I’ve been there.
Let me tell you about my friend Sarah. She’s this amazing graphic designer who really relies on her laptop—a Dell Inspiron, if I remember correctly—for everything from work to catching up with her favorite shows. One day out of nowhere, she ran into this Secure Boot Error issue and called me up in a panic.
So here’s the deal with that Secure Boot thing—it’s supposed to keep your system safe from malicious software during start-up by ensuring only trusted software can load. But sometimes things get wonky—especially after updates or hardware changes—and suddenly your system doesn’t recognize even its own shoes, so to speak.
When Sarah encountered this error her first reaction was frustration—and understandably so! Oh man was she worried she’d lost projects and files forever! But usually what happens is it just needs a gentle nudge back into order.
First off, you’ll want to head over to BIOS settings—that’s like the control center for things before Windows even gets going. You do this by pressing F2 right after turning on your machine—you gotta be quick though! Once you’re there look for that “Secure Boot” option—sometimes it just needs switching off and back on again or resetting defaults.
Long story short? We managed to reset everything without hassle; Sarah’s laptop booted right up again like nothing happened—all it took was some patience and deep breaths!
Honestly facing these tech hiccups together gave us both more confidence handling future frolics technology throws our way—not easy but doable as part of digital life adventures!