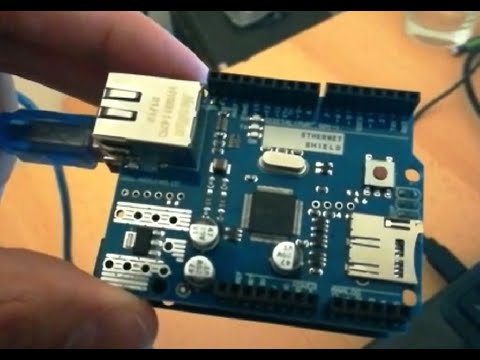
You ever had one of those days when your gadgets just won’t cooperate? Like, you’re all set to turn on your latest DIY project using an Arduino Ethernet module, and bam! Connection issues. Frustrating, right?
I remember this one time, I was trying to show off my cool smart appliance setup to my pals. Everything was ready; I’d even tidied up the place! But the darn module refused to connect. Talk about embarrassing.
It’s like these gizmos have a mind of their own sometimes. You just sit there questioning every wire and code line you painstakingly put together. What went wrong, you wonder? Is it the wiring? The settings? Or maybe… just maybe… you’re in need of a little break.
If that’s where you are right now, hang tight! We’re diving into that world of tiny connections and mysterious failures together. It’s gonna be okay—promise!
Arduino Ethernet Client Code Example
Connecting your Arduino to the internet using an Ethernet module can be a bit tricky, but don’t worry! Let’s take a small journey through this process together and I’ll share some insights that might help you with those pesky connection failures.
First off, when dealing with an Arduino Ethernet Client, you want to begin with the basics. Make sure you’ve got all the hardware connections set up correctly. Double and triple-check those wires—you won’t believe how often something simple like that can trip you up.
Here’s a basic sketch example for setting up an Ethernet client:
“`cpp
#include
#include
// Enter a MAC address and IP address for your controller
byte mac[] = { 0xDE, 0xAD, 0xBE, 0xEF, 0xFE, 0xED };
IPAddress ip(192, 168, 1, 177);
// Initialize the Ethernet client library
// with the server’s IP address and port
IPAddress server(192, 168, 1, 2);
EthernetClient client;
void setup() {
// Start the Ethernet connection
Ethernet.begin(mac, ip);
if (client.connect(server, 80)) {
Serial.println(“Connected”);
client.println(“GET / HTTP/1.1”);
client.println(“Host: www.example.com”);
client.println(“Connection: close”);
client.println();
} else {
Serial.println(“Connection failed”);
}
}
void loop() {
if (client.available()) {
char c = client.read();
Serial.print(c);
}
if (!client.connected()) {
Serial.println();
Serial.println(“disconnecting.”);
client.stop();
while (true);
}
}
“`
Let’s break it down into key points where things could go wrong and how to fix them:
- Check Your Connections: Make sure all wires are properly connected. Check both ends—believe me it’s easy to miss.
- IP Address Conflicts: Ensure that your Arduino’s IP doesn’t conflict with another device on your network.
- Network Configuration: Confirm that you’re using correct network settings—like gateway and subnet mask.
- Cables: Used cable in good condition? Faulty cables could be problematic.
Now here’s a little anecdote from my own experience: once upon a time I spent nearly two hours troubleshooting because my laptop’s network was filtering out certain types of packets coming from the Arduino. Turns out nothing was wrong in my setup; I just needed to tweak firewall settings!
Having issues still even after everything seems correct on paper? You might be facing environmental factors or hardware quirks—consider trying other cables or ports.
Remember patience is key here! Don’t get too frustrated—it’ll click eventually! If it helps jot down troubleshooting steps as you go along; might save you next time round.
Arduino Ethernet IP Library Compatibility
Imagine this: You’re working on an Arduino project, and everything’s going great until you decide to connect it to the internet using an Ethernet module. You hook up all the wiring, write your brilliant code, hit upload… and nothing. No connection. Frustrating, right?
When dealing with , several factors can lead to a module connection failure. To guide you through this maze and give your project a fighting chance, here are some crucial aspects to consider:
- Check Your Hardware Connections: Sometimes it’s as simple as a loose wire or incorrect pin connections causing havoc. Double-check that everything is snug and correctly hooked up.
- Library Versions Matter: The compatibility between the library version you’re using and your specific Ethernet module is crucial. Libraries can be updated frequently, so make sure you’re using one that’s compatible with your hardware.
- Power Supply: An often overlooked issue is providing sufficient power to both the Arduino board and the Ethernet shield or module. Insufficient power can cause strange errors.
- Cable Quality: Believe it or not, a faulty Ethernet cable could be the culprit behind connection problems! Swap it out for another one just in case—better safe than sorry!
It’s worth pausing here for a quick story: There was once this fellow tinkering away at their project late into the night (as you do). After hours of frustration over non-responsive hardware, all it took was switching library versions for their setup—and voila! Perfect connectivity.
Troubleshooting with Your Code:
- Error Messages Are Your Friends: They may seem intimidating but pay attention—they’re trying to help you figure out what’s wrong (even if sometimes cryptic!).
- Simplify First Tests: Start small by sending basic data like simple HTTP requests instead of tackling complex tasks immediately; gradually work towards more advanced features when things stabilize.
And remember that community forums could be huge lifesavers if nothing seems apparent after checking everything mentioned above—you might find those who encountered similar issues willing enough share insights from personal experiences too!
Arduino Audio Shield Compatibility Requirements
Ever tried to match an Arduino Audio Shield with your favorite board and felt like it’s just not clicking? Happens more often than you think, and trust me, it’s not just you. Many folks get caught up in the web of compatibility issues and end up wondering if they’re missing something obvious. Let’s see how you can make these pieces work together.
First off, there’s this whole thing about ensuring that the shield is compatible with your Arduino board model. Sounds simple enough, right? But then there’s quirks and specifics! Some shields need a bit more juice or pin connections than others. You probably want to check the datasheet of both your board and the shield to confirm power and I/O requirements.
And then there’s the library support. You need libraries—kind of like guides—for different audio functionalities. Trust me, without them, you’ll be scratching your head trying to get sound out of those tiny speakers.
- Check Pin Compatibility: Make sure that pins needed by the audio shield don’t clash with those used by another module you’re plugging in.
- Power Requirements Matter: If your setup gets thirsty for power (especially with an Ethernet Module involved), consider using an external power supply for stability.
- SPI Connections: Both your audio shield and Ethernet Module might want to talk over SPI (Serial Peripheral Interface). Double-check they’re happily sharing or use a multiplexer!
- Add Swell libraries:: Download any necessary Arduino libraries from reputable sources online.
But hey—I know we mentioned Ethernet Modules earlier. Having trouble connecting them too? What happens is sometimes it’s due to IP conflicts or misconfigured network settings. To solve that headache: make sure DHCP setting on network is enabled if it’s supposed be automatic setup!
You may discover using a separate breadboard helps during development phases before making things permanent on PCB—gives room for trial error without ruining components.
Hopefully now all becomes clearer road map tackling these devices; remember patience perseverance key mastering projects here fun learning process not one-size-fits-all approach conquering challenges presented techy world DIY gadgetry!
Oh boy, Arduino Ethernet Module connection failures can be a real head-scratcher, right? I remember the first time I dabbled with setting up one of these things. I thought, “How hard can it be to connect an Arduino to the internet?” Turns out, it was like a puzzle missing half its pieces—or at least that’s how it felt at the time.
You see, one of those things that people often overlook is the simplicity of getting all the cables and connections in just right. It’s like trying to thread a needle after having too much coffee—shaky hands don’t help! From mismatched pins to loose wires… sometimes it’s as straightforward as plugging something in correctly.
And let’s not forget about software hiccups. Oh man, those can be sneaky. You might upload your sketch thinking everything’s set and bam—no connection! It’s like being ghosted by your favorite coffee shop when you need caffeine desperately. Checking for library updates or incorrect IP configurations can save you from tearing out your hair.
I’ve watched friends go through this process too. One buddy spent hours troubleshooting before realizing his issue was a mistyped MAC address in his code. What looked like gibberish turned into hours of frustration until he spotted that pesky mistake.
Honestly, patience becomes key when you’re working with these modules. It’s easy to get caught up in wanting immediate results but sometimes stepping back for a bit helps sort things out. Maybe make yourself a cup of tea while you’re waiting? You know?
These little modules may seem daunting initially but once you’ve tackled those initial hurdles (and maybe learned from my mistakes), managing them gets easier every time—even if they do throw curveballs occasionally!