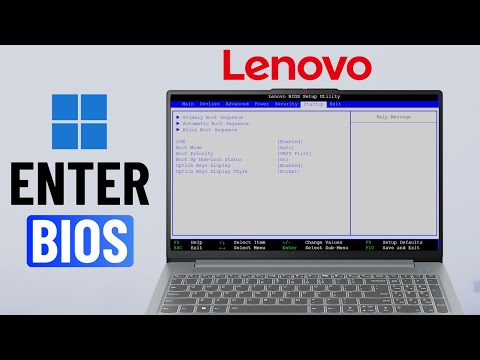
Alright, imagine this: You’ve got your trusty Lenovo notebook, and you’re feeling pretty good about it. But you heard somewhere that updating the BIOS could make it even better. You’re intrigued but also a bit nervous, right? BIOS updates sound like one of those techy things that can either go really well or… well, not so much.
Honestly, I remember the first time I thought about fiddling with my own BIOS. I felt like I was about to perform some brain surgery! But trust me, it’s not as intimidating as it seems once you know the ropes.
Okay then, let’s get comfy and chat about how to sneak into your Lenovo’s BIOS without breaking a sweat. It’s like finding the secret back door to your computer’s brain—kinda cool and mysterious at the same time!
Ready for some simple steps that’ll make you feel like a tech wizard? Let’s unravel this together. Keep that coffee handy!
Accessing and Updating Lenovo BIOS on Windows 10
Hey, friend! If you’re trying to get into the BIOS of your Lenovo laptop and maybe even update it on Windows 10, you’ve come to the right place. The BIOS (Basic Input/Output System) is that tiny bit of software that boots up your computer and gets things rolling. It’s like the head chef in a restaurant kitchen!
Accessing Lenovo BIOS
First off, let’s see how you can jump into the BIOS menu:
- Restart your laptop: While it’s booting back up, keep tapping the F2 key. Depending on the model, you might need to try F1, F12, or even press a small button near your power button called “Novo.” It’s sort of like finding a secret door!
- Windows recovery: If those keys don’t do their magic, restart while holding down the “Shift”. This gets you into recovery mode. Go for: Troubleshoot > Advanced options > UEFI Firmware Settings. Click Restart.
Once inside, take care with what you change—it’s like being in charge of all those little chefs in our analogy.
Updating Lenovo BIOS
Updating it means getting it all dressed up with new features or fixes. Here’s how you can do it without breaking a sweat:
- Check current version: Type “msinfo32” in your search bar and hit Enter. Look for “BIOS Version/Date”—this is just to know where you’re starting from.
- Straight from Lenovo: Head over to their official support site using another device (safety first!). Look up your laptop model and download any newer updates than what you saw before.
- The update itself:
– Make sure you’re plugged into power; playing it safe!
– Run that downloaded file following whatever prompts show up.
– Let it work through its process without interruptions.
It kind of feels like watching paint dry but important nonetheless—a wrong move might lead to problems booting up!
Always remember: while updating your BIOS can solve certain issues or improve performance straight away—it isn’t something you’d do regularly unless there are specific bugs needing addressing.
There—you should now have everything needed under wraps about accessing/updating Lenovo’s biographical brains safely!
Accessing BIOS on Lenovo Laptop Windows 11
Gaining access to the BIOS on a Lenovo laptop running Windows 11 might seem a bit tricky if you’re not used to it. Don’t worry, I’m here to guide you through this process! Imagine BIOS like that secret basement in your house where all the foundational stuff is kept—it’s essential, but you don’t go there every day.
Getting into BIOS Menu
When you want to access the BIOS, timing is everything. Here’s what you should do:
- First things first, shut down your laptop completely. Make sure it’s off and not in sleep or hibernate mode.
- Press the power button to turn on your laptop.
- Now, this is important: immediately start pressing the F2 key repeatedly. It’s like trying different keys until one works; except this time we’re sure F2 will do its magic!
You will soon see your computer screen changing as it launches into that hidden BIOS world.
Using Novo Button
Some Lenovo laptops have a tiny button called the “Novo” button. If yours does too, here’s how you’ll use it:
- Turn off your computer completely.
- No joke! Look for a small pinhole on one side of your laptop labeled “Novo.”
- You can use an unrolled paperclip (or something similar) to gently press this button.
- A menu will pop up with different options—select “Bios Setup” from there.
Navigating within Your BIOS Setup
Once you’re inside—don’t panic if things look technical or confusing—that’s what makes these settings powerful!
- You can move around using arrow keys (left-right up-down).
- If needed make any changes by selecting options from various menus listed (use enter + esc keys wisely).
Feel free experimenting safely since changes won’t be applied without confirmation anyway; so explore until comfortable before deciding anything permanent! Remember though: adjusting settings here could impact how smoothly everything runs later!
Also remember installing updates afterwards is crucial because outdated firmware causes computers’ quirks nobody enjoys dealing with over long periods… yikes yup that’s life guys living home digital times y’all follow me?
Lenovo Ideapad BIOS Access Key
Ever tried to change some settings on your Lenovo Ideapad, only to find yourself stuck at the BIOS access point? It’s like trying to get into a secret club sometimes. But don’t worry! Accessing the Lenovo Ideapad BIOS can be a pretty straightforward process once you know the right key—or keys.
- BIOS Access Key: The usual suspect for most Lenovo laptops, including the Ideapad series, is the F2 key. To get in there, just restart your laptop and when you see that first splash of the Lenovo logo, start tapping F2 like you’re playing a game of whack-a-mole! If you’re quick enough—you’ll dive right into BIOS land.
- The Novo Button: Ever notice that tiny pinhole marked with an arrow near your power button? That’s called the Novo button. It’s like having a secret trapdoor to your BIOS. You’ll need something small like a paperclip to access it. When you use it while powering on—voilà—the Novo Menu pops up with an option for entering BIOS setup.
Friendly reminder though—don’t mess around in there unless you know what you’re doing! The last thing anyone wants is their computer acting all weird after tweaking settings they shouldn’t have. We’ve all been there tweaking something out of curiosity and then scratching our heads wondering what went wrong.
If updating is what you’re after—Lenovo makes it pretty simple too. They usually provide firmware updates directly from their official site or through their Vantage app designed especially for this stuff.
Remember: always back up any crucial data before making significant changes in these areas!
Accessing and updating safely keeps things running smoothly without any hiccups along way—and who doesn’t love trouble-free tech experiences anyway?
Ah, Lenovo notebooks. They do pack quite a punch, don’t they? If you’ve got one, you’re probably aware of how sturdy and reliable they can be. You might not think about your BIOS too often—this mysterious little program tucked away in your machine. But sometimes you get curious or need to tweak something for it to run smoother.
I remember that time my buddy Alex wanted to upgrade his laptop’s hardware: he was itching for more RAM to speed things up. He hit a wall because his notebook didn’t recognize the new memory stick he installed. We were puzzled for a while until we realized the BIOS needed an update.
Accessing the BIOS is like sneaking into a secret room in your computer’s brain—you’ve got to strike during that brief window right at startup! With most Lenovo notebooks, tapping F2 or F10 when you see the Lenovo logo flash on screen is your ticket in. It usually takes a couple of tries before you get the timing right. I mean, who doesn’t love starting their day with some good old trial and error?
Updating it safely is another thing entirely; it’s all about minimizing risks! First off, you’ll want to download any updates directly from Lenovo’s official website—third-party sources can be sketchy! And always keep your device plugged into power because losing juice mid-update? Yep, that’s asking for trouble.
It’s fascinating how just pressing those few keys brings you face-to-face with settings that control so much more than you realize. Like having keys to unlock extra potential within this little machine that’s been by your side through countless all-nighters or Netflix marathons.
So next time you’re diving into this world hidden behind startup screens and blinking cursors—do tread carefully—but remember how empowering it feels knowing just what these few steps can unlock!