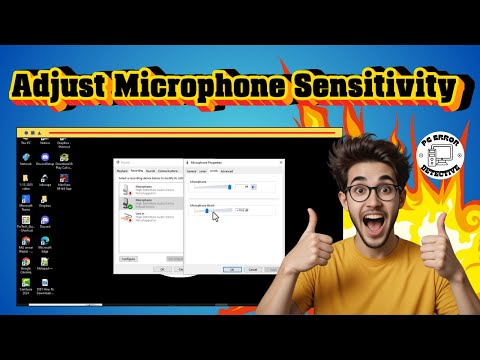
Alright, imagine this. You’re all set for your big online meeting or ready to record that podcast you’ve been itching to start. The spotlight’s on, and then—oops!—your microphone decides it wants a day off. Frustrating, right?
I’ve been there too. You think everything’s going smoothly and suddenly you sound like a distant robot or a whispering ghost. Not cool at all when you’re trying to impress your boss or wow your audience!
But guess what? Adjusting those microphone settings on Windows 10 isn’t as tricky as it might seem. Kind of like tuning an old radio—you just need the right knobs and a bit of patience.
So if you’re dealing with mic troubles, relax! I’ll walk you through some easy steps to get that mic back in action and make sure you’re coming through loud and clear in no time.
Determining Microphone Compatibility with PC
Determining if your microphone is compatible with your PC can feel like a bit of a puzzle. But don’t worry, it’s simpler than it seems once you know what to look for. Let me walk you through it.
Check the Connection Type:
Different microphones use different types of connectors, and this can be the first clue about compatibility.
- USB Microphones: These are pretty straightforward. If your computer has a USB port, which most do these days, you’re good to go.
- 3.5mm Jack: This is also very common. Look for the pink or red port on your PC—this usually means it’s for a microphone.
- XLR Mics: Now these are typically for more professional setups and will require an audio interface that connects via USB or other options.
Operating System Requirements:
Make sure that the microphone’s drivers or software (if any) is supported by Windows 10. Most modern mics will be plug-and-play with minimal fuss.
Adjusting Microphone Settings on Windows 10:
Let’s say you’ve plugged in your mic and want to adjust its settings:
- Access Settings: Right-click on the speaker icon in your taskbar & choose “Sounds.”
- Select Your Microphone: Head over to the “Recording” tab and find your mic in the list.
- Tweak as Needed: You can set levels and enhance audio quality—try adding noise suppression if needed!
If you ever get stuck, remember: there’s always someone out there who’s faced similar issues. And sometimes all it needs is patience and maybe a little help from our trusty friend called Google!
Adjusting Microphone Settings on Windows 10
Okay, imagine this: you’re all set for an important video call or a fierce gaming session, and your microphone’s just not playing ball. Frustrating, huh? Let’s make sure your microphone settings on Windows 10 are just right for whatever you’ve got going on.
First up, you need to get to the settings menu. You can open the Start menu by clicking the little Windows icon at the bottom left of your screen and then select “Settings.” It’s like the control center of your computer.
- Hop into System Settings: Once you’re in Settings, click on “System.” That’s where all the hardware controls hide.
- Open Sound Settings: Look for “Sound” on the left panel. Clicking it will show you everything sound-related.
Now that you’re in Sound settings, you’ll spot a section called “Input.” That’s where magic happens with microphones.
- Select Your Microphone: If there’s more than one device listed under Input Device (like a webcam mic or headset), choose one you want to use from drop-down list.
- Test Your Microphone: Speak into it; see if level bars move under Test your microphone. If they don’t move much or at all we might have another problem.
One time I was helping my cousin prepare her sound setup for an online class. Turns out her laptop mic was selected by default when she used headphones with built-in mic. No wonder nobody could hear her very well!
And what if testing shows no sound at all? Don’t panic yet! Check whether it’s muted physically (some mics have button/switch) or in software controls.
Additionally:
- Tweak Input Volume:You can adjust volume using slider below input device list–this helps make sure voice won’t be too loud/distorted either!
- Troubleshoot Further? Head back upper area & find link labeled something like “Troubleshoot,” which offers automatic fix attempts–worth trying!
Dust off basics & grab control over how others hear ya!
Configuring Microphone Settings on Windows 11
Oh, microphones! They can be tricky little things sometimes, can’t they? You might be all set to dive into a video call or record something cool, but then—bam! The mic isn’t working right. Let’s see how to sort that out on Windows 11.
First thing’s first, let’s make sure your mic is connected properly. It sounds basic, but you wouldn’t believe how often cables aren’t fully plugged in. If it’s wireless, ensure it’s paired correctly.
Now getting into the nitty-gritty:
1. Open Settings: Just hit that Start button and choose “Settings.” Easy peasy.
2. Navigate to Sound: Over here, click on the “System” option and then on “Sound.”
3. Check your input device:
- Under “Input,” you’ll see a list of devices.
- Select your microphone from this list.
If you don’t see it there, we might have a problem with drivers or connections.
Okay, you’ve found it! Next step:
Adjusting Input Volume: There’s always that awkward moment when people can’t hear you well during calls.
- You’ll find an option for “Input Volume.” Slide it up if folks can’t hear you; lower it if they’re complaining about noise.
Ever tested the mic directly in Windows? It’s neat!
Microphone Test:
– In the same section under “Test your microphone,” try speaking into it.
– You’ll notice some blue bars moving—if not, adjust that volume again or double-check connectivity.
Ah, privacy is also big these days!
Ensure Mic Access:
- Nip over to “Privacy & Security” in settings and find “Microphone.” Make sure apps you’re using have permission to access the microphone.
There’s more advanced stuff too like managing sound enhancements or disabling them completely in case of issues like echoing. But that’s another story for another day!
Oops… one last bit—drivers! Sometimes mics play up just because those little software pieces are out of date or not installed correctly.
So remember: check physical connections first (simple yet top culprits!), dive through basic settings next while paying attention especially on test parts; Privacy options are crucial these days particularly given modern app permissions requirements – who knew right?
Solved everything now? Awesome! You’re back live ready whether recording music pieces (or podcasts), joining work meetings without disturbances… Great vibes only now eh what do ya reckon?!
You ever get that feeling when you’re in the middle of an online meeting, and suddenly everyone’s looking at you funny? Not because of what you’re saying, but because they can’t hear you or there’s some weird noise coming through your mic. Yep, we’ve all been there. It’s both frustrating and a bit embarrassing, frankly.
This is where getting those microphone settings right on Windows 10 becomes the hero of our stories. You know how it is—you plug in your brand new microphone, expecting to sound like a radio host, only to have folks ask if you’re underwater. I remember once trying to give a presentation from home during a thunderstorm. Adjusting my mic settings couldn’t stop the thunder (obviously!), but it sure helped cut down on that background noise.
First things first: head over to the sound settings on your computer. It’s kinda like taking your car for a check-up—it’s gotta be done! You can find it by right-clicking on that little speaker icon down by the clock and selecting sounds. Then click on the “Recording” tab. This is where all your attached microphones appear as if they were waiting for their turn to shine.
You might notice one labeled as ‘Default Device.’ That’s the main guy Windows listens to by default—just make sure it’s really picking up from the mic you want!
Sometimes, though, even if everything looks right, things still aren’t great! Volume too low? Or maybe it’s picking up too much ambient noise? Head into ‘Properties’ for more detailed adjustments under ‘Levels’ and ‘Enhancements’. Play around with them until ya get that sweet spot balance!
It takes patience—like teaching your grandma tech tricks—but seeing (or rather hearing) those results in clear communication feels pretty awesome after all those trials.
Hopefully now you’ll never miss another chance letting people hear what wonderful insights you’ve got lined up without any tech hiccups stealing away center stage!