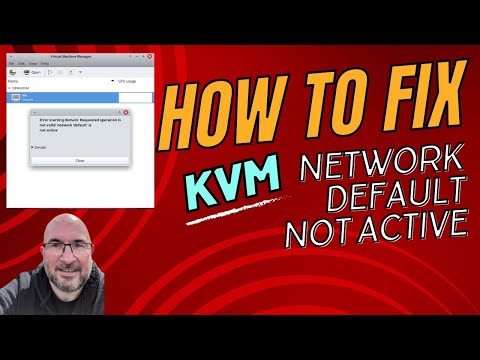
Alright, so you’ve got your oVirt KVM setup, huh? Nice! But, oh dear, things aren’t connecting the way they should. I mean, who hasn’t been there with these network gremlins playing hide and seek?
You’re probably thinking it’s something super complex under the hood. Relax! It’s often just a little thing here or there causing all the fuss.
Let me tell ya, I remember this one time when nothing seemed to work until—bam!—I realized a tiny checkbox was unchecked. Crazy how that happens, right?
Anyway, let’s try and make this whole network mess less of a headache for you. Trust me, once you get it sorted out, you’ll feel like you’ve conquered Everest—or at least a mini version of it! So let’s jump right in and sort this out together. Sound good?
Network Setup Challenges on oVirt KVM with Windows 11
Alright, let’s chat about setting up networks on oVirt KVM when you’re running Windows 11. It’s one of those things that can feel like a puzzle, but let’s break it down step by step.
First off, let’s talk about what we’re dealing with. oVirt is basically this neat platform that helps you manage virtual machines (VMs), and it’s based on KVM—a hypervisor that’s super popular for its performance. When you’re trying to get Windows 11 to play nice within oVirt, network setup can sometimes throw a few curveballs your way.
Here’s where you might hit a snag: configuring the network so your Windows VM actually connects without hiccups. Now, imagine you’ve got your Windows 11 VM set up, but the network connection is acting like a rebellious teenager—doesn’t want to cooperate at all!
One thing you should check first is whether the network interface controllers (NICs) are properly mapped in oVirt’s admin panel. If they’re not linked correctly, the VM may just sit there scratching its head wondering how to connect.
- Bridge Mode: This setting lets your VM appear as a separate device on your network. It’s great for most cases since it behaves like any other computer connected via Ethernet.
- NAT (Network Address Translation): Use this if you’re looking to simplify things—especially if you’re limited by IP addresses or security policies.
For example, I remember setting up my own little home network using oVirt with all these cool Linux servers and then adding a Windows 11 machine into it was tricky at first because of these setup issues!
The next piece of advice is drivers. Often they’re forgotten about but are vital! Ensure that the virtio drivers are installed on your guest OS—here being our beloved Win 11. These drivers help optimize virtualization performance by allowing better communication between host and guest systems; otherwise known as “magic speed boosters.”
Finally: firewall settings! Firewalls sometimes love blocking everything under the sun if not configured properly—so checking both host-side firewalls along with anything running within Win11 will certainly ease connectivity woes too…like opening necessary ports manually through control panels within individual machines too similar fashion aside whether custom rules needed therein assists also ensuring smooth sailing henceforth avoiding those occasional tidal waves instead surfing peacefully…
So go ahead give these tips shot see magic unfold before very eyes indeed because nailing down correct configurations key achieving zen-like harmony peace technical realm certainly feels satisfying doesn’t absolute bliss quite fitting metaphor describes especially after times stubborn connectivity speak truth now doesn’t simply sensational result desired journey fantastically gratifying outcome ensures smooth streaming internet phenomena unfolds flawlessly beyond expectations satisfied always when delighted never better joyous occasions celebrated heartily exciting happens lively scenarios develop wondrous transformations daily routine seamlessly invigorates renewed vigor alike.
Windows 10 Network Setup on oVirt KVM
Setting up Windows 10 on oVirt KVM can feel a bit like trying to solve a puzzle, but once you know the steps, it’s not too bad. You might be familiar with oVirt; it’s that open-source virtualization solution that many use to manage virtual machines (VMs) with KVM as the hypervisor. And hey, if you’re facing some hiccups setting up the network for your Windows 10 VM on it, let’s walk through this together.
First things first: Ensure your oVirt environment is all set up and running smoothly. If there are any updates pending for oVirt or your hosts, it’s best to take care of those right off the bat.
Creating a Virtual Machine (VM):
- Head over to your oVirt dashboard and select “New VM”.
- Select “Windows” as your operating system type and go with “Windows 10” for the version.
- You’ll want to allocate enough resources like CPU and RAM based on what you plan to do with this VM.
The Network Setup Part:
- You need first check if there’s already a configured network interface present. Go into the Network Interfaces tab.
- Add an interface by clicking “Add” and choose a network from the drop-down menu that connects your VM securely to other devices or VMs.
And here’s one little tip: Many folks find that using an emulated e1000 driver sometimes helps in resolving compatibility issues with Windows VMs.
Installing Tools:
It’s always wise after setting up the OS in any virtualization environment to install relevant tools—like Guest Agent software—because this helps improve functionality such as mouse handling between host/guest systems or facilitating better control over networking features.
You’ll find these under “Installation Sources” once inside already deployed instance setup processes themselves via console windows provided within standard deployments base templates offered across board initial options presented when creating new vm profiles beforehand too remember chooses correctly at start!
Once everything’s done there run-through updates keep updated recent patches bugs fixes addressed keeping safe secure experiencing optimal performance levels out experience remember stay curious never stop exploring tech world surprises await around corner good luck adventure awaits ahead now go forth embark journey discovery today happy computing whatever endeavors pursue life fills joy wonderment thanks reading hope shared here helpful insightful enlightening whatever task hand tackling even smallest ones matter contributing overall success jointly achieving dream together world connected place understanding cooperation essential fostering growth prosperity everyone involved making future brighter better tomorrow possible thrive advance reaching fullest potentials!
KVM Networking Configuration Steps
Trying to figure out KVM Networking Configuration? If you’re dealing with oVirt KVM, network setup might seem a bit tricky at first, but trust me, you’ll get the hang of it. Grab a cup of coffee and let’s dive in!
Understanding KVM Networking Basics
Imagine you have a virtual office space—each cubicle needs access to the internet and internal resources. That’s what networking in KVM is like! You’re basically connecting your virtual machines (VMs) so they can communicate internally and externally.
Steps to Configure Network on oVirt KVM
- Access the oVirt Management Console: First up, log into your oVirt Manager. Think of it as your control room where you manage everything.
- Create a New Network: You’ll want to go to the ‘Networks’ section. Click on ‘New,’ and then choose your data center. This sets up a fresh network environment for your VMs.
- Define Network Properties: Here’s where you name your network—something descriptive helps, like “Office_VLAN.” You’ll also set VLAN ID if needed (this is like identifying which cubicle connects where).
- Select Assignments for Hosts: Assign this new network to hosts—those are like servers running VMs. Choose hosts from the list that’s applicable to the datacenter.
- Edit VM NICs Order: Go ahead into each VM settings and assign them the newly created network interface card (NIC) under their ‘Network Interfaces’ tab.
- Configure Virtual NICs (vNIC): This part’s about setting IP configurations: static or DHCP, depending on what suits your setup best.
- Tune Specific Settings:You might want specific protocols enabled or security settings adjusted here—for instance enabling STP (Spanning Tree Protocol).
Troubleshooting Common Issues
Sometimes things don’t go smoothly—you know? A common hiccup could be connectivity issues between VMs even though they’re in same subnet; often this traces back needing updated routes on host machines or incorrect IP settings.
Remember that feeling when you’re puzzled over something till realization hits with clarity? Checking routing tables and ensuring correct subnets can often lead those “Aha!” moments.
In computer networks as with coffee preparations—a bit different every time yet rewarding once figured out! Take slow steps document each phase move forward knowing better handling than yesterday!
And there you have it—a basic rundown making sure all stays connected together while unraveling mysteries behind virtual networking bits by pieces bit confusing sometimes but worth understanding fully!
Ah, network setups—it feels like they always know when you’re in a hurry, doesn’t it? I remember this one time, I thought setting up oVirt on my KVM was going to be a walk in the park. You know, I had everything planned out: snacks ready, a nice cup of coffee… but boy did things get interesting.
Setting up networks can sometimes seem like fitting puzzle pieces together while blindfolded. First off, with oVirt and KVM, it’s so crucial to understand the virtual network interface cards (NICs) or you might find yourself tangled up in cables—virtually speaking! Imagine trying to get all those virtual machines talking to each other smoothly. It’s like hosting a family dinner and making sure everyone’s got their favorite dish. Except here, it’s IP addresses and DHCP leases we’re dealing with!
Then there was this pesky bridge network issue I faced. Oh man, bridging those connections had my head spinning initially. It felt like trying to invite two shy friends from different groups to see if they’d become best buds without any awkwardness! Sometimes the solution is just a bit of patience and some trial and error until everything clicks into place.
Don’t even get me started on firewalls making everything look blocked or unreachable when you least expect it. I tell ya’, double-checking those firewall rules became second nature after that experience. It’s pretty much about allowing the right ports through so everything flows without a hitch.
All this tech jargon might sound intimidating at first glance but once you dive into it (there’s that phrase!), you’ll find it’s about ensuring that every little part of your setup can chat happily with every other part—without throwing tantrums.
Anyway! Once all the pieces were in place and running smoothly? It was pure bliss seeing things work as intended. Like watching a perfectly choreographed dance after hours of practice—it just clicks beautifully when everyone knows their moves!