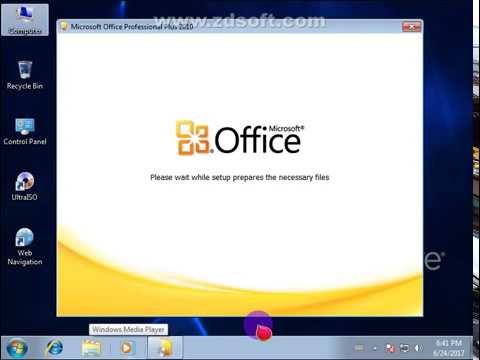
Oh man, remember Microsoft Office 2010? Those were the days! It’s like a cozy old sweater you found in your closet. Still fits like a charm. Especially on Windows 7.
I know, I know—it feels like ancient history. But sometimes, there’s just something comforting about the classics. You fire it up and it’s like meeting an old friend who hasn’t changed one bit.
If you’re itching to get it running again and relive those glory days—you’re in luck! I’m here to help you sort it out without any hassle.
Grab some coffee, settle in, and let’s get this thing going! Trust me, it’s easier than finding that lost sock from last week’s laundry. Ready?
Microsoft Office Compatibility with Windows 7
You might be sitting there with Windows 7, wondering if you can get Microsoft Office 2010 up and running on your machine. Well, the good news is that it’s doable. Let’s chat about how to make this happen without too much fuss.
Check System Requirements
Before you dive into anything else, make sure your computer can handle it. You need at least a 500 MHz processor (yep, pretty old-school), 256 MB of RAM, and around 3 GB of free space on your hard drive. Most computers running Windows 7 should meet these requirements easily.
Get Your Installation Disc or File
The thing is you’ll need the installation media for Office 2010. If you’ve got a physical disc, great! Otherwise, if you’ve got a digital download from when you bought it online back in the day, that works too.
- Insert the Installation Media: Pop in that disc or run the downloaded installer.
- Follow On-Screen Instructions: A setup wizard will guide you through. It’s like having a helpful friend right there.
- Enter Product Key: Halfway through installation You’ll be prompted to enter this key—think of it as unlocking everything Office has to offer.
Select Programs to Install
One cool thing is you’re not forced to install every program in the suite. You can choose just Word and Excel if that’s all you use most days:
- Select “Customize” during installation.
- Deselect programs you don’t need right now; remember simplicity’s often less overwhelming.
Once everything finishes installing (cross those fingers!), give your computer a quick restart—you know how computers sometimes crave fresh starts—and voila!
Troubleshooting Common Issues
Now what if something goes wrong? Technology loves doing its own thing sometimes:
- If Office isn’t opening after installtion maybe try running it as an administrator (right-click > “Run as Administrator”).
- If issues persist with specific files not opening properly within Office apps themselves update both Windows & Microsoft office right away—it could solve mysterious headaches faster than you’d think possible!
That should cover getting Microsoft Office installed neatly onto Windows 7! Got some stories where tech didn’t go quite according plan? Most folks have been there too—it brings us together somehow doesn’t’it?
Retrieving Your Office 2010 Product Key
Getting back your Office 2010 product key can feel like finding a needle in a haystack sometimes. But don’t worry, it’s totally doable! You just need to know where to look. Let’s go through this step by step, shall we?
Why Do You Need the Product Key?
You know that feeling when you’re all set to install Microsoft Office 2010 on your Windows 7 computer and then hit a brick wall because you can’t find the product key? It’s super frustrating, right? That little series of letters and numbers is essential for unlocking the software. Kind of like a password for your program.
Where Is It Hiding?
The product key might be stored or printed in various places. Here are some common spots where it could be:
- Printed Sticker: If you bought a physical copy of Office, there’s often a sticker on the CD case or inside the packaging that has your product key. Give those items a once-over.
- Confirmation Email: Bought Office online? Check your email inbox for any purchase confirmations from Microsoft—sometimes they include the product key right there.
- User Account: Log into your account at the Microsoft website. Look under ‘Order History’ or ‘My Products’, sometimes they store keys there too.
If It’s Still Elusive
Maybe you’ve scoured through all these places and still no luck? Well, there’s hope yet!
You could use something known as a ‘product key finder’. These tools sniff out stored keys from installations on your computer. An option you might want try is Belarc Advisor—it’s free!
A Quick Note:
Remember though, downloading unfamiliar software always comes with risks. So only snag it from trusted sources!
Once you’ve got that golden key back in hand, just input it during installation when prompted—it’ll be as easy as pie.
And voilà! You’re ready get started with Microsoft Office 2010 on Windows 7 without any more hiccups!
Hope this helped illuminate things bit more clearly! If not don’t hesitate ask further questions—I’m here help guide every step along way!
Free Installation Guide for Excel 2010
Alright, installing Excel 2010 is a bit like putting together a puzzle. You get the right pieces—installation files and your Windows 7 computer—and poof, you’re ready to crunch numbers in no time! Ready? Let’s roll up our sleeves and dive in.
Step-by-Step Installation
First things first, make sure you’ve got the installation disk or a downloaded copy of the Microsoft Office 2010 package. If it’s an ISO file you’ve downloaded, you’ll need to mount it; kind of like virtually inserting a CD into your computer.
- Pop that disk in or click on that setup file: Once you have the disk or image ready, double-click it if using an ISO or simply pop the CD into your drive. The installer should automatically start up.
- Follow those prompts: You’ll be greeted by the shiny Microsoft installation screen. It usually asks for a product key right at the start. This key is crucial! Think of it like your golden ticket from Willy Wonka but for software access.
- Selecting what to install: Here comes a choice—do you want everything including Word, PowerPoint etc., or just Excel? Most folks go for all of Office; but hey, if storage is tight just hit “Customize” and pick Excel.
- Smooth sailing through EULAs and Ts & Cs: Accept any legal terms they throw at ya then proceed with “Install Now.” This part could take some time; maybe go grab a cup o’ joe while things load up?
- The grand finale – Finish Up!: Once installation wraps up—a little message pops saying it’s done—you can click “Close”. And there we have it! Woohoo!
Troubleshooting Common Issues
Sometimes tech decides to pull little stunts! If something fumbles along this journey:
- If no auto-play: Head over manually via “My Computer” -> DVD Drive (or mounted drive).
- No internet means offline help: Ring customer services if activation hiccups occur—super important when entering product keys from old packaging!
- Error messages happening?: Check online forums often have answers needed by users sharing similar experiences; trust community wisdom sometimes works wonders!
Knowing how long setups take differs depending upon device speed/storage space etc., often cracking open several apps/performing tasks simultaneously affecting process duration variability too truthfully speaking far wiser installing Office prior needing immediate usage timeframe allowing days plan manage actual urgency thereof boundaries… Trusting walkthrough transforms seamless adventure possible big smiles guaranteed post-install phase marks celebration success accomplished milestone goal achieved voila dear adventurer embark happy spreadsheet-making voyage ahoy captain spreadsheet vessel bon voyage!!
Installing Microsoft Office 2010 on Windows 7 feels like taking a nostalgic trip down memory lane, doesn’t it? I remember doing this way back when, and it felt like bringing a new toy home. Back then, getting your software up and running was like opening the door to a world of possibilities—well, maybe that’s a bit dramatic, but you get the point.
First things first: you need to have your Office 2010 CD or download link with a shiny product key ready. It’s kind of satisfying watching that installation bar fill up as the program installs itself onto your system. Just pop in the CD, or if you’ve got it digitally, double-click that setup file. Little did we know at the time how much we’d rely on these programs for everything from writing reports to making presentations.
Remember to accept those terms and conditions like we all do without really reading them (if we’re being honest). Then follow the prompts on screen. You might feel a little impatient during this part—waiting can be so tiresome! Yet, it’s part of the anticipation; soon enough, you’ll see that “installation complete” message.
Once it’s all set up, you’ll have to activate Office using your product key. This part is crucial because without activation some features are locked down tighter than Fort Knox! Inputting those alphanumeric codes is a small price to pay for what comes next: Word documents galore and Excel magic at your fingertips.
I recall my first time experiencing the Ribbon interface introduced in Office 2007 brought over into 2010—it was quite an adjustment from those old menu styles we were used to! It took some learning but eventually became second nature.
In no time at all after installing you’ll be crafting documents or creating spreadsheets like never before—or procrastinating with them open thinking about what else could possibly distract you from work today… ah yes good times!
So there you have it—reliving past tech experiences always brings back fond memories filled with excitement anticipation (and maybe just bit frustration if things didn’t go quite smoothly). Happy installing!