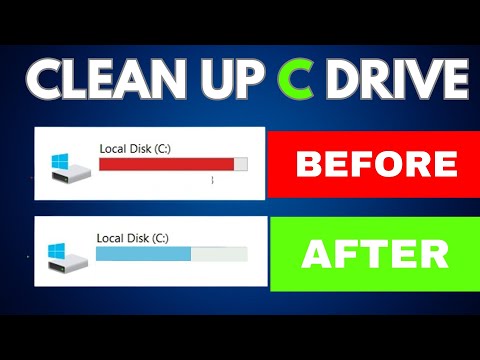
You know how it goes. One day, your PC’s working just fine, and the next thing you know—bam!—it’s moving slower than molasses in January. You’re clicking around, trying to open files or watch videos, but everything’s lagging. What’s happening?
Well, it’s probably all that stuff cluttering up your storage. Pictures from five years ago you forgot about, programs you don’t really use anymore, and random downloads piling up like old newspapers stacked beside a couch.
It’s kinda like cleaning out a junk drawer. Feels overwhelming at first glance, right? But believe me when I say: freeing up some space can work wonders on your computer’s performance—and might even bring back its missing pep! Let’s see how we can make some room and get things rolling again without any fuss. You ready to tackle this?
Utilizing Disk Cleanup Tools
Freeing up storage space on your PC can feel like those times when you clean out your old stuff at home. A bit daunting at first, but oh-so-satisfying once done! Let’s dive right into using disk cleanup tools to tidy up that digital clutter.
Why Use Disk Cleanup Tools?
Our computers tend to gather a lot of digital junk over time. Temporary files, old system backups, downloads you forgot about—these all take precious space. Imagine trying to fit more clothes into a jam-packed wardrobe! Not easy, right? Cleanups help keep things neat.
Steps to Run Disk Cleanup
Getting started is usually pretty straightforward. Windows has its own built-in tool called *Disk Cleanup*. Here’s how you can use it:
- Open the Tool: Search for “Disk Cleanup” in your Start menu and select it.
- Select Drive: Choose the drive you want to clean (usually C:).
- Select Files to Delete: Keep an eye on file types—temporary files, system error memory dump files are commonly safe to delete.
- Run the Cleanup: Once you’ve picked what to remove, hit OK and free up that precious space!
Diving Deeper with Advanced Tools
Sometimes you’ll need something more powerful than basic options. Tools like CCleaner or BleachBit offer deeper scans and remove more flotsam and jetsam from your machine’s nooks and crannies.
A Family Anecdote!
I remember helping my grandma with her ancient laptop once—it was slooow as molasses! We ran a disk cleanup tool together; she didn’t realize how much unnecessary stuff was just sitting there idly gobbling up space!
In short: just like tidying your living room makes lounging there much better, keeping digital spaces orderly enhances performance while giving peace of mind knowing where things stand storage-wise!
Cleaning Up Disk Space in Windows 11
Hey there! So, you’re juggling with Windows 11 and you feel like your disk space is just vanishing into thin air? It happens to the best of us. Your computer starts slowing down because it’s running out of space, and it feels like trying to cram an elephant into a tiny car. Trust me, I get it. Anyway, let’s see how can we clear up some of that precious disk space.
1. Use Storage Sense
Windows 11 has this neat tool called Storage Sense. It’s like your little cleaning buddy that helps keep things tidy automatically.
- Go to Settings: Press the Windows key, type “Settings,” and hit Enter.
- Click on System: Look for “Storage” in the menu.
- Toggle on Storage Sense: This feature will automatically delete junk files and temporary system files whenever you’re low on space.
2. Clean Up Temporary Files
You know those temporary internet cookies or files? Some might say they’re as necessary as socks in sandals—definitely not!
- Select Temporary Files: Stay in the Storage section under Settings.
- Select what you want to remove: Things like Downloads, Recycle Bin or even Previous Windows installations can take up lots of space.
3. Uninstall Unused Apps
Over time, we tend to collect apps we don’t use much. It’s probably time water your digital garden a little by cutting them back.
- Navigate to Apps & Features: Back in “Settings,” find “Apps” then select “Apps & Features.”
- Select unnecessary apps: If you spot ones you barely use, click and uninstall them!
4. Manage Large Files
Sometimes large files are lurking around without us even noticing—a bit like forgetting about that giant cookie tin from last Christmas!
- Select “Large Files” scanner: Go back to Storage settings again.
- TEMP folder: Use
%temp%in the Run dialog (Win + R) to access temporary files and clear them. - Certain features or solutions might have been added after October 2023; check recent updates.
ul >
Now keep in mind it’s all entros about staying informed – Our computers need room breath too! Keeping tabs available free memory helps keep them running smoothly – kind giving their own Zen spacethemselves . So yeah remember regularly review what’s cookin’ drive makes sure there’s enough legroom move responsibly consider utilizing external drives cloud storages best practices care environment overall win situation!
Freeing Up Windows 10 PC Storage
Freeing up storage on your Windows 10 PC can feel like a breath of fresh air. You know that feeling when you’re trying to capture a moment or download something important, and **bam!** Your device runs out of space. Frustrating, right? Let’s chat about giving your PC some breathing room by going through some easy steps.
Delete Unnecessary Files:
The simplest way is cleaning out files you no longer need. Check the “Downloads” folder—it’s often a graveyard of forgotten documents and installers. Also, give the desktop a peek for clutter too.
Use Storage Sense:
This nifty tool helps manage space automatically. Go to Settings, then System, and you’ll find Storage. Turn on **Storage Sense** to let Windows clean up temporary files and items in the Recycle Bin without lifting a finger.
Uninstall Unused Software:
Everyone finds themselves with loads of programs they either don’t use or even remember installing! Head over to Add or Remove Programs. Get rid of apps you don’t interact with anymore—your PC will thank you for it.
Your OneDrive Settings:
If you’re using OneDrive, make sure it’s not keeping copies of everything both locally and online. Right-click on the OneDrive cloud icon, choose **Settings**, and select which folders are available offline.
It’s like my grandma always said: “There’s beauty in tidiness.” Not only will these steps help reclaim space but also contribute to smoother performance. Give yourself that extra room today—it feels great!
Oh, freeing up storage space on a PC! It’s such a common thing, yet it can feel like solving an unsolvable puzzle sometimes, right? I remember this one time when my own computer was slowing down to the speed of molasses. Every click seemed to take ages and boy, it was frustrating!
First, you know how it piles up: photos from last year’s vacation you swear you’ll sort through “later,” old documents that might be “needed someday,” random software downloads… The digital clutter creeps in just like that mysterious drawer in the kitchen where everything ends up.
The feeling of liberation when you start digging into those folders is fantastic. It’s like spring cleaning without dust bunnies—purely digital ones. I’ve even found files I completely forgot about! And let me tell you, deleting unused apps felt incredibly refreshing. Like tossing out clothes from high school—who needs ‘em?
And let’s not forget about those massive forgotten videos or duplicate files hiding somewhere. Finding them is almost like discovering a treasure chest, except the treasure is space on your hard drive and a sense of satisfaction.
A bit of caution though: Always keep backups for important stuff. You don’t want to delete something precious in the heat of the moment! So yeah, once you’ve cleared things out and reorganized what’s left—wow—it feels like giving your computer a nice deep breath again.
Anyway as tedious as it seems initially, freeing up storage could become that therapeutic chore we all need now and then—to clear chaos around us every which way possible!