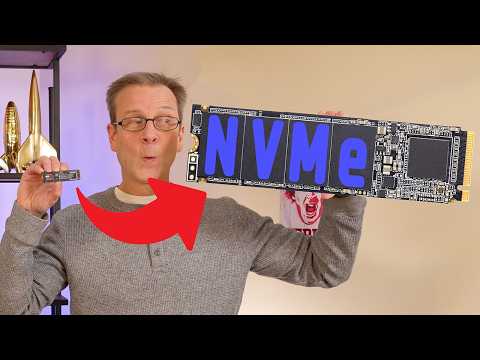
You know when you get that shiny new M.2 drive and all you want is your stuff to just magically appear on it? I get it, right?
Switching over feels like such a hassle. Like moving houses but for your files. Your photos, games, that embarrassing playlist – all packed in boxes, waiting.
And don’t even get me started on losing data. Been there before, totally panicked! But hey, there’s a way to clone everything nice and clean.
So here’s the deal: stick around, and we’ll make this whole cloning thing feel like a piece of cake. Trust me, you’ll love how simple it can be!
NVMe SSD Formatting Before Cloning
Formatting an NVMe SSD before cloning can feel a bit like prepping your workspace before a big DIY project. You want everything neat and tidy, to get the best results. So let’s walk through this step-by-step to make sure you’re ready to go.
First things first: why format? Well, when you’re cloning a drive—basically making an identical twin—you want to ensure there’s no old clutter or errors tagging along for the ride. Formatting wipes the slate clean.
- Backup Your Data: This is numero uno. Before you even think about formatting, make sure all your precious files are safely backed up elsewhere. You wouldn’t want to lose those vacation photos or important documents.
- Select the Right File System: For most users, using NTFS on Windows is ideal, while macOS folks will be more at home with APFS or HFS+. Choose based on where this SSD will primarily be used.
- Use Disk Management Tools: On Windows, you can simply start by typing “disk management” in your search bar and select the option that pops up. On macOS, head over to Disk Utility under Utilities in Applications.
- Initialize (if Needed): Sometimes new drives need initializing before formatting. This is like telling your computer “hey, here’s a new guy!”
- The Actual Format: Once you’ve done all of this and you’re ready, right-click on your drive in Disk Management (or select it in Disk Utility), choose ‘Format,’ pick your desired file system and allocation size (usually default works fine), then hit okay.
- If you’re unsure at any step—or see an unexpected error—don’t hesitate to pause and do a quick online search or ask a buddy who loves tech stuff!
- Performance Impact: After cloning your NVMe drive, the performance should remain consistent with no significant changes. It’s like moving into a new house with the same layout; you know where everything is.
- Data Integrity: Cloning ensures all data is transferred accurately. However, using trusted software for this process is crucial to avoid errors or corrupted files.
- Drive Lifespan: NVMe drives have limited read/write cycles. So frequent cloning might slightly reduce their lifespan but don’t sweat it; modern NVMes are built pretty robustly!
- Select Appropriate Software: Use reliable cloning software that properly supports NVMe technology.
- Create Backup: Always back up important data first—just in case things don’t go as planned.
- Check Compatibility: Ensure the new drive fits and supports your device before copying anything over.
- Two M.2 slots: Crucial for direct cloning, as each drive needs its own space.
- M.2 compatible motherboard: Not every board supports this; check yours before diving in.
- Cloning software: Tools like Macrium Reflect or Acronis True Image are popular choices. They simplify the process big time.
- Screwdriver: A small but essential tool for securing your drives in place.
- Install both M.2 drives: Gently slide them into their respective slots on your motherboard and secure them with screws—it’s like putting batteries in, but more delicate!
- Select your software: Launch your chosen cloning program. It’s like choosing a hero for this epic journey!
- Select source and destination drives:You need to tell the software which is which—don’t mix them up! The source is where the data comes from, think of it as copying paste from one sheet to another.
- Create an exact copy:If prompted, choose “clone disk” or similar options within the software—kind of feels like magic happening right in front of you!
- If either drive isn’t showing up: Double-check seating (that’s fancy talk for making sure it’s plugged in securely). li
- Screws feel loose?: Tighten gently—not too much force needed here. li
- The clone fails partway through: Check software settings or try running as admin—it might just be waiting for permission from its boss (you!). li
ulLook there ya go! Once done, unplug that old drive if needed—or store it away safely—you’ve successfully cloned onto new hardware without losing out any precious bits along way!
It kind sounds complicated initially sometimes—but taking care every step helps ease things along—and hey—you now have real life skills under belt too—cool huh?
Ah, cloning M.2 drives. It’s one of those tasks that sounds pretty high-tech, like something out of a sci-fi movie, but really, it’s way more down-to-earth than you might think. Imagine this: You’ve been using a super-fast M.2 SSD in your computer for a while now—everything’s smooth, programs open in a flash—but it’s getting crowded with all your stuff.
Now you’re thinking about upgrading to a bigger drive. You could start fresh and reinstall everything on the new drive, but who has time for that? That’s were cloning comes in handy. It’s like photocopying everything from your old drive onto the new one: operating system files, applications, personal documents—basically everything.
The tricky thing is not so much the process itself but can be setting up correctly before you even get started. You’ll need some software to do the heavy lifting for you and an external enclosure or an adapter to connect both drives if you’re working with a laptop which usually only has room for one M.2 slot at a time.
I remember way back when I first tried cloning an M.2 drive; I was so anxious I’d mess up and lose all my data! But once I had the right stuff together—the right cables and software—it was honestly pretty straightforward if me being overly cautious counts as ‘straightforward’. And seeing my system pop up exactly how I left it on this shiny new piece of hardware felt like magic!
So here’s how it generally goes: you fire up your trusty cloning software (there are plenty free ones available), select source (your old drive), then destination (your new drive). After double-checking that order—‘cause swap that accidentally and things go bad—you start the clone job and let ‘er run!
Time varies depending on how much data’s being shifted around but typically is quick thanks tons to these speedy M.p Drives we’re dealing with these days. Once done swapping them out physically its booting into Windows or macOS just where ya left off; quite satisfying if ye ask me.
Although it’s not rocket science anyone comfortable handling minor tech tasks should feel confident attempting MPU clone project no fear! And remember backup before starting just case gremlins sneak into system midway… always good practice anyway right?
Anyway next upgrade don’t stress too much ’bout re setting everything again give cloning whirl save yourself headache maybe find fun learning experience ta boot!
Now that everything’s formatted neatly, just imagine it as setting up fresh canvas for painting… with no leftover smudges from previous artwork.
An Anecdote for You: I remember once helping my uncle set up his brand-new SSDs when he decided to upgrade his work computer setup at home. We overlooked the formatting part initially—and honestly? It led us into circles trying figure out why things weren’t as zippy as he’d hopped they’d be after completion! That simple oversight added hours frustration till we realized our blunder—only took couple minutes fix once knew what do again properly.”
So remember folks: taking time do small things ahead helps BIG TIME down road!
Effects of Cloning NVMe Drives
Cloning NVMe drives can be quite handy, especially when you’re upgrading to a larger storage or trying to have a backup. But what exactly does cloning mean here? Well, think of it as creating an exact duplicate of your drive’s data, including the operating system, applications, and files. This can save you time since you won’t have to reinstall everything from scratch.
Here’s something from personal experience: I remember cloning my laptop’s NVMe drive onto a new one with larger capacity and being thrilled how seamless it was—no hassle at all!
Now let’s consider some key steps if you’re thinking of doing this:
One thing people often overlook is making sure both old and new drives are correctly connected during the process; missed connections might cause incomplete transfers or errors.
To make things clear: while there may be technical nuances (like sector sizes), most modern tools handle them automatically.
In essence—cloning an NVMe drive can be efficient without affecting performance much if done right! However tempting it might seem sometimes though not do backups…
Cloning an M.2 SSD with Two Slots
Sure thing! Talking about cloning an M.2 SSD when you’ve got two slots available is a nifty little trick that can save you quite a bit of hassle. You just pop one drive into each slot and let the magic happen, right? Let’s take a walk through it.
First things first, why would you want to clone an M.2 SSD? Maybe you’re upgrading to a larger drive or moving to something faster—no judgment here! Cloning lets you keep all your files and settings without the headache of reinstalling everything.
Getting Started: Here’s what you’ll need:
The Process: Got everything? Awesome!
Troubleshooting Tips: Encountering hiccups?