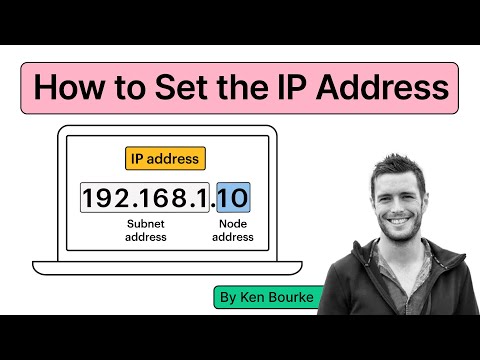
Alright, so you’ve got a computer, right? And maybe you’re just doing your thing, browsing cat videos or working from home. But hey, sometimes you need to know this thing called an IP address. Ever wonder what that’s all about?
Imagine it like this: Your computer’s IP address is kind of like its home address on the Internet. It tells data where to go and how to get back! And guess what? It’s super important for everything online.
The good news is checking your PC’s IP address isn’t rocket science. Seriously! I remember the first time I had to find mine; I thought it’d be all techy and complicated. But nah! It was surprisingly straightforward.
So if you’re ever in jam or just curious about how things tick behind the scenes, let’s chat about finding that sneaky little number called your IP. Trust me—it’s easier than you’d think!
Finding Your Computer’s IP Address
Trying to find your computer’s IP address can feel like solving a mystery sometimes, right? But don’t worry, it’s actually not as tricky as it seems. Let me give you a simple rundown on how to locate your IP address, whether you’re using Windows or Mac.
What is an IP address?
Think of an IP address like your computer’s home address on the internet. It’s a unique string of numbers that identifies your device among billions out there. Without it, finding and sharing information online would be chaotic.
Finding Your IP Address on Windows
Here’s the scoop:
- Open the Command Prompt: You can do this by typing “cmd” in the search bar and hitting Enter.
- Type
ipconfig: In the window that pops up, just typeipconfig, then press Enter. - Spot Your Address: Look for something called “IPv4 Address.” That’s your local IP!
A Little Story:
The first time I tried this with my dad’s ancient laptop, he was amazed! He thought his machine was too old for such magic. It turned out to be easy peasy.
If You’re Using a Mac, here’s how to dig up that sneaky number:
- Dive into System Preferences: Click on the Apple logo at the top left corner of your screen and navigate to “System Preferences.”
- Select Network:: Pick “Network” from the list—you’ll see all connected networks.
- The Big Reveal:: Click on your active connection (either Wi-Fi or Ethernet). There you’ll find goodies including—yep—a whole lotta numbers; look for “IP Address.”
And there you have it! Isn’t it cool knowing these little tricks? Next time someone asks how they can find their PC’s IP address, you’ll sound like quite the whiz kid!
Remember though that this is just scratching at what gets more detailed beneath surface-level operations… But hey every journey begins by taking some steps first eh? Now if anything feels off try asking again—I’m all ears whenever necessary!
Checking Your PC’s IP Address in Windows 11
Alright, so you’re trying to find your PC’s IP address in Windows 11, right? No worries—let’s walk through this together. It’s easier than you might think!
First Things First: You need to know what an IP (Internet Protocol) address is. Picture it as your computer’s home address on the internet. It’s how networks find and communicate with each other. Cool, huh?
Step-by-Step Guide:
- Open Settings: Click that little gear icon in your Start menu or press Windows + I. This gets you into the settings.
- Network & Internet Section: Once you’re there, look for “Network & Internet.” It usually hangs out on the left sidebar.
- Status Page: Click “Status” from the options. You’ll see a page showing your current network status—almost like a quick report card.
- Select Your Network: Whether you’re on Wi-Fi or Ethernet, click on “Properties” under your connected network type. Right there before you know it!
- Your IP Address: Scroll down a bit until you see something like “IPv4 address.” Voila! What you’ll see there is your IP address looking right at you!
A Quick Tip: If you’re curious about both IPv4 and IPv6 addresses, they show up here side by side.
And that’s it! Pretty simple once you’ve done it step-by-step. I remember when I first had to do this—it felt like discovering another side of my computer’s secret identity! If computers had personalities… Anyway.
If you’re more into using commands and all that techie fun stuff:
- Powershell or Command Prompt Method: Hit up either tool (Right-click Start and select one), then type:
ipconfig - Your details will pop up faster than you can say “double-click,” including what we were hunting for: the IPv4 address.
Hopefully now checking it next time will be as smooth as buttered toast!
How to Find Your IP Address on Windows 10
Looking to find your IP address on Windows 10? No worries, I’ve got you covered. Let’s jump right into it—you can do this in a couple of different ways.
Method 1: Using the Command Prompt
Open the Command Prompt by pressing Windows + R on your keyboard. This opens the Run dialog box—type cmd, and hit Enter. You’ll see a black window pop up; don’t be intimidated! Just type ipconfig and press Enter again.
- You’ll get a bunch of info—look for something that says “IPv4 Address.”
- This is your local IP address.
Method 2: Through Network Settings
Now, if you’re more of a visual person and like to click through menus, this method’s for you.
- Click on the Start Menu (that little Windows icon).
- Select “Settings” (it’s the gear icon).
- Nexthing is choosing “Network & Internet.”
- If you’re connected through Wi-Fi, select “Wi-Fi.” For Ethernet connections, choose “Ethernet.”
- Your connected network will appear—click on it.
- Scroll down and you’ll spot your IPv4 address there.
A Bit More About IP Addresses:
Now why’s this small set of numbers so important? Well, think of it like your home address. It tells other computers where to send data, sort of guiding everything through traffic correctly.
If you ever have connection issues or need to change settings on your router or firewall, knowing where to find this is handy!
And there you go! Super straightforward, right? Hope that helps clear things up for you while diving into Windows networking mysteries!
Alright, picture this: You’re in your living room, just trying to connect a new device to your Wi-Fi network. Suddenly, the system asks for your PC’s IP address. Now you’re scratching your head thinking: “Wait a second, what’s an IP address and where do I even find it?” Don’t worry; it’s simpler than you think.
An IP (Internet Protocol) address is like your computer’s home address but on the internet – it tells other devices where to send stuff, sort of like a digital postman. Here’s how you can usually track it down on your computer. If you’re using Windows, just hit that Windows key on your keyboard and type “cmd” to open the Command Prompt. In there, type “ipconfig” and press Enter. You’ll see lines of text pop up with various details about your network connections—look for the one labeled as ‘IPv4 Address’.
For macOS users, it’s pretty straightforward too! Head over to System Preferences from that apple menu in the top left corner. Click Network, select the active connection (Wi-Fi or Ethernet), and then Advanced… You’ll spot “TCP/IP” at the top; click it! Voilà! Your IP address should be right there.
You know what’s funny? I once spent ages figuring this out in my early tech days because I was convinced my computer settings were different. Turns out I’d been reading guides for the wrong operating system all along!
Remember though—your IP might not stay constant forever unless it’s static (which most aren’t). But don’t sweat it; finding this little number is something anyone can handle once you get past that initial hurdle of not knowing where to look.
Now next time someone throws around tech jargon involving IPs at a gathering or something—you’ll be ready with all these tricks up your sleeve! Yeah!