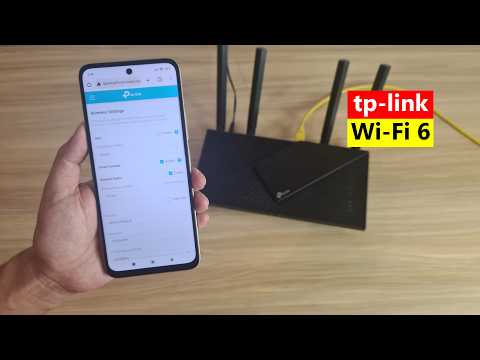
Hey! Got a new TP-Link router and feeling a bit overwhelmed about setting it up? You’re definitely not alone. Those blinking lights can be intimidating, right?
Setting up the IP stuff might sound technical, but trust me, it’s easier than you think. It’s kinda like assembling IKEA furniture—looks complicated at first glance, but totally doable with the right steps.
We’ll walk through it together, no fancy jargon. Just grab your router and let’s make this a breeze!
TP-Link Extender Setup Procedure
Oh, getting your TP-Link extender up and running? It’s pretty much like giving your Wi-Fi a little boost so it covers those annoying dead zones. You know how frustrating that can be, right? Well, here’s how you can sort that out using some simple steps.
First off, let’s power up that TP-Link extender. Plug it into an outlet close to your main router. Why? Because during setup they need to chat—just like neighbors getting to know each other!
Step 1: Connect to the Extender
- Grab any device with Wi-Fi capabilities. Could be your phone, tablet, or laptop.
- Look for the Wi-Fi network named something like “TP-LINK_Extender” in the available networks.
- Connect to it; no password is usually needed at this point.
Step 2: Access the Setup Page
- Open a browser and type 192.168.0.254. This address lets you into the extender’s settings—as if you’re unlocking a secret door!
- You’ll probably see a login page pop up asking for credentials.
- The default username and password are often both “admin.” Super simple! But remember those days when you’d forget such easy creds?
Step 3: Set Up Your Extender
- The Quick Setup wizard should greet you like an old friend guiding you step-by-step through selection screens.
Select Your Wi-Fi Network:
- Select your home network from a list of nearby signals popping up on screen.
Enter Password:
- This is where you’ll put in your original Wi-Fi’s password so they can connect and create harmony!
Keep an Eye on Placement:
- Your placement matters!
Place extenders mid-way between routers & devices needing signal assistance—offering better connection possibilities all around without dragging cables everywhere.
Finally reboot everything & test range improvements made possible by clever positioning wizardry done earlier.
If something seems off along way remember there’s always using support resources made available online or official user guides coming pre-packaged alongside system setups helping troubleshoot occasional hiccups encountered throughout journey itself- These tips should cover most situations though provide peaceful browsing experiences once sorted out entirely new level altogether thanks technology advancements made recently promising brighter future interconnectedness society today!
TP-Link Router IP Configuration Steps
Setting up the IP configuration for your TP-Link router can seem like a daunting task at first, but trust me, it’s not as bad as it sounds! We’ll work through it together, step by step.
First things first, you’ll need to access the router’s web interface. You might wonder how to do that. Well, here’s how you can break it down:
- Grab a computer or device that’s connected to the TP-Link router. This connection can be either through Wi-Fi or an Ethernet cable.
- Open any web browser you like. It could be Chrome, Firefox—whatever you’re comfortable with.
- In the address bar at the top (where you usually type out website URLs), enter “192.168.0.1” or “192.168.1.1”. These numbers are kind of like a phone number for your router.
Now comes a small hurdle—logging in! When you’ve typed that address and hit ‘Enter’, a login page will appear:
- The username and password fields will be waiting for you to fill them in.
- If you haven’t changed anything before, enter “admin” as both the username and password.
- If that doesn’t work, you might have set custom credentials earlier (or maybe someone else did). In this case retrieve those or reset if needed!
Once you’ve logged in successfully—you’re almost there! You’ll find yourself on your router’s home page where all sorts of settings live.
To configure IP settings:
- Find a menu option called “Network”, “Basic Settings”, or something along those lines—routers play hard-to-get sometimes with slightly different interfaces!
- Select “LAN” from this menu because LAN is what ties devices within your home network together using IP addresses.
- You’ll see some fields here: mainly an option labeled “IP Address“. Here is where magic happens—you get to assign an IP range or specific address!
But why would anyone want change these? Sometimes optimized settings can help improve speed connections internally; other times static setups are essential for certain equipment requiring consistent communication protocols within network!
Before changing anything drastic though make sure note current settings since reverting back proves helpful occasionally.
Anyway once comfortable tweaking configurations confirmed appropriate selections save any amendments checked over correctness possibility recheck errors if needed avoid chaos sudden loss connectivity potential security issues.:
Congratulations now you’ve equipped yourself better understanding overall configuring splendidly orchestrated harmony between technological wonders surrounding future endeavors without fear newfound mastery prowess accompaniment too frustrating disheartening measures reaching success navigating underworld routers protocol paths filled wondrous satisfaction knowing capable guiding light midst technology web woven complexity intrigue progress follows grace deserved patience determination reigns true!
TP-Link Router Configuration Steps
Alright, setting up a TP-Link router can seem a bit like solving a puzzle sometimes. But hang in there, because it’s not that complicated once you get the hang of it! I remember my first time fiddling with one—it felt like trying to solve a Rubik’s Cube blindfolded. But hey, practice makes perfect, right?
Now, let’s dive into what you’ll need.
Firstly, make sure you have an Ethernet cable handy. It’s the lifeline between your modem and your new TP-Link router. Okay? Got it? Good!
Next, let’s connect your router.
- Plug in the power: Connect your router to a power source using the adapter that came with it. You’ll see some lights flicker—those are good signs!
- Connect to the modem: Use an Ethernet cable to connect from the WAN (Internet) port on your TP-Link router to your modem. You know those slots—they’re usually blue or labeled ‘Internet’.
- PC connection time: Attach another Ethernet cable from one of the LAN ports on the router directly to your computer.
Now comes accessing those magical configuration settings on the web browser.
- The IP address quest: Open any web browser on your PC and type in “192.168.0.1” or “192.168.1.1”. These numbers might look like gibberish at first glance but they’re how we reach our destination here.
- Usernames & passwords: A login screen will pop up asking for credentials—these are usually ‘admin’ for both username and password unless changed previously.
Once logged in…
Your dashboard awaits!
Now here’s where things start looking official—but don’t sweat it:
- Select ‘Quick Setup’: This is often best for newbies since it’ll guide through necessary settings step-by-step without drowning us under technical jargon.
- Select Internet Connection Type: Based off info provided by ISP (your Internet Service Provider), it could be dynamic IP or PPoE etc.. If unsure ask them directly—it never hurts calling once more!
Finally…
Create Wi-Fi Network : b>
Here’s where personalization begins…
- Enter preferred wireless network name (SSID) li >
KitchenWiFi maybe? Or ‘DragonNet’? 😄
Add security mode WPA/WPA2-Personal along desired password .Something unique yet memorable helps keeps unwelcome neighbors out !And voila—you’re done !
Remember each little hiccup teaches something new along way —making us savvier techies every day .
Setting up a TP-Link router can sometimes feel like trying to solve a puzzle with no picture on the box. Remember those jigsaw puzzles we as kids used to dump all over the floor? You’d start searching for the corner pieces, hoping they’d make it easier. Well, diving into router settings can feel a bit like that, but trust me, it’s not too bad once you get going.
Picture this: you’ve got your shiny new TP-Link router, and now it’s time to sort out that IP setup stuff. First things first, you’ll want to connect everything physically. Just plug in your modem and computer into the right spots on your router – there’s usually handy images above each port showing where things go. It’s kinda like painting by numbers.
Once you’re all plugged in and have power running through it, you’ll need to pick up your browser and type in a number! Yeah, that’s all it is – just entering “192.168.0.1” or “192.168.1.1” into the address bar (like where you’d normally put facebook.com or whatever). Weird right? But that’s what gets you inside.
Now here comes one of those moments when panic sometimes hits: logging in! Routers come with default usernames and passwords, usually something super original like “admin” for both fields (who would’ve thought?). If you’ve already changed it because some guide told you it was smart security practice but forgotten… uh-oh! Don’t worry though—there’s always ways around such booboos!
Inside those settings is where magic happens – setting up Wi-Fi names and passwords so neighbors aren’t quietly tapping away data from YOUR internet (unless they bring cookies; then perhaps we can negotiate!).
In any case revisiting these steps when resetting or changing things around jars memories—good luck fitting life analogies back there next time someone asks about connecting routers again—not quite same level existential question possible roommates might pose over pizza nights discussing universe mysteries but definitely adds spice technical conversations nonetheless!