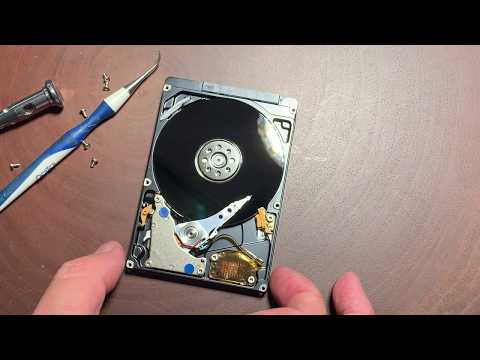
Oh man, it’s a total bummer when your hard drive kicks the bucket, isn’t it? Happens to the best of us, right when you think everything’s just peachy. Suddenly, those precious photos from your cousin’s wedding or that epic road trip seem like they’ve vanished into thin air.
But hey, don’t freak out. There’s hope! Getting those pictures back might not be as impossible as it feels right now. Think of your hard drive as a super messy room. Things are there somewhere; you just gotta dig a little.
Let’s see what we can do about pulling those photos back from the brink! Whether you’re a tech whiz or not-so-techy person, I got your back on this one.
How to Retrieve Photos from a Damaged Hard Drive
Getting your photos back from a damaged hard drive can feel like quite the rescue mission, right? I’ve been there myself. Think about all those precious moments that you captured—just sitting there, waiting to be freed. Let’s walk through this process together.
First step: Assess the damage. You need to figure out if it’s a physical issue or something related to software. If your hard drive makes weird noises, like clicking or grinding sounds (ugh, I know!), it might be a physical problem. In such cases, it’s better not to mess with it yourself and seek professional help.
However, if it’s a software issue—the kind where files can’t be accessed due to corruption—then you’re in luck! You can take some steps on your own:
- Stop using the drive: Honestly, avoiding further damage is crucial. More usage could overwrite those lovely photos you’re trying to save.
- Repair tools: You’ve got some powerful utilities at your disposal. For Windows users, there’s CHKDSK; for Mac folks, the Disk Utility can attempt repairs on the drive.
- Recovery software: There are several great tools out there but remember: free options might come with limitations on how many files they can recover unless upgraded.
A little story here—I once lost all my vacation photos due to an unexpected failure during a power surge… I was devastated! Using recovery software saved my sanity; who knew those waterfall selfies could feel so important?
Create an image of your drive, if possible. It acts as a backup clone just in case things go south during recovery attempts. Professional apps usually have this feature built-in.
Lastly (drumroll), restore those pictures! Follow instructions of chosen software attentively and handle results carefully—some might come back with different filenames or require extra sorting time.
And hey… Once recovered—and fingers crossed they are—consider making regular backups next time ’round! Trust me; nothing beats having peace of mind knowing every memory stays safe somewhere else too 🤞.
Recovering Permanently Deleted Photos
Alright, let’s dig into the world of recovering photos—those precious memories that can seem lost forever when deleted or when your hard drive’s on the fritz. Hopefully this will help you hold onto those important snaps a little longer.
First things first, permanently deleted photos might not be as “gone” as they sound. Often, they’re lurking around in your storage until new data overwrites them. It’s like erasing pencil marks from paper—you can still see those tiny traces until you scribble over them again.
If your hard drive’s damaged, you’ve got a double whammy on your hands. But don’t flip yet; there are still some things worth trying out.
Some tools and methods could give back what seems lost:
- Recuva: This is a well-loved recovery software by many folks out there. You can download and install it to scan your drives for recoverable files.
- PhotoRec: An open-source option that’s great if you’re up for something a bit technical but often very effective.
- Disk Drill: Known for its user-friendly interface which makes maneuvering through these murky waters less intimidating.
Picture this scenario: Say you accidentally trashed some holiday pictures. First thing to do, don’t panic! With these tools above, you’ll want to carefully run scans on the affected drive without saving any new files onto it—that’s crucial because saving over that space might erase your photos for good.
If it’s a hardware issue…
Here’s where it gets interesting (and tricky). Sometimes hearing strange sounds from the drive or unrecognizable formats popping up is enough to clue you in that something isn’t quite right behind-the-scenes there.
Before any attempts at home surgery-like opening up the hard drive—uh-oh alert—you should know it’s best left untouched unless you’re highly experienced; otherwise professional help’s probably smarter (pun intended).
While this journey may seem daunting—sorta like combing through an endless basement full of old stuff looking for grandma’s quilt—the satisfaction and relief when retrieving those hard-to-replace snapshots makes every bit worthwhile!
If nothing else works—and fingers crossed that’s never needed—you still have another option: seek help from professionals who specialize in data recovery services (but they’re often pricey).
Sending positive vibes your way while navigating through photo recoveries! Remember not all hope is ever lost with technology—it loves surprising us sometimes doesn’t it?
Recovering Photos from a Non-booting Computer
Oh, dealing with a non-booting computer can be quite the hassle, right? Especially when you think about all those precious photos stored inside. But hey, don’t sweat it! You might still have a chance to recover them.
First off, it’s important to pinpoint the issue. Is it just that your computer won’t boot up, or is there more damage lurking beneath? If the hard drive hasn’t physically failed yet, you can often access its files through another working computer. Here’s an idea of how you might do this.
- Remove the Hard Drive: If you’re comfortable with handling hardware components, carefully take out your hard drive from the non-booting machine. Make sure everything’s powered off before doing this, though!
- Use an External Enclosure or Dock: After removing the hard drive, place it into an external enclosure—which is kind a little box that connects via USB—or use a docking station. You connect this setup to a working computer.
- Access Your Files: Once connected, your photos should show up just like any other files on an external device. Simply browse and copy them to your healthy computer’s storage.
But what if you’re thinking “Hey! I can’t open my old machine!” Well in that case—no worries—you can also try using what’s called a Live CD or USB. It’s like giving CPR to your system short-term!
- Create a Bootable Live USB/CD: Make one using tools like Rufus with something reliable such as Ubuntu (it’s free!). Insert this into the not-so-cooperative computer.
- Boot from USB/CD Drive: Restart and while starting up hit F8/F12 (depends on models) for boot menu selection; make sure CD/USB option has priority over internal drives.
- Navigate and Save Photos: Once in Ubuntu—or whatever OS found its way through—locate those cherished images within file directories provided there!
I know touching upon hardware directly isn’t everyone’s cup of tea but hey—you got options!
If neither route gets results then contacting professionals may become necessary – reparations only desired outcome sometimes possible without jeopardizing vital memories captured by clicks past years unmissed—you get me?
There’s always hope even when things seem bleakest because technology finds way crossing paths unimaginable initially anticipated…you follow me buddy?
Ah, recovering photos from a damaged hard drive—what a rollercoaster. It’s like trying to find treasure in a sunken ship, isn’t it? I once faced the horror of losing my digital memories when my old external drive decided it had had enough. One moment I was browsing through pictures of vacations and family gatherings—the next, poof! The dreaded noise of a failing drive.
First things first: don’t panic. Easier said than done, trust me, I know. There’s this initial impulse to try everything at once—flipping cables, rebooting the system over and over or giving the thing a little tap as if that might magically bring it back. And yeah, sometimes it feels like those quick fixes should work.
But when push comes to shove and you realize it’s not looking good? That’s where professional help can come in handy. Turns out there are folks who specialize in retrieving data from these stubborn little boxes of circuits using specialized gear and techniques that sound straight outta sci-fi.
Of course you might want to try some do-it-yourself approaches first before calling in reinforcements. There are software tools designed specifically for data recovery—and they can be pretty effective if your drive is still spinning up without making too much noise (that’s usually a bad sign).
Oh! And remember this: you should always be gentle with your hardware if it’s acting up; excessive fiddling may spell disaster for those cherished snaps lurking inside.
Having backups would’ve saved me quite a few headaches back then—I learned that lesson the hard way! So while you’re thinking about getting back those lost photos from your busted drive maybe also think about setting up backup plans for the future?
In any case just hang tight keep calm take methodical steps—and here’s hoping all turns out well soon enough so that nostalgia-filled slideshows can light up screens everywhere yet again!