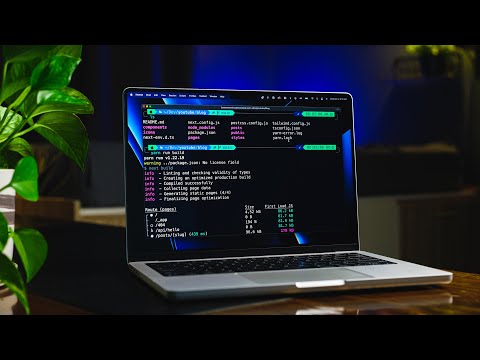
You know, I was just thinking about how life gets so much easier with a little tech magic. Ever felt like your terminal could do with a sprinkle of that? You’re not alone! We’re all hunting for ways to make things smoother, faster, and just a tad more fun.
So, maybe you’ve heard whispers about zsh plugins? They’re like those nifty add-ons you didn’t realize you needed until they turned your plain terminal into a superhero setup. Trust me, once you see what they can do, there’s no going back!
The coolest part? They’re not as complicated as people might think. Like putting icing on your favorite cake—simple yet game-changing. Feeling curious yet? Let’s dive into this!
Top Zsh Plugins to Enhance Your Terminal
Oh, the world of Zsh plugins! If you’re into customizing your terminal, you’re in for a treat. Zsh, or Z shell, is like the cool cousin of the famous Bash shell. It’s highly customizable and has some neat features that make terminal navigation a breeze. Here’s where plugins come in—they add extra flavor and functionality to your Zsh experience.
Why Use Zsh Plugins?
Don’t you just love when things are made easier? Plugins can help automate tasks, enhance productivity, and even make your terminal pop with color and magic. Imagine typing less but doing more! That’s what these nifty little add-ons do.
Some Popular Plugins to Check Out:
- Oh My Zsh: This one is huge in the world of Zsh users. Oh My Zsh isn’t a single plugin but a framework to manage several plugins. It offers themes too, making it easy-peasy to change up your terminal’s look.
- Syntax Highlighting: Imagine you’re coding away… and boom! Your commands are highlighted by color based on syntax rules—makes spotting errors way easier!
- Autosuggestions: Ever start typing something you’ve used before and wished it would just magically complete itself? Autosuggestions does exactly that by suggesting commands as you type based on your history.
- Themes: Not exactly pure plugins, but worth mentioning since they’re key players in personalization. Frameworks like Oh My Zsh offer tons of theme options!
- Z: This one’s about jumping around directories like a pro! It keeps track of where you’ve been most often so jumping back there needs only tiny keystrokes.
A Little Tale from Experience
I remember once setting up my terminal for some serious development work late at night—coffee was involved—and it felt so drab I could almost hear its sighs through lines of code staring back at me lifelessly across white-on-black text space… Until suddenly–with few simple tweaks using those effervescent little buddies called “plugins”, life rushed into screen turning routine coding session all sparkly shiny inviting again!
So hey… Why not give them try?
Zsh-autosuggestions Installation Steps
Oh, you’re diving into the world of Zsh plugins! That’s great news. Adding some flair to your terminal can make your workflow not just more efficient but also, hey, a bit exciting. Now this Zsh-autosuggestions plugin—it’s a game changer for real. It predicts what you’re going to type based on your history, making things quicker and smoother.
Alright, let’s see how you can set it up:
Step 1: Install Zsh
First things first, you’ve got to have Zsh installed. You might already have it if you’re on macOS or certain Linux distros. To check if it’s there, run:
“`bash
zsh –version
“`
If it’s not installed yet or if you like updating it:
- macOS: Use
brew install zshwith Homebrew. - Ubuntu: Run
sudo apt-get install zsh. - Fedora: Try
sudo dnf install zsh.
Step 2: Install Oh My Zsh!
This framework makes managing Zsh configurations quite simple. To get that running:
“`bash
sh -c “$(curl -fsSL https://raw.githubusercontent.com/ohmyzsh/ohmyzsh/master/tools/install.sh)”
“`
Step 3: Clone the Autosuggestions Repository
Now for the fun part! You need to grab the autosuggestions code from GitHub.
- Navigate to your plugins directory by entering:
“`bash
cd ~/.oh-my-zsh/custom/plugins
“` - Create a clone using this command:
“`bash
git clone https://github.com/zsh-users/zsh-autosuggestions.git
“`
Step 4: Enable the Plugin
Almost there! Just let Oh My Zsh know you want to use this new gizmo.
- Edit your configuration file with:
“`bash
nano ~/.zshrc
“` - You’ll see a line with all active plugins—add `zsh-autosuggestions` at the end, like so after other ones present:
“`shell
plugins=(git z colored-man-pages z extract repo web-search)
# Add ‘z-shautosuggestions’
“`
Save changes and close.
Your Finale Touch: Refreshing The Shell!
Let’s put everything in motion by refreshing things.
“`shell
source ~/.zshrcc
“`
Now when you open up terminal again—you’ll notice suggestions popping up magically as you type away commands from before.
Here’s hoping these steps went smoothly and everything runs swiftly without hiccups! If anything seems off during installation though—the community around these tools is generally awesome at providing insights when needed somewhere online :).
Happy coding sessions friend; hope autosuggests make life easier now onwards—like having another brain helping finishes thoughts—not too shabby huh?
Zsh Syntax Highlighting Configuration Options
You know when you’re working in the terminal and all those commands start blending together like, well, a big blob of text? That’s where Zsh syntax highlighting comes in—it makes everything pop with color, helping you catch errors before they happen. It’s like when you realize your socks don’t match, but hey, at least you caught it before leaving the house!
Zsh Syntax Highlighting is a handy feature that spices things up by adding colors to different parts of your command line inputs. Picture this: commands look one way, keywords another, and potential errors? They stand out like neon signs.
To get started with Zsh syntax highlighting configuration, you’ll need to have Zsh installed and set as your default shell. Once you’ve got that sorted out, here’s how the setup usually goes:
- Installation: First off, you’ll need to grab the plugin. If you’re using a framework like Oh My Zsh or Prezto—it’s usually available there. If not, clone the repository from GitHub directly into your Zsh plugins directory.
- Activation: To activate it for Oh My Zsh users—you’d add “zsh-syntax-highlighting” to the end of your plugin list in the .zshrc file.
- Configuration: Here comes the fun part! Now that it’s activated—you can tweak it! For example—change colors by editing environment variables inside .zshrc file:
ZSH_HIGHLIGHT_HIGHLIGHTERS=(main brackets pattern)- You can customize them further—like say highlight comments differently or certain patterns.
And voilà! After reloading Zsh—you should see instant changes (colors!) when typing commands.
A little story—once I was fiddling around setting aliases without realizing an accidental space could mess things up big time until syntax highlighting turned those spaces a deep red instantly catching my eye.
You know what they say about an ounce of prevention being worth a pound of cure? This feels kinda similar; one small tweak saves headaches from unintended command blunders.
Gotchas though—the coloring might not work inside scripts run within other sessions nor will it predict anything unpredictable (like requesting coffee directly from terminal…though wouldn’t THAT be awesome?) Anyway,
Remember playing with these settings adds personality-clutter-free-playground—for something otherwise dull!.
You ever had that moment when you discover a neat tool and suddenly everything just clicks? I remember the first time I stumbled upon Zsh. Boy, it was like finding an old dusty bicycle in the garage and realizing it’s a top-notch mountain bike with all the bells and whistles. You see, Zsh (or Z shell) is already pretty cool on its own for managing your terminal tasks. But when you add plugins, oh man, it feels like you’re turbocharging that bike.
Let’s be real here, working with the command line can sometimes feel a bit like wandering through a dense forest without a map. That’s where these plugins come in handy—they’re kinda like those little trail markers keeping you on track or showing you shortcuts you didn’t even know existed.
For one, there’s “Oh My Zsh.” This is almost everybody’s favorite starting point—it’s like your new best buddy who introduces you to this vast world of possibilities. With stuff like syntax highlighting—where text colors change based on what commands you’re typing—you get instant feedback if something looks off. Imagine catching little typos before they trip up whatever script you’re running!
Then there’s auto-suggestions. It’s as if your terminal suddenly gets psychic powers! Start typing an old familiar command and boom—a light suggestion appears right there for completion. Saves time and definitely eases some headaches trying to remember those long command strings you’ve used once upon a time.
But hey, we can’t forget about customizing themes. Just because it’s technical doesn’t mean it can’t be pretty! You can spice up your terminal aesthetics till they shine just how you want them to—and leave folks peeking over your shoulder impressed.
Anyway—that’s just scratching surface level stuff yet already makes life so much smoother navigating through all things code-related or simply managing files efficienty via terminal space.
In essence—I’d say diving into exploring these plugins maybe feels daunting initially but oh boy does it transform usability tenfold worth giving shot if u havent’ already tinkered around yet!