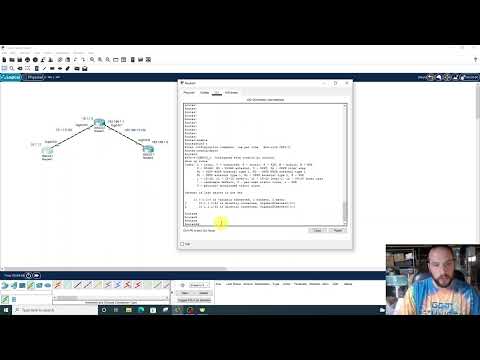
So, you’ve got a Cisco router and you’re looking to configure a static route, huh? No worries, I’ve totally been there before. It sounds tricky at first, but it’s really not that bad once you get the hang of it.
You know how sometimes your GPS just needs a little nudge in the right direction? That’s kind of what you’re doing with static routes. You’re just telling your router exactly where to go without any guessing involved. It’s like giving it perfect directions every time.
I remember when I first tried it. Felt like I was learning a whole new language! But honestly, it’s less rocket science and more like following a recipe. Promise! You’re basically just setting some straightforward instructions for your router to follow.
Static Route Configuration on Cisco Routers
Configuring a static route on Cisco routers can seem a bit daunting at first, right? But once you get the hang of it, it’s like riding a bike. You won’t forget how to do it! Static routes are like giving your router a simple set of directions so it knows where to send data. This can be super useful when you have fixed network paths that don’t change, like ever.
Imagine this: You just moved into a new place and your friend comes over. To get there next time, they’ll need precise directions—like “turn right at the big oak tree.” Static routes work in kind of the same way. You’re telling the router, “hey, for this destination, go here.” Let’s break it down:
- First thing’s first, access your router’s command line interface (CLI). You’ll need administrative privileges to make changes.
- Enter global configuration mode using enable followed by configure terminal. Now you’re in business!
- To add a static route use this basic format:
ip route <destination-network> <subnet-mask> <next-hop-ip-address>.
Here’s what these mean:- <destination-network>: This is where you want the data packets to go.
- <subnet-mask>: Helps define the range of addresses within that network.
- <next-hop-ip-address>: It’s like saying “turn right at…”. This points to where packets should head next.
Now let’s say you have a scenario: Your internal network is 192.168.1.0 with a subnet mask of 255.255.255.0 and your gateway IP—where these packets should head next—is 192.168.2.1.
Adding that into our command looks something like this:
ip route 192.168.1.0 255.255.255.0 192.168.2.1
And voilà! You’ve given your router clear instructions on how to handle data headed for that network.
But keep an eye out—you’ve gotta make sure there aren’t other dynamic routing protocols interfering with how these instructions play out though when used correctly, static routes keep things simple and predictable.
Take care—misconfigured routes can lead directly toward nothing but silence on those lines if data can’t find its way home again!
Configuring a Static Route on Cisco Routers
Navigating through networking can feel like a maze, right? But don’t worry, configuring a static route on Cisco routers is straightforward, so let’s walk through it together.
First things first, what even is a static route? Imagine you’re sending a letter. You decide exactly which path it’ll take to get there—no detours. In networking terms, this means you manually tell your router where to send certain packets of data. This can be super handy when you’ve got specific paths in mind.
Okay, let’s jump into the setup!
- Access Your Router’s Interface: You’ll start by accessing your Cisco router’s command-line interface (CLI). Most of the time it’s through a console cable or remotely via SSH.
- Enter Global Configuration Mode: Once you’re in the CLI, type
enableand hit enter. Then typeconfigure terminal. You’ll know you’re in the right place when you see something like:(config)#. - Add Your Static Route: Now let’s set up that route. Use the command:
ip route [destination-network] [subnet-mask] [next-hop-address].
For instance, if your destination network is 192.168.1.0 with a subnet mask of 255.255.255.0 and your next hop’s IP address is 10.0.0.1, you’d type:ip route 192.168.1.0 255.255.255 .0 10 .0 .0 .1.
Easy peasy! - S ave Your Configuration: Trust me; this step saves headaches! Type:
write memory code>

    or
.
This way your new setup doesn't disappear with a reboot. li > - You're going want make sure it's all working fine by typing:
Look for your new static ro ute , and c heck if it appear whatever yo u expe ct.
Funny thing happened last week while I was doing something similar at home—it turns out I had typed my neighbor’s IP by mistake! Lesson learned: triple-check those numbers before hitting save
That should cover the basics! изher learning curve might seem steep initially but trust me once you've configured one static роutίe thιοng becomes much easier Happy routing
Cisco Static Route Configuration
Configuring a static route on Cisco routers might seem like rocket science at first, but once you get the hang of it, it's as easy as pie. Sometimes you find yourself in scenarios where dynamic routing protocols are overkill or maybe not suitable for your network needs. That's where static routes come in handy. They're like the GPS navigator telling data packets exactly how to get from one place to another.
What Is a Static Route?
A static route is simply a manually configured path that network traffic follows to reach a specific destination. Imagine drawing a line on a map between two points and saying, "This is the road you should take."When To Use Static Routes?
- You have small networks where dynamic routing can be too complex.
- The network paths hardly change and thereby don't really require frequent updates.
- You need more control over path selection.
How To Configure A Static Route On Cisco Routers
First things first: you'll need access to your router's command-line interface (CLI). With Cisco routers, this usually means using something like PuTTY or another terminal emulator.
Once logged into the CLI, enter global configuration mode by typing:
```plaintext
enable
configure terminal
```From there, use the `ip route` command to define your static route. It's like giving directions: "if you're trying to reach network X, take Y route." Here's an example:
```plaintext
ip route 192.168.2.0 255.255.255.0 10.10.10.2
```Let me break that down for ya:
- **192.168.2.0**: The destination network.
- **255.255.255 .0**: The subnet mask of the destination.
- **10 .10 .10 .2**: The next-hop IP address—the gateway through which data should be sent.Error Checking?
Always verify your work! You know how important it is; no one wants their precious data running amok across wrongful paths! You can see all configured routes with the `show ip route` command.
Remember one time my friend had forgotten about this verification step? Almost gave him a mini-heart attack when parts of his network weren't reachable!
That's basically it—pretty straightforward once it's down pat in your memory bank! It's these little technical tweaks that make managing networks feel rewarding when everything runs smoothly without hiccups!
You know, dealing with networking can feel a bit intimidating at first, especially when you're trying to wrap your head around configuring static routes on Cisco routers. I remember the first time I walked into a room full of blinking lights and endless cables—oh boy, it felt like stepping into another world! But once you get the hang of it, it's actually quite empowering.
Configuring a static route is like giving your data a map. Imagine trying to find your way in a new city without GPS or directions; that's kind of how data feels without routing info. With Cisco routers, setting up these paths manually ensures that data travels exactly where you want it to go.
Here's how you might approach it: you'll need to access the router's Command Line Interface (CLI). This is like talking directly to the machine where you type in specific commands. Trust me, once you've typed "enable" and get started in configuration mode using "configure terminal," you're halfway there!
Why static routes? Well, they’re great for small networks where things don't change often. They provide reliability and stability since they're less prone to unexpected changes that can sometimes come with dynamic routing protocols.
Now, picture this: you're typing away at that CLI and telling the router precisely which network leads where by using commands such as "ip route." You're essentially saying: “Hey network traffic! If you're trying to reach this particular destination, here's how you get there." It's like being an air traffic controller but for data packets.
Of course, there's always some trial and error involved—everyone's been caught out by a typo or two while entering IP addresses! Not everything goes perfectly every time. Remembering subnet masks also helps avoid those pesky reroutes that might occur if something's off.
So yeah—configuring static routes on Cisco routers might seem technical at first glance. But understanding how information flows through networks—and being able control it—is pretty amazing once all those pieces click together!