You know those days when everything just seems to go wrong with your computer? Yeah, I’ve been there too. Sometimes you just want to hit a magic button that makes everything go back to normal. Lucky for us, Windows 8 has a feature that’s kinda like that.
Imagine this: you’re working on something super important. Suddenly, things start acting weird—apps not opening or maybe some settings went haywire. Panic starts creeping in, right?
Well, there’s this cool thing called System Restore in Windows 8. It’s like a time machine for your computer! All those glitches and hiccups can be rolled back to a previous point when things were running smoothly.
It’s much simpler than it sounds and can save you loads of frustration. I’ll tell you more about it so you can breathe easy knowing there’s hope even on the glitchiest days!
Finding System Restore in Windows 8
Navigating Windows 8 can feel a bit like trying to find your keys in a messy room, right? Especially when you’re looking for something like System Restore! It’s handy though, especially when your computer starts acting up. Let’s look at how you can find and use it.
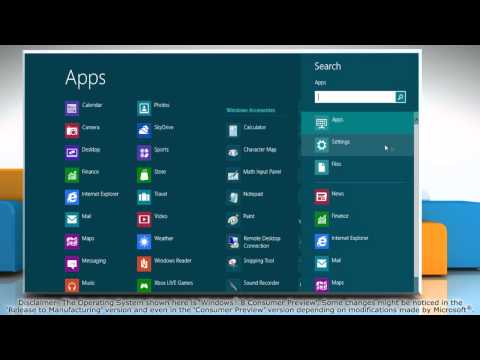
- Accessing the Control Panel: First thing’s first, you’ll want to get to the Control Panel. You can do this by simply moving your mouse to the bottom-right corner of your screen. A little menu called the “Charms Bar” will appear—sounds fancy, right? Then click on Search, type in “Control Panel”, and there you go.
- Finding System Restore: Once you’re inside the Control Panel, it might all look a bit overwhelming with all those icons and options staring at you. But don’t worry! Look for something called “System and Security.” Give that a click. Then head over to “Action Center.”
- Diving into Recovery: In the Action Center, there’s going to be an option named “Recovery.” Click on it, and then you’ll see “Open System Restore.” That’s what we’re aiming for.
- Selecting a Restore Point: After opening System Restore, it’ll guide you through choosing a restore point—a moment in time when things were running smoothly. It’s kind of like turning back time without needing any magical spells!
- The Process: Once you’ve selected that magical moment (or restore point), just follow through with the instructions it gives you on-screen. Your PC will do its thing—make sure during this time not to turn off or reboot.
System Restore basically acts like a “do-over” button for your computer—bringing back system files or settings from an earlier date without touching personal files. Pretty neat!
Think back: remember when I accidentally deleted an important document? I panicked until realizing I’d used System Restore just days before, and thankfully managed everything smoothly after that little hiccup.
Catch up if you’ve had any hiccups lately—it’s one way out if technology decides today’s not its favorite day either!
Windows 8 Factory Reset Procedure
Oh, I remember when my cousin was so frustrated with his Windows 8 computer because it was running slower than a snail in molasses. He called me up and said, “What am I doing wrong here? It’s like this thing is running backward!” And you know sometimes starting fresh can be the breath of fresh air your computer’s been craving.
Factory Reset Procedure for Windows 8
So here’s the scoop on how to give your Windows 8 system a new start. It’s kind of like giving your room a complete makeover without actually moving.
Step-by-step reset instructions:
- Access PC Settings: First things first, move your mouse to either the upper or lower right corner of the screen. It’ll pop out what’s known as the “charms bar”. From there, just click on Settings.
- Change PC Settings: Click on Change PC settings. You’ll find this at the bottom – not too hard to spot.
- Navigating Through Update and Recovery: Find and select Update and recovery. It’s where all the magic begins!
- Select Recovery Option: Within Update and recovery, you’ll see an option for Recovery. Go ahead and click it.
- The Refresh or Reset dilemma:
Sometimes life presents choices! Here you can either:- “Refresh your PC”: Keep files but refresh everything else.
- “Remove everything and reinstall Windows”: The clean slate option—just like brand new!
Most people want that super clean start, so they pick removing everything.
- If Removing Everything – Confirm Removal Type: You can choose to just remove files or fully clean drives too.
- The Final Countdown: When you’re all set with these decisions, hit Next then Reset. And voila! Your system starts anew.
)
Now let me tell ya something crucial – before doing any of this flashing down memory lane business—backup those treasured files if there’s anything important you don’t want slipping through fingers!
Honestly though sometimes even tech wizards gotta reboot; much like clearing old cobwebs from attic corners—you’ll thank yourself later when it’s humming nicely again.
Remember always keep backups handy no one wants their stuff vanishing like socks after laundry day!
How to Boot into Windows 10 Recovery
Sure thing! Booting into Windows 10 recovery can be a lifesaver. It’s one of those things you might never need until you’re in a pickle. I had a friend once whose laptop decided to take a nap during an important presentation—talk about stress! Luckily, knowing how to access the recovery options saved the day. Let’s get into how you can do it.
Getting Started with Windows 10 Recovery:
First off, it’s good to know that Windows 8 and Windows 10 have similar recovery options, which is handy if you’ve messed around with both systems before.
Using the Settings:
- Click on the Start menu (that little window icon in the bottom left corner).
- Select Settings. It’s like a gear icon—can’t miss it!
- Go to Update & Security. You’ll find this at the bottom of the settings window.
- Select Recovery. A list of options will pop up.
- You should see something like “Advanced startup.” Hit that magical button: Restart now.
This will restart your computer and take you right where you need to be—kind of like teleportation for your computer’s troubleshooting menu.
If Things Are Not Going Smoothly:
Let’s say your system doesn’t boot up normally; no worries! Here’s another method:
- If your computer is off, turn it on and immediately press and hold down the power button until it shuts down again. Do this three times in a row.
- The fourth time, let it fully boot up. This should trigger Automatic Repair mode.
- You’ll see “Preparing Automatic Repair” appear on your screen followed by “Diagnosing Your PC” section
- First up, access that search charm by swiping from the right edge of your screen (or move your mouse to the upper-right corner).
- Type “Control Panel” and select it—that’s where all this magic starts.
- Nudge on “System and Security,” then “File History,” and hit “Recovery” down at the bottom corner.
- Spot that option saying “Open System Restore”? Click on it!
Once there let’s navigate through:
Navigating Through Recovery Options:
* Click on Troubleshoot
* Go to Advanced Options
* Select System Restore if rolling back system changes might do wonders
It could save hours trying desperatly figure out gremlins lurking beneath keys typing fervently
There isn’t always gilded path technology As much double-edged sword leads upto point agonising stares raised hopes dashed unexpectedly unanticipated hiccups manageable phew–>
Look experience teaches meanings grow deeper even compared untangling massive headphone spaghetti wires speakers playing same song looped guess ‘Staying alive’ fitting soundtrack sure buoy spirits–> Tech world fun unpredictable territory navigate through together learning appreciated
Hope brief insight ensuring smooth sail hard reset power reserves kept check occasional hijinks thrown way luck next adventure system restore folks kidding watch small issues become altogether familiar element conquering unknowns tackled daytrip lie ahead cheers trusty friend functioning thrive till next fix beckons…
Restoring your system in Windows 8 might seem like a big task at first, right? I remember this one time I was trying to help my cousin over the phone. She just called out of the blue, panicking because she thought she’d lost all her vacation pictures after some crazy update went rogue. Seriously nerve-racking!
Now, if you ever find yourself in a similar pickle, don’t worry too much. Restoring Windows 8 is like having a magic button—kind of! The process just helps you roll back your computer’s state to an earlier point in time. It’s like hitting the rewind button on a TV remote when you’ve missed something.
Alright, here’s what usually needs to happen when you’re doing this restoration thing:
There’s this wizard-type guide that will pop up. It’ll take you by the hand through every single step till you’re golden. You just follow along as it shows available restore points—you know, those saved moments where things still worked fine!
Don’t forget: make sure you’ve saved any work before starting ’cause anything new will vanish faster than cookies at a kid’s party!
And oh, if you’re adding any personal twist or comments while restoring: make sure everything important is backed up… because we all know how Murphy’s Law likes to have fun with our lives sometimes.
So even though it feels daunting initially—maybe takes getting used to—it might just save your day (and precious pictures) more often than not!